Takahashi Epsilon E-200

When an old telescope becomes new again
In June of 2022, a person posted to our local astronomy clubs forum that someone was selling an old telescope. The second I saw the photo of this yellow tube, I instantly recognized it must be a Takahashi Epsilon. What I didn’t know was that this was a model that’s no longer made. The E-200 is an 800mm focal length, 200mm aperture F4 Newtonian with a hyperbolic mirror. This scope was made for imaging the night sky with film. I reached out the the seller right away, and over the next week went to their home to check out the telescope. It turns out they had three Takahashi telescopes (E-200, TS-50, FC-125), a Takahashi NJP mount, and several TeleVue eye pieces. I ended up walking away with all of it. It was more than I wanted to spend, but I did get a very good deal.
Once I had the telescopes in my possession, I had to make some effort to get them working with modern equipment. For some of the older Epsilons, Takahashi later released a corrector lens that had been remade for digital cameras, but that was not the case with this particular telescope. Through some research I did find out that it has a 60mm corrected image circle, and would support a full frame camera pretty easily. So, I set about adopting my ZWO ASI6200MM-Pro camera to this telescope. I found out the back focus distance on the scope is 59.8mm, and Precise Parts happened to have the thread size for the corrector in this unit. I ordered an adapter that was 5.8mm to add to the ZWO gear which is 55mm and added another 1mm for my 3mm thick filters. The total distance for back focus was 60.8mm to the camera sensor.
With the camera squared away, I needed some way to focus, and I knew ZWO made Takahashi adapters for their EAF focus motors, so I got one of those on order. Additionally, I needed a way to mount this huge telescope on a more modern mount, and I ordered 10” scope rings from Parallax Instruments along with a Losmandy dovetail. I had a spare ASIAir pro sitting around as well as a 10” long vixen dovetail and Baader guide shoe, which let me bolt the computer equipment to the top rail.
The original Epsilon 200 came paired with a Takahashi NJP mount and an NJP Motor Drive PD4-XY-B. All of which I got with this system and have in good working order.
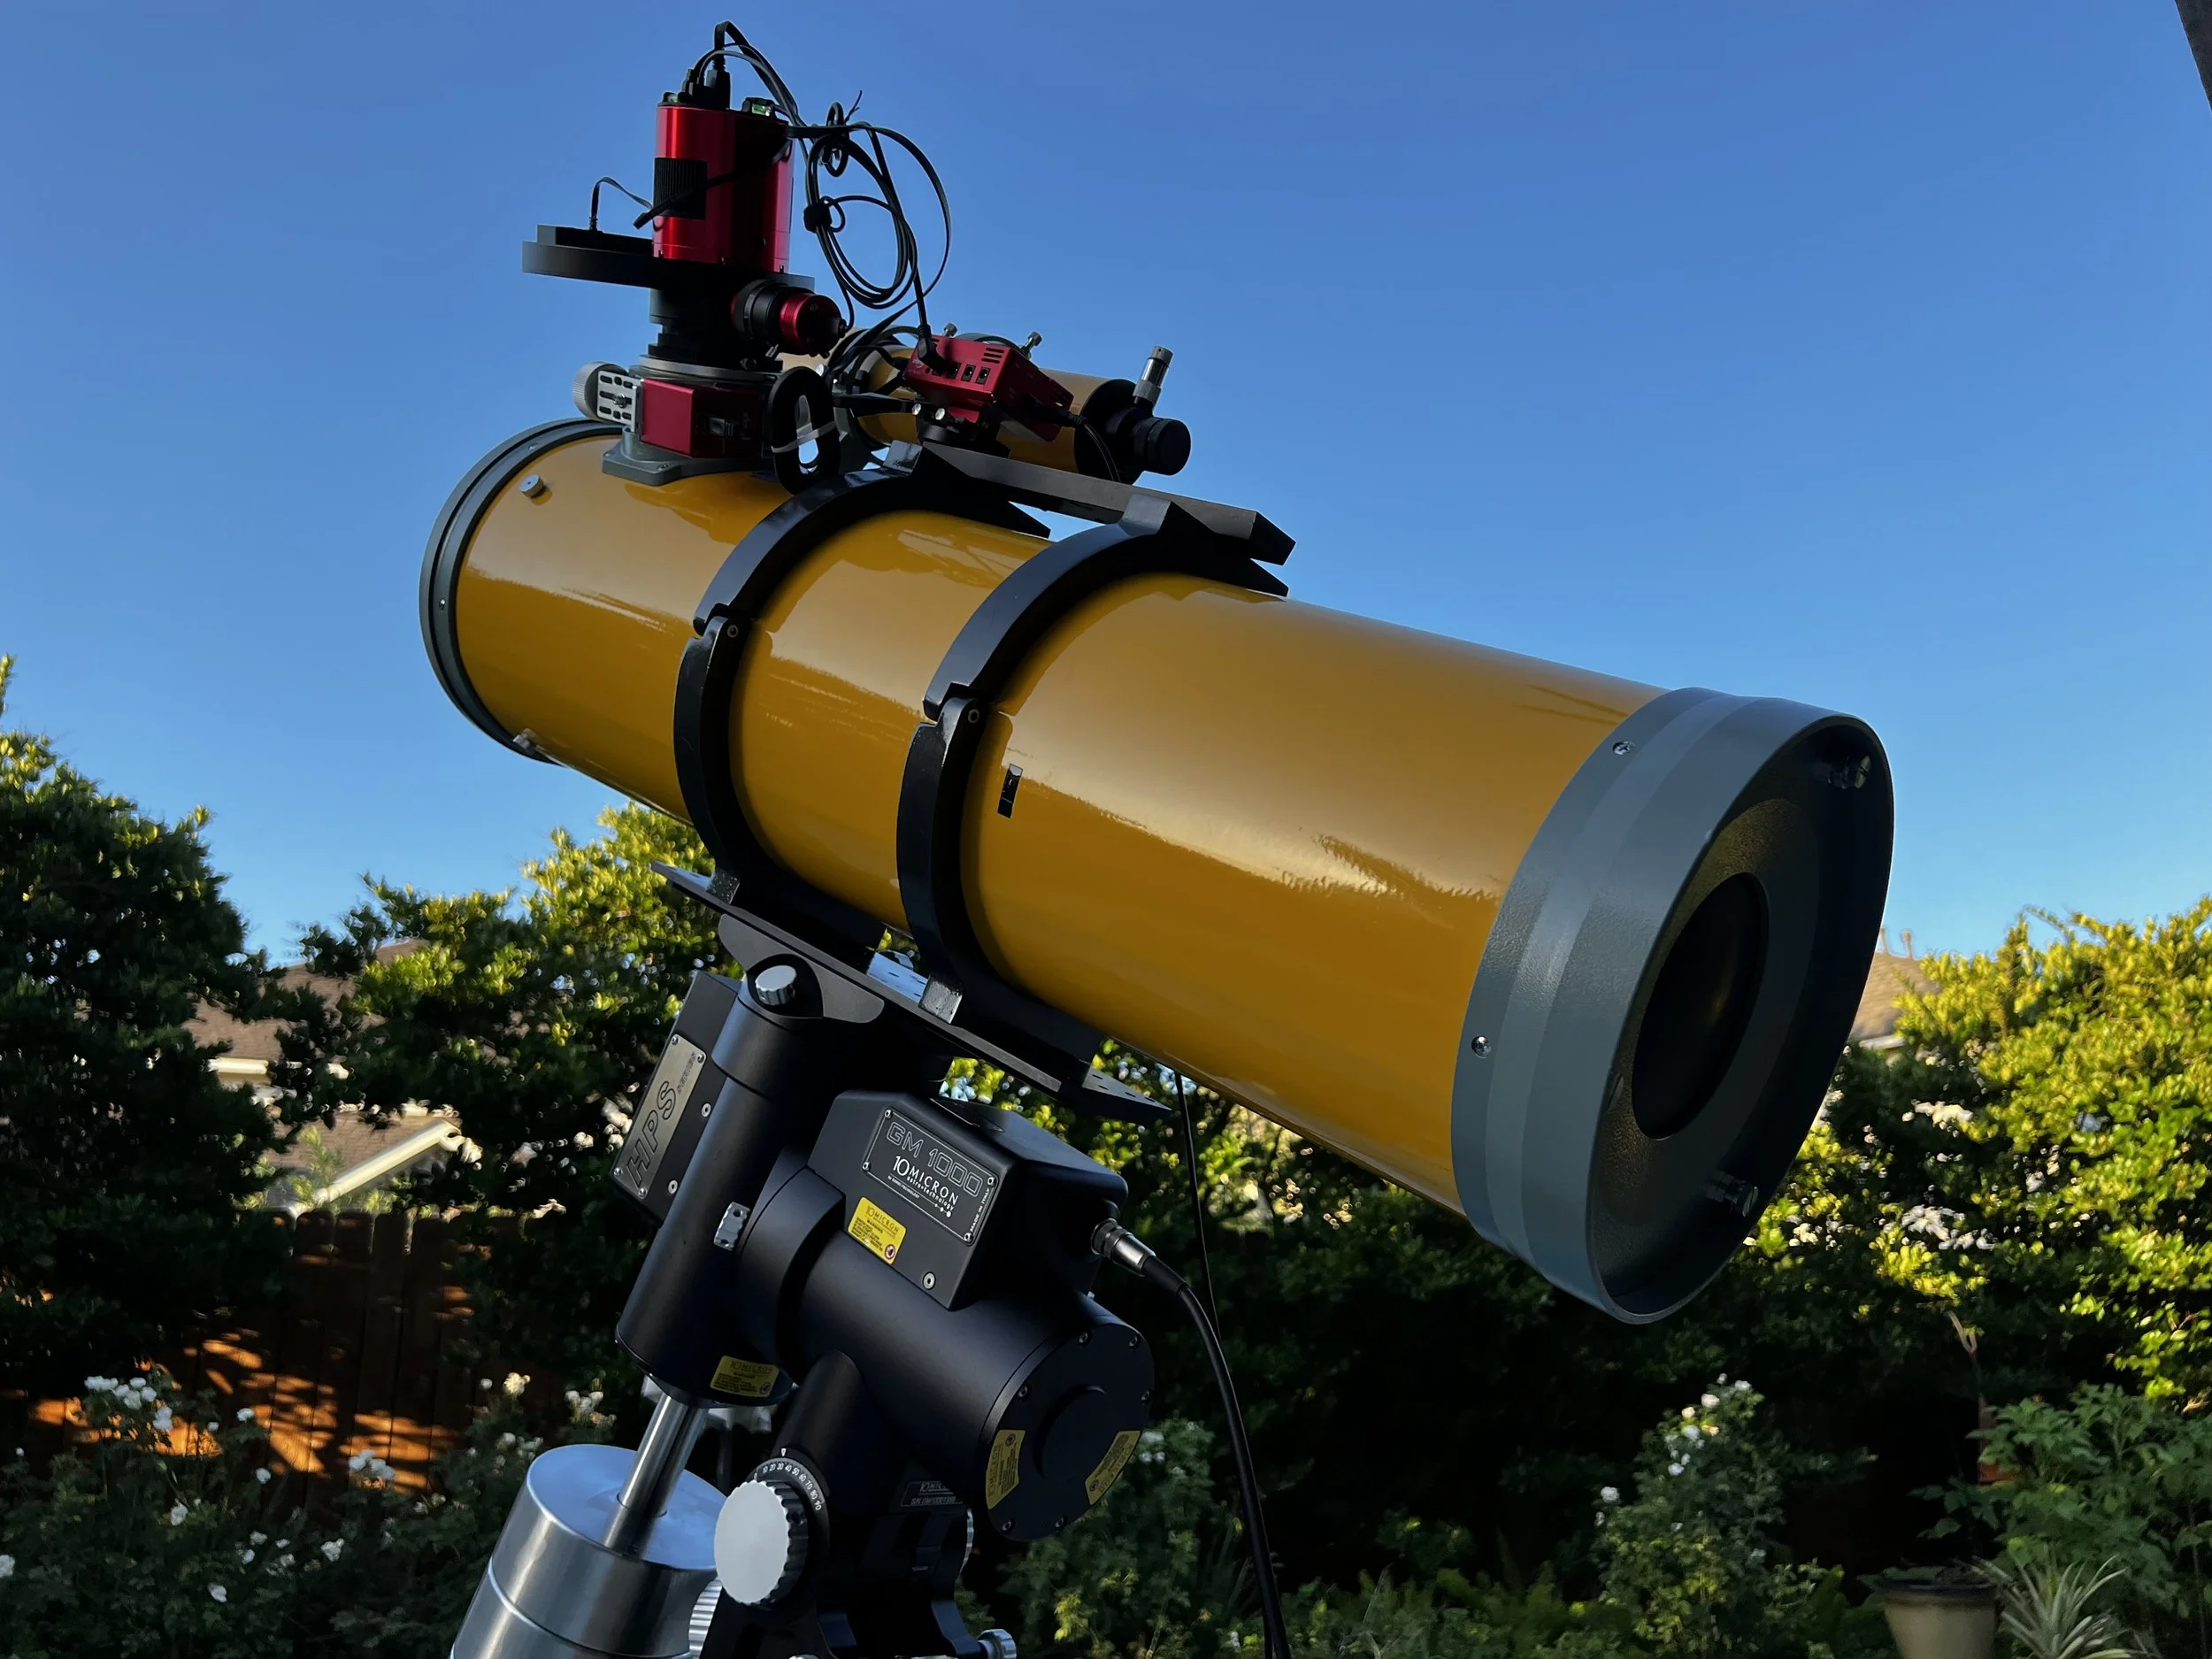
The more modern E-200 with new imaging gear, and 10micron GM1000 mount.
first light with the Takahashi e-200
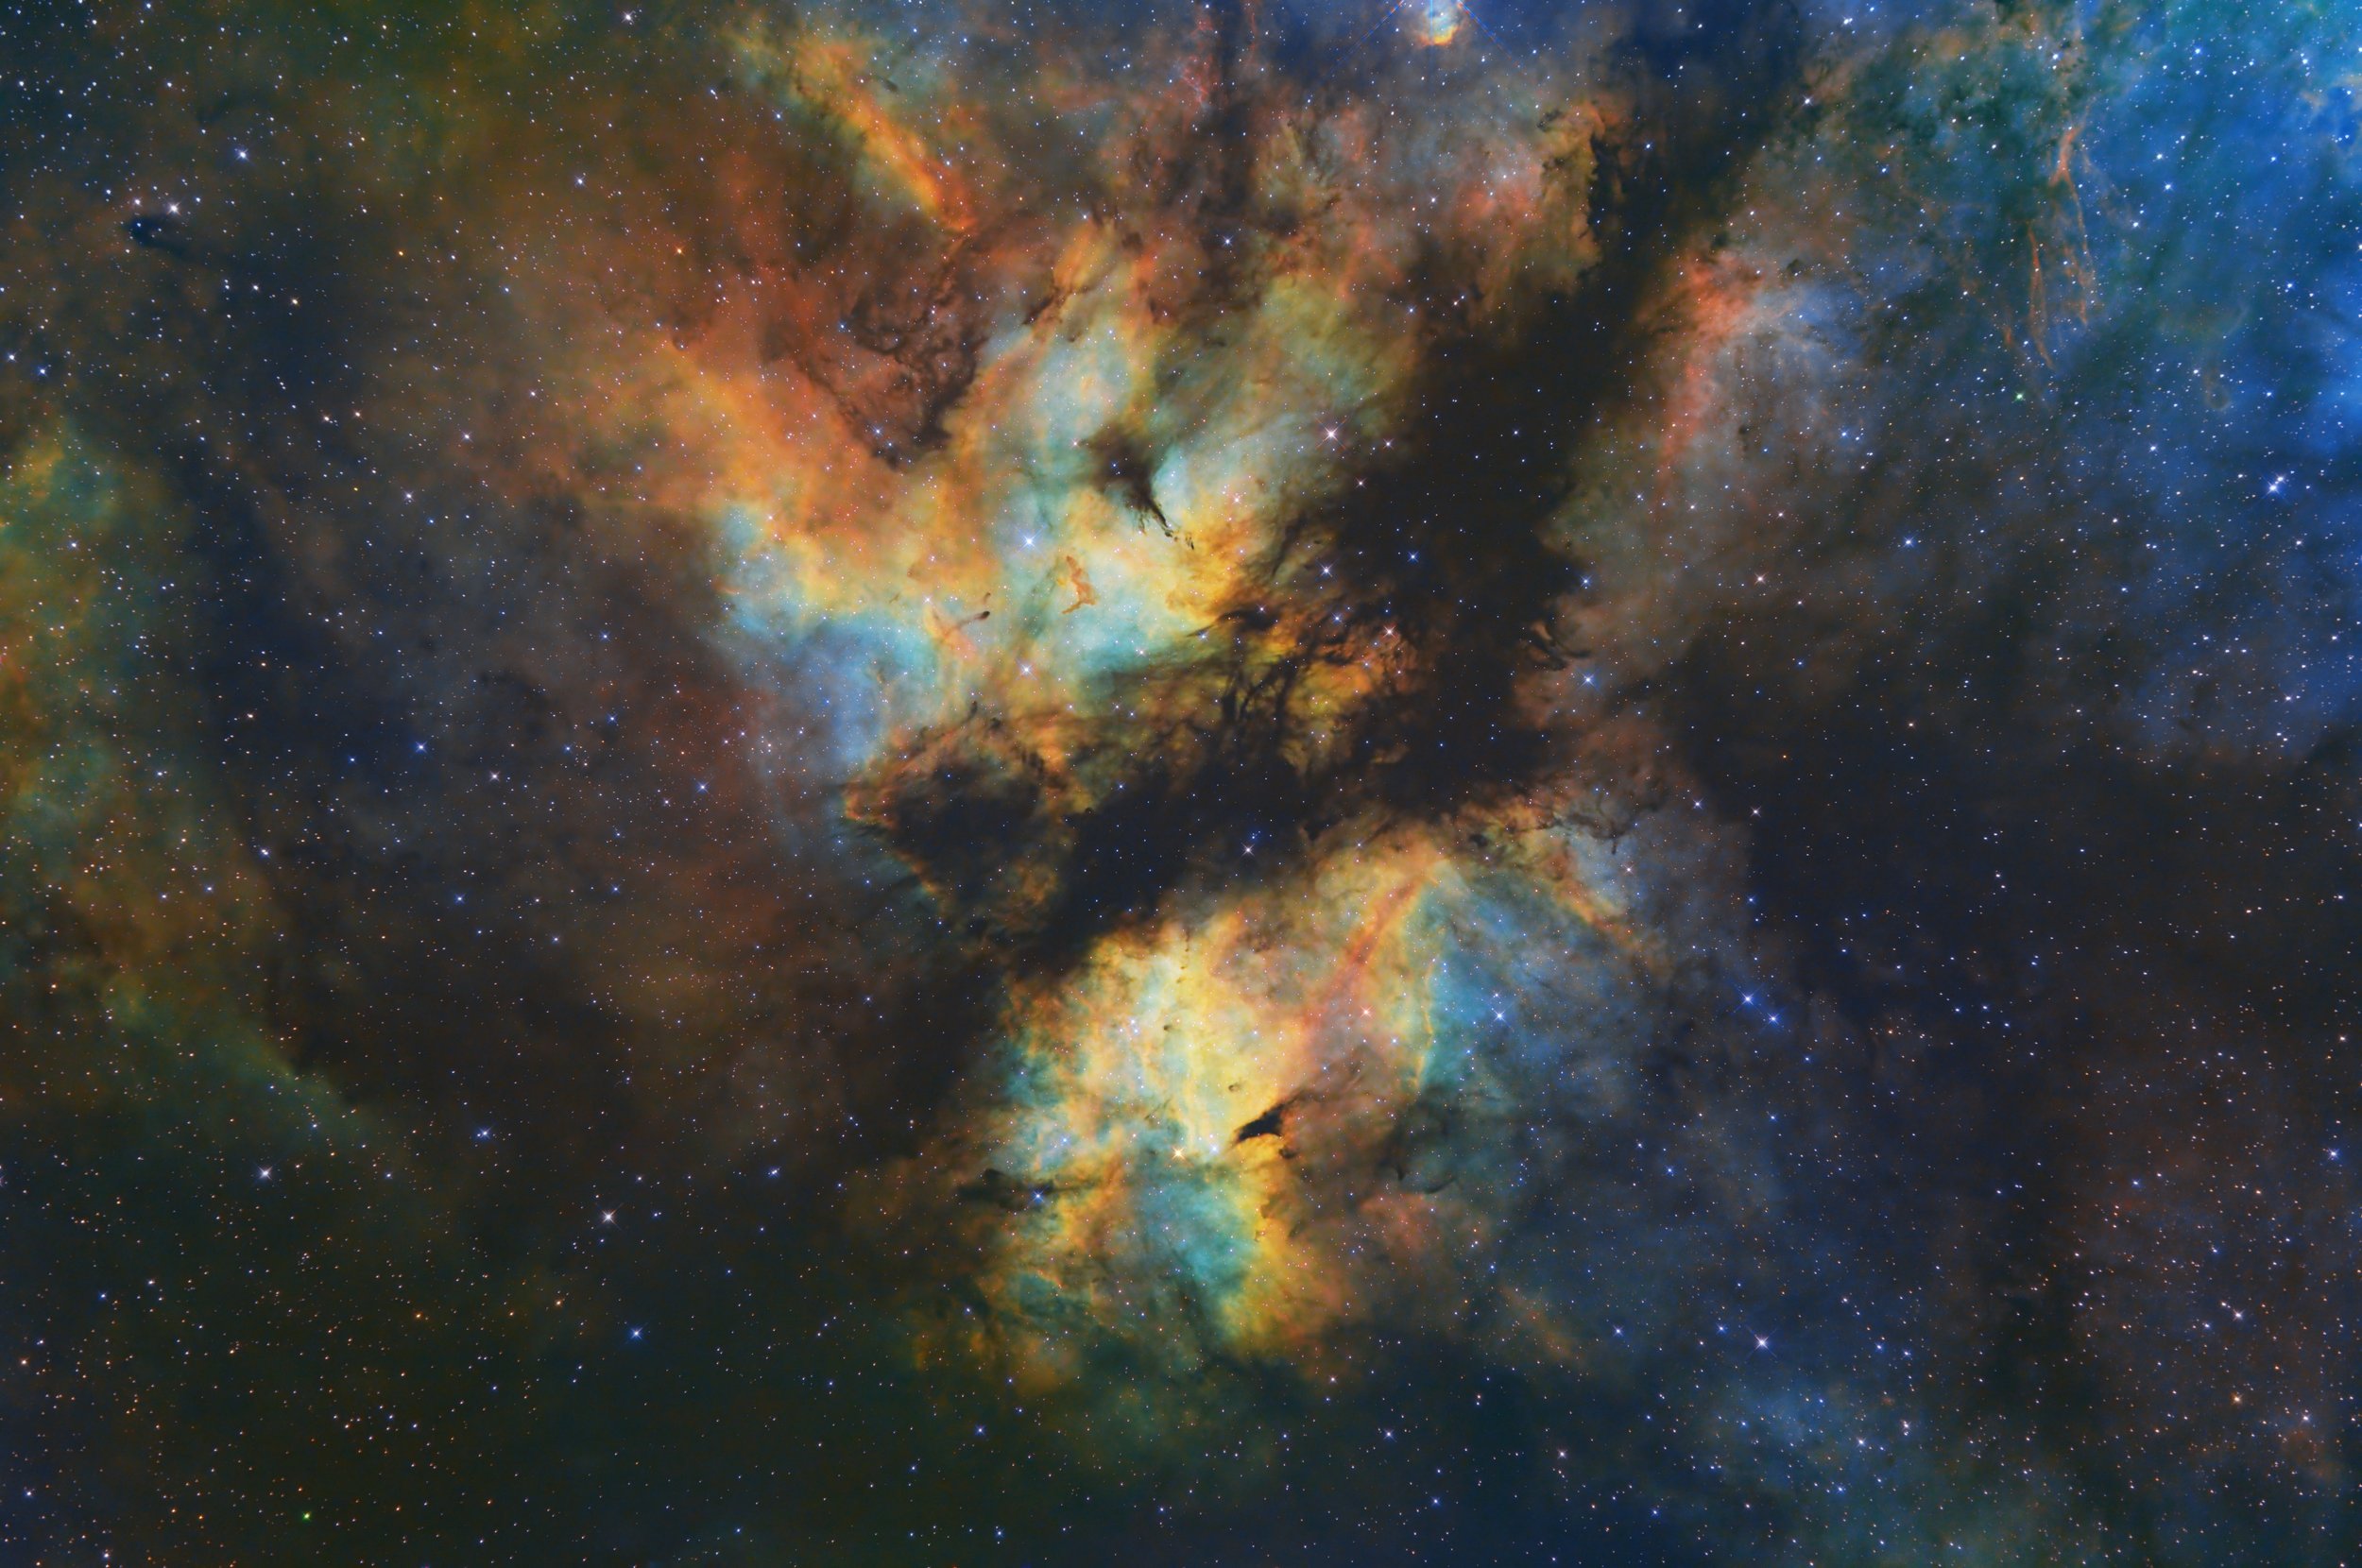
Now that I was all squared away and ready to image, I decided to maximize the first full night of imaging by aiming for the North American Nebula NGC 7000. It’s bright and would be up all night. This was also my first attempt to image and I would need to obtain focus, and check out the image quality coming off the camera.
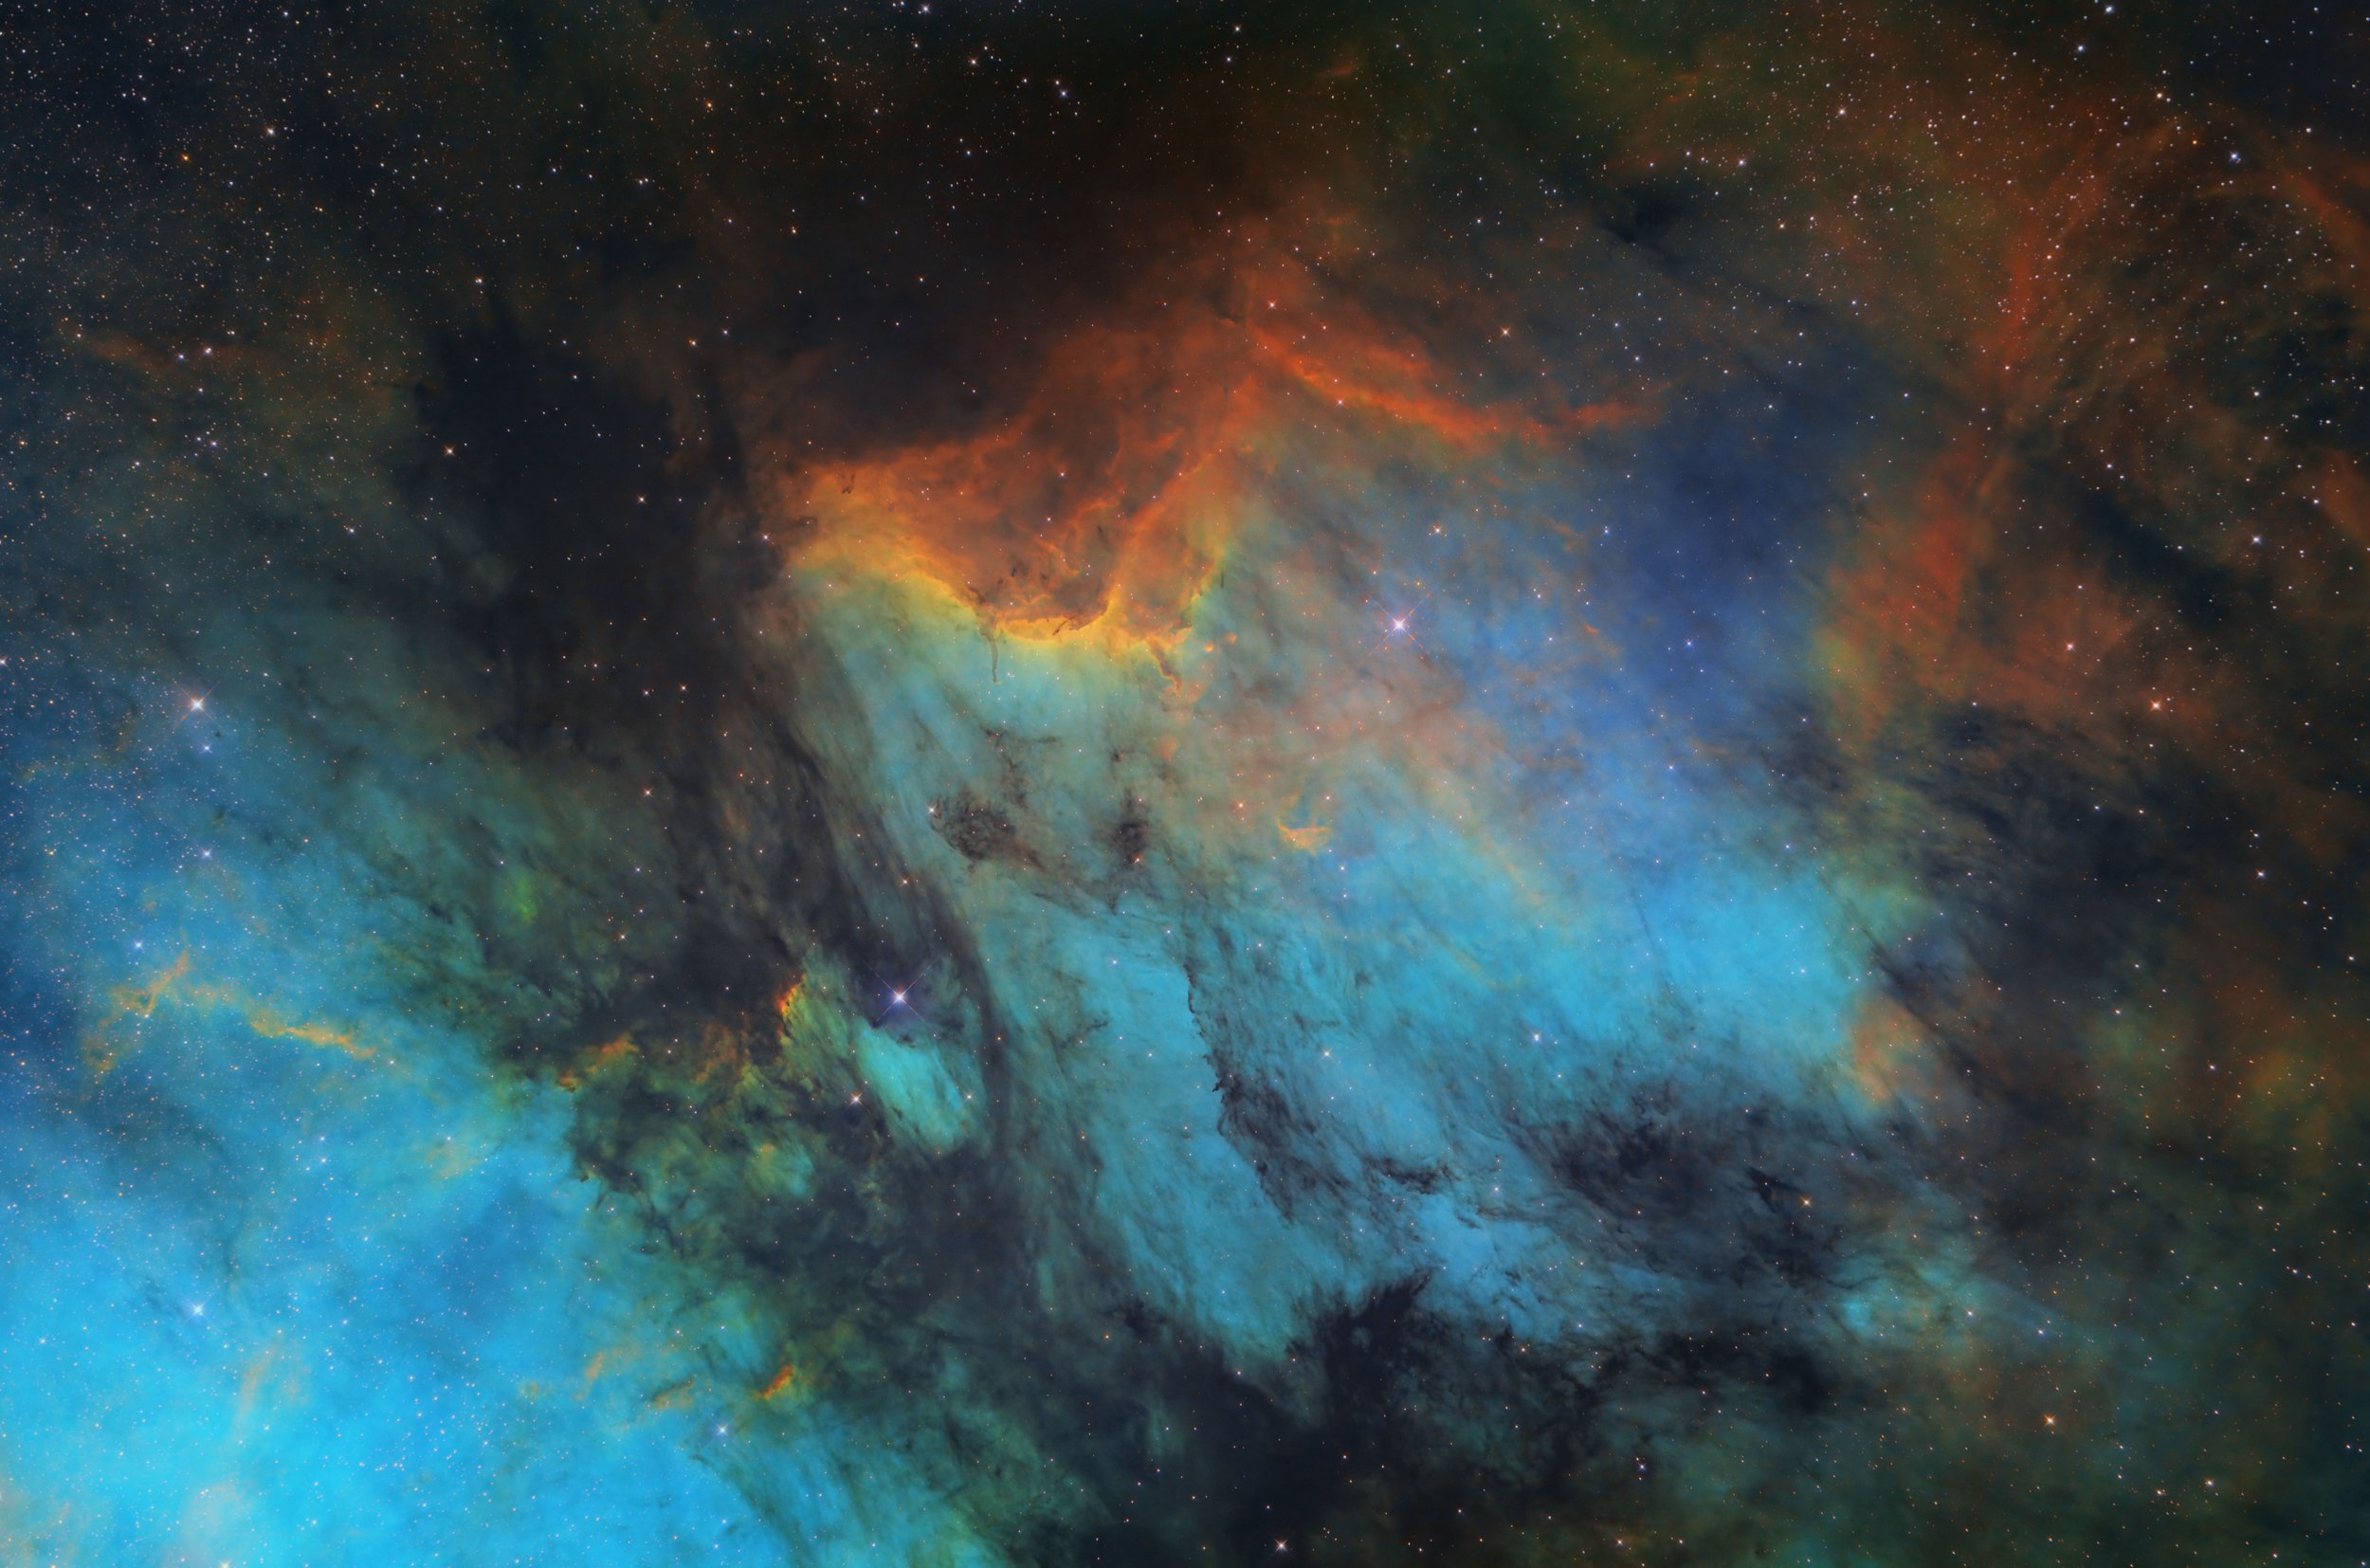
I could quickly see towards the corners that all was not well, but I kept imaging all night to produce the image above. Without zooming in, to any level of detail, the overall image was spectacular. But I knew I need to work on collimating this scope since it had been sitting in a closet for years. Initially I was convinced I had no tools on hand to use, but then I remembered I had purchased a laser collimator off Amazon a few years back, and thought that would be the perfect tool for collimation. So I got it out, and collimated as best I could with it. then set out for a second image the very next night. This time I set my sights on the Pelican Nebula IC 5070.
Collimating the Takahashi Epsilon 200
After collimating with the cheap Amazon collimation laser, I quickly realized it ruined the collimation even further. While the overall image looks pretty good, the stars were even worse across the board except for the very center of the image. With the laser option out of the picture, I ordered the Takahashi tools from Takahashi North America. They were on backorder, and desperate to get this thing fixed for a future night of imaging, I dug deep into my bucket of parts and came across an Orion Cheshire collimating eyepiece. Wow, I thought I hit the jackpot. And started collimating again. After some fiddling around, trying to center the secondary and not being able to make heads or tails of what was happening with the primary mirror, I started to give up. Then I dug through the bucket of parts that came with these old telescopes and found I had a Takahashi Collimating Eyepiece (but no Cheshire). Cool, I’ll give this thing a shot. WOAH! I could not believe what I was seeing. It was like suddenly putting on glasses after losing your vision.
Trying to collimate with an Orion Cheshire eye piece.
Collimating with the Takahashi Collimating Eyepiece. The finished collimation should look like this image.
It was at this point I realized how good Takahashi engineering was. Not only was the picture extremely clear, but the polished parts of the Takahashi Collimating Eyepiece are set up to reflect perfectly the crosshair of the primary and it has a black coated center that when reflected in the secondary allows you to adjust the secondary collimation to center. Suddenly the mystery of collimating this telescope came into view.
Looking through the collimation eye piece you’ll see a dark black circle in the middle, this is the center of the eye piece reflected in the secondary. Collimate your secondary by using the three screw heads on the secondary to move the tiny dot into the center of the black reflected circle. Once this step is complete, you don’t need to do anything else with the secondary mirror. Now you just have to adjust the primary mirror collimation screws. This part involves centering the crosshair (that’s painted on the primary mirror) around the black circle reflection of the collimation eyepiece. This was a little tricky to do as you can’t look into the eye piece and adjust the collimation screws at the same time. The telescope is just too long. You might need a second person to help with this part. Or if you’re like me, and extremely determined to get the job done, you push forward. Unlock all three primary mirror locks, and then unscrew the inner screw, and then use a wrench to move the outer screw one turn at a time, peeking back and forth to the eyepiece to see what’s happening. After some trial and error you start to figure out how things move when you turn certain screws, and eventually you can center things up and lock it down. I came across an old scanned manual for the E-200 and page 4 details very well what the collimation procedure is for the primary mirror and how to use those concentric lock/push/pull screws on the back of the mirror.
The secondary mirror collimation screws at the top of the telescope.
The primary mirror concentric push/pull collimation screws at the bottom of the telescope.
With the scope in good collimation I was finally able to take another image, and the results are improved over the previous two attempts. However, it’s clear now I have some vertical tilt across the frame, so I need one more clear night to work that out.
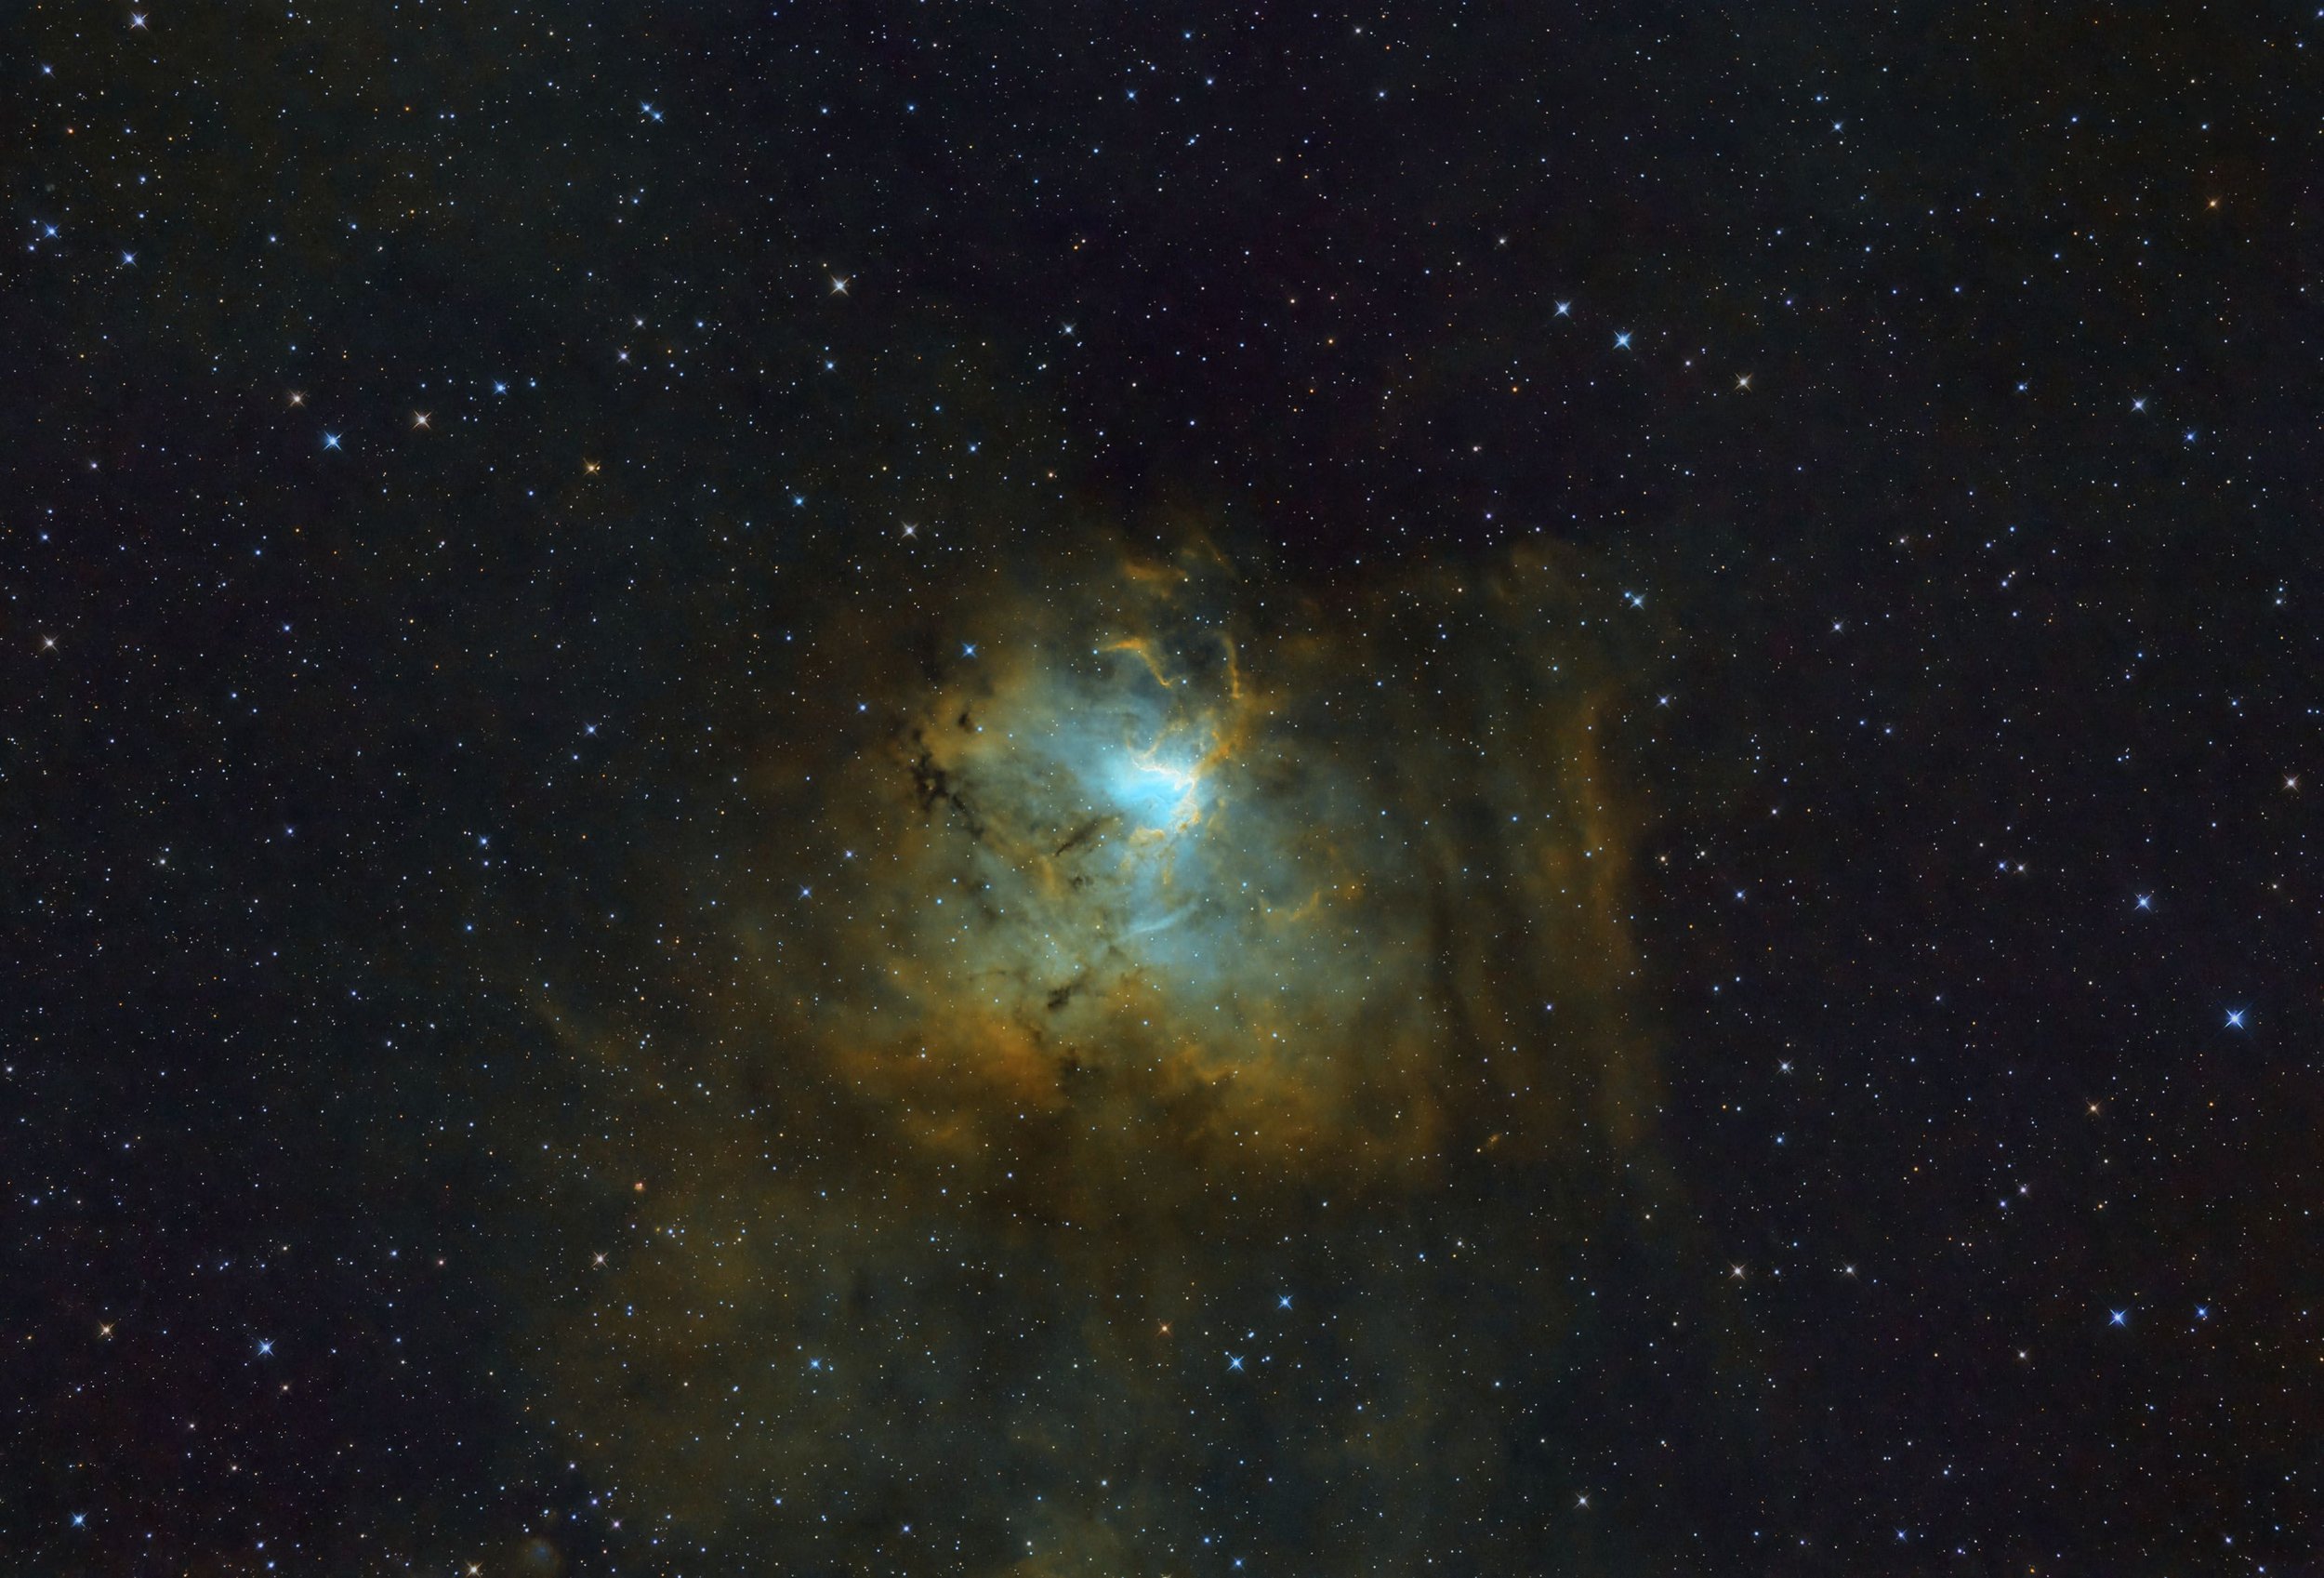
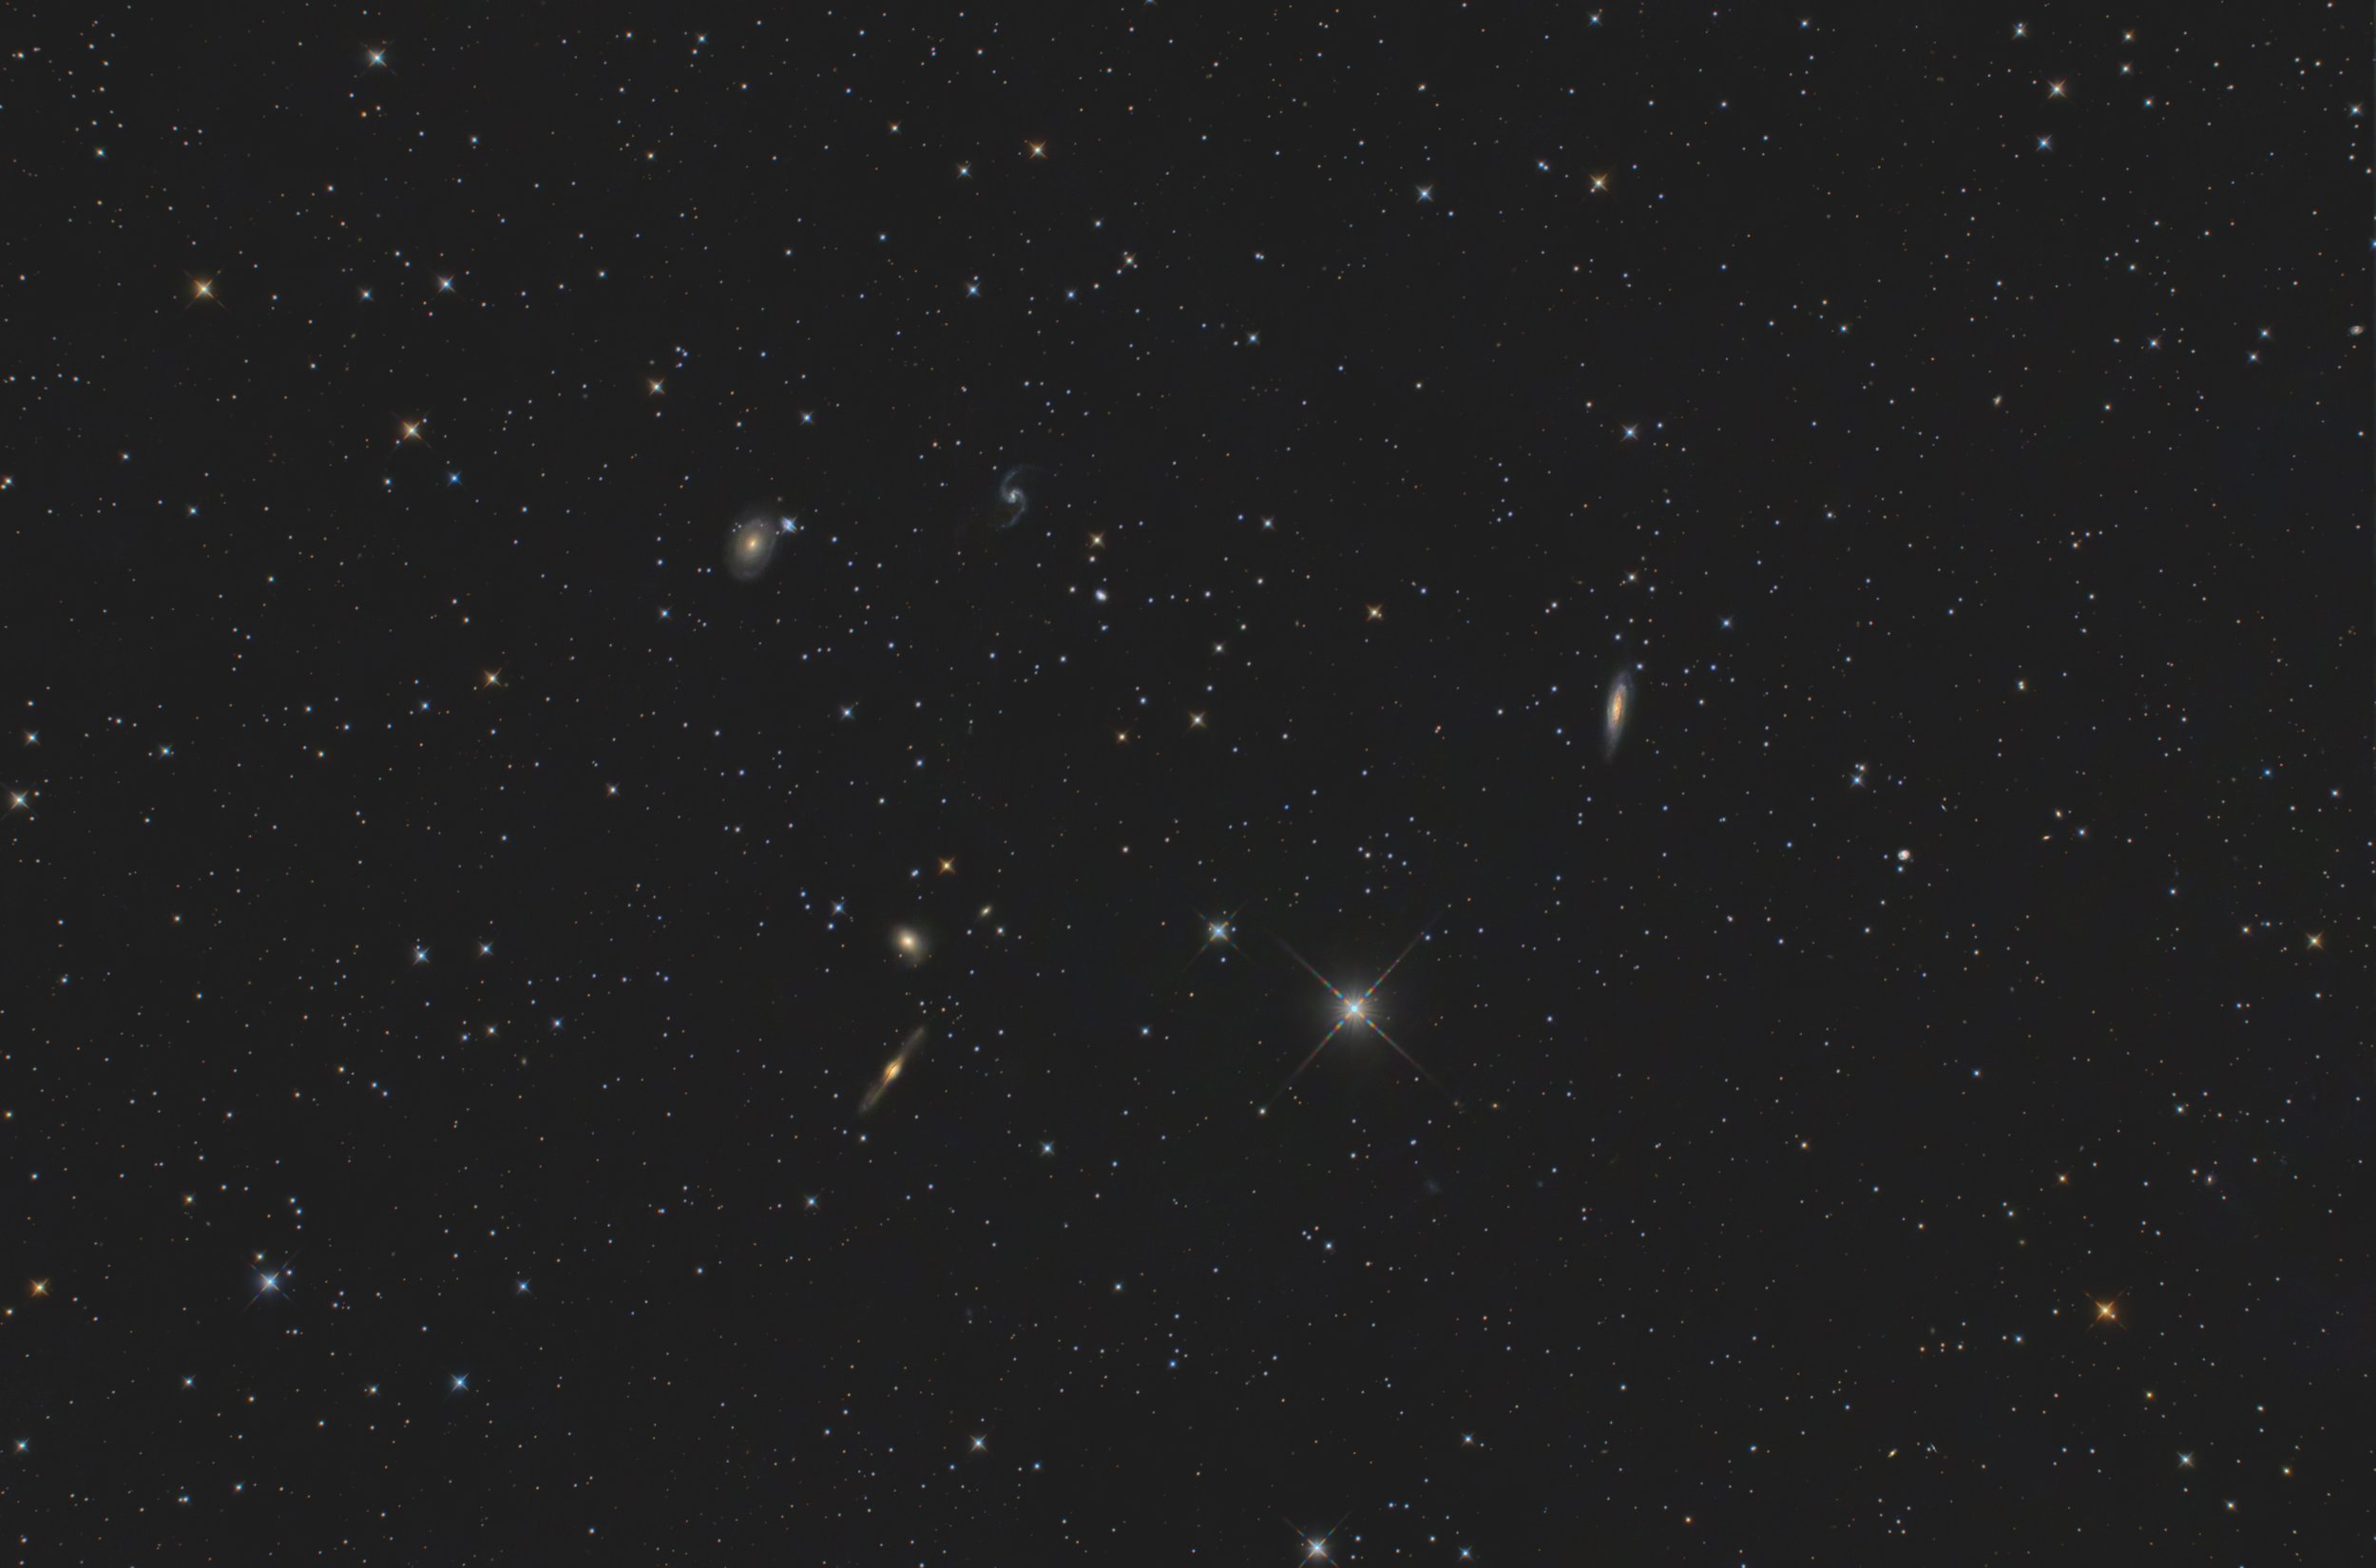
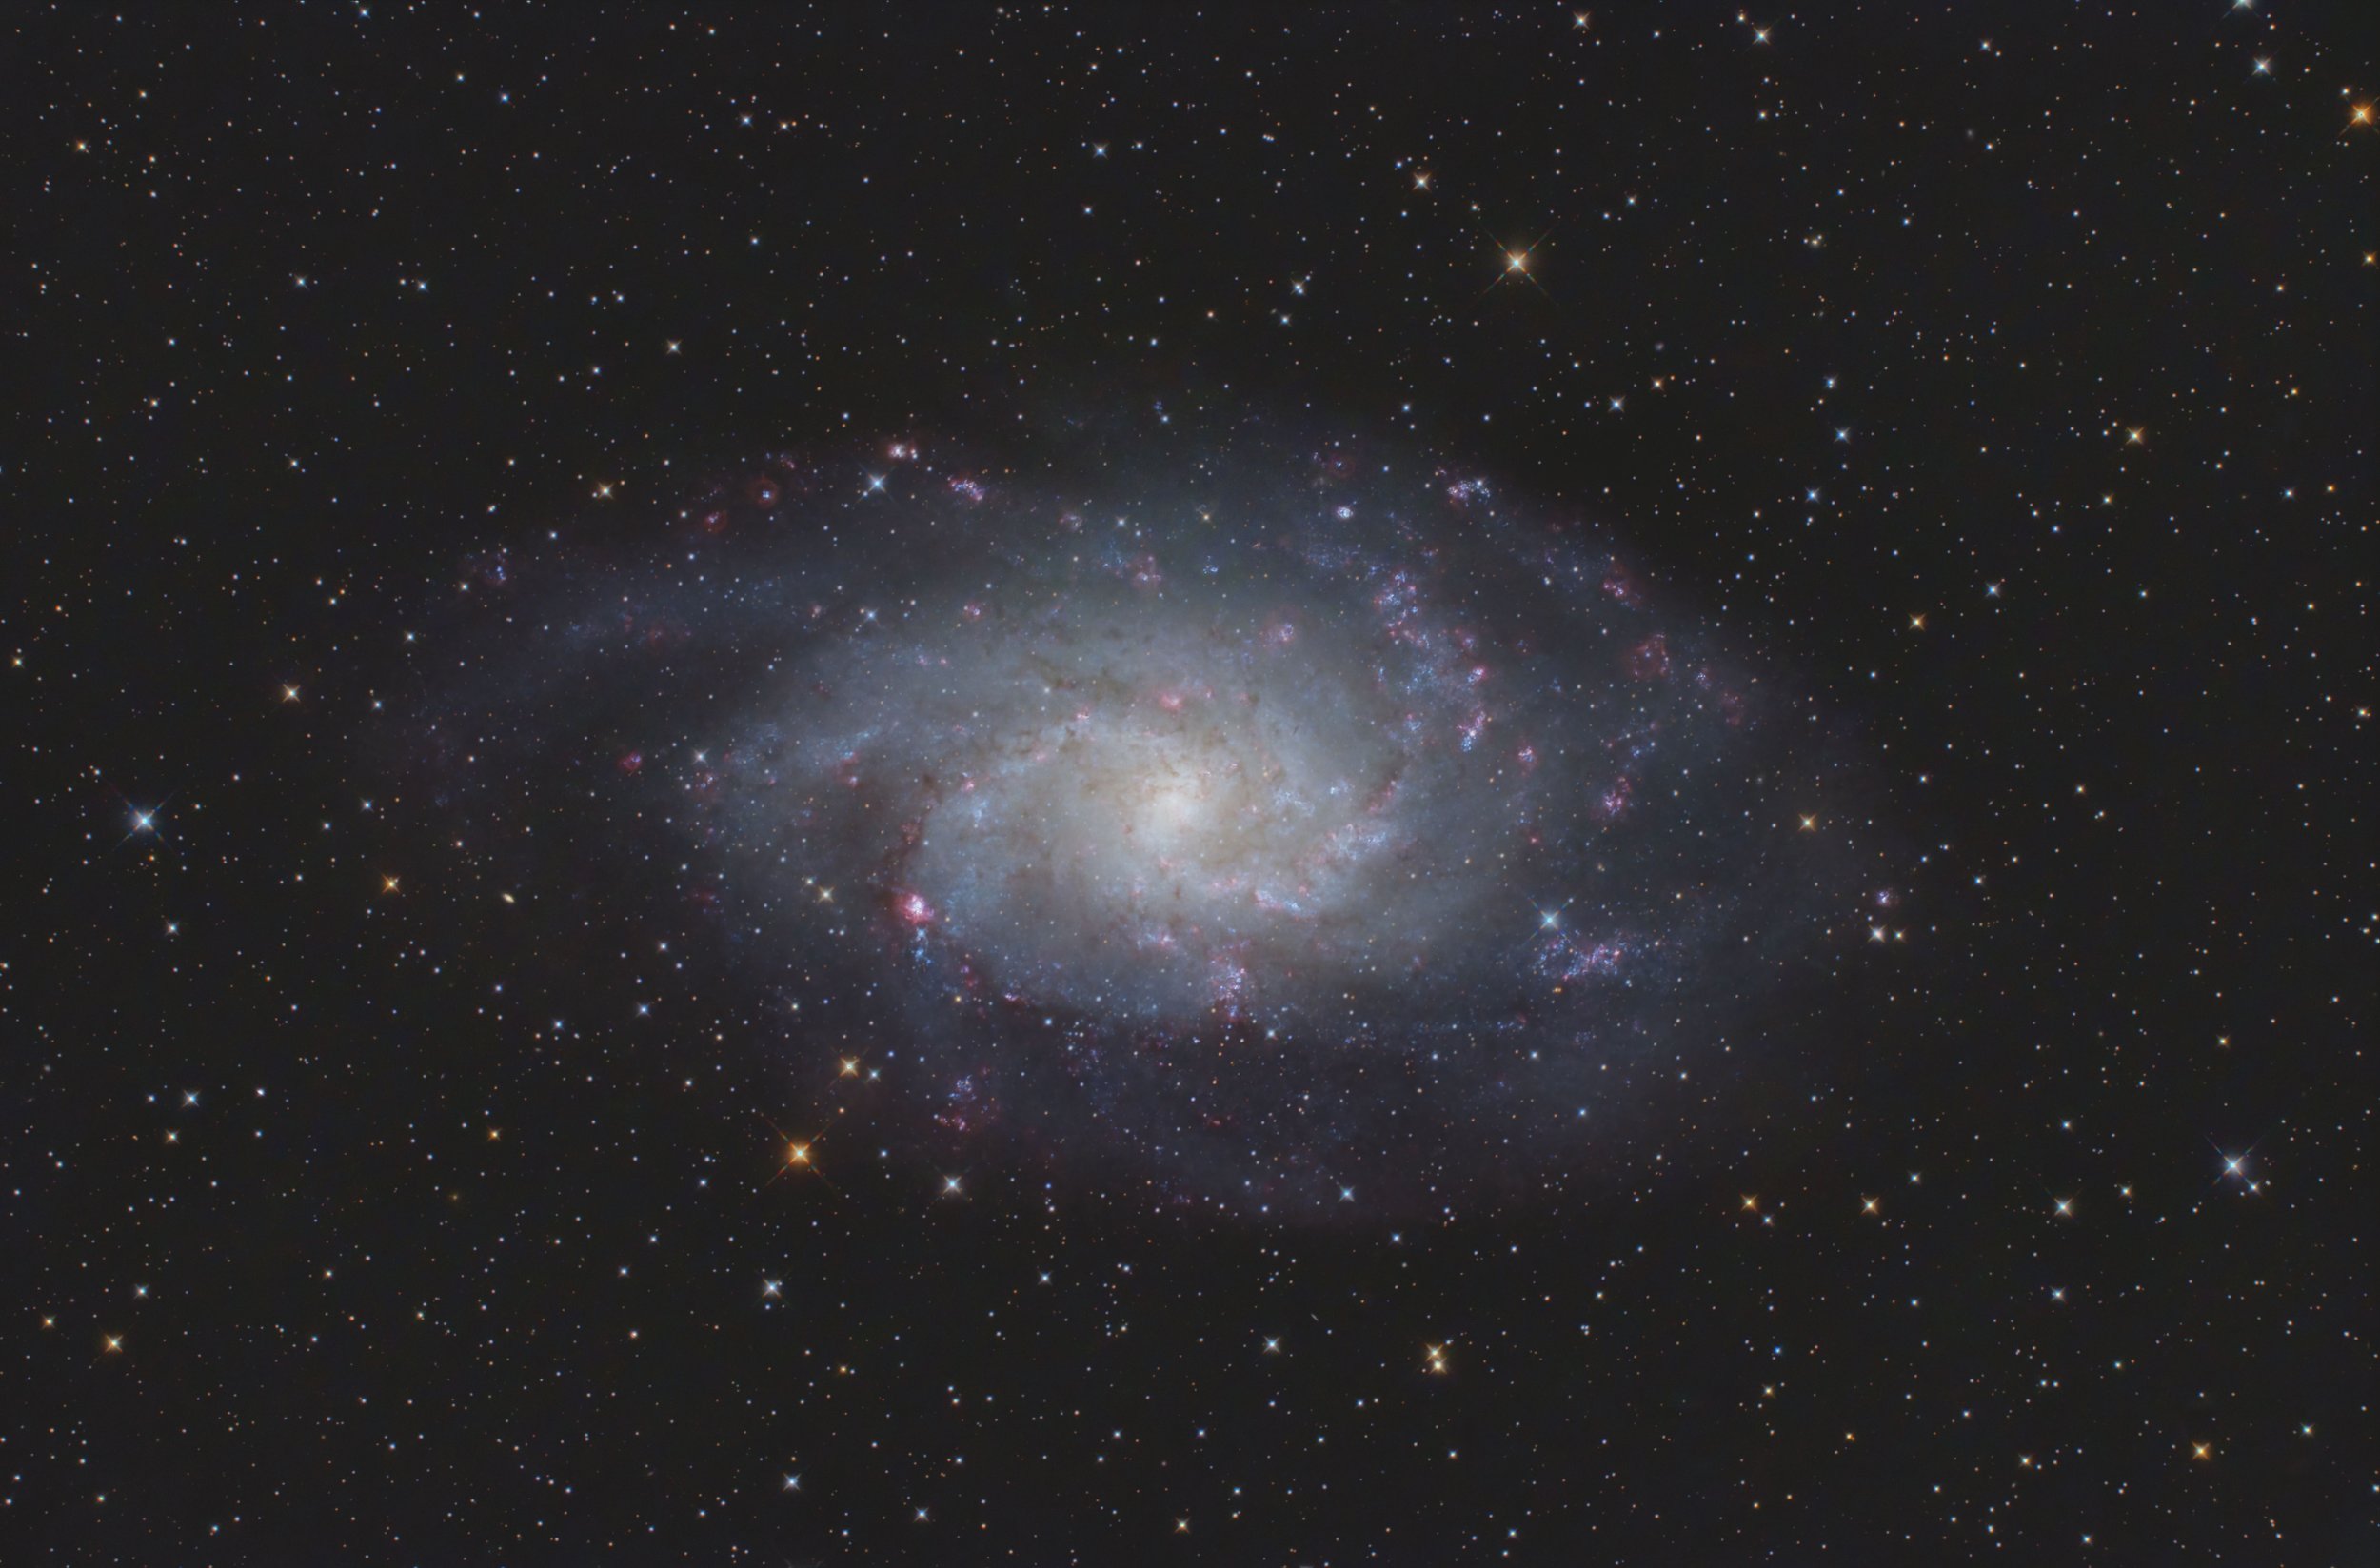
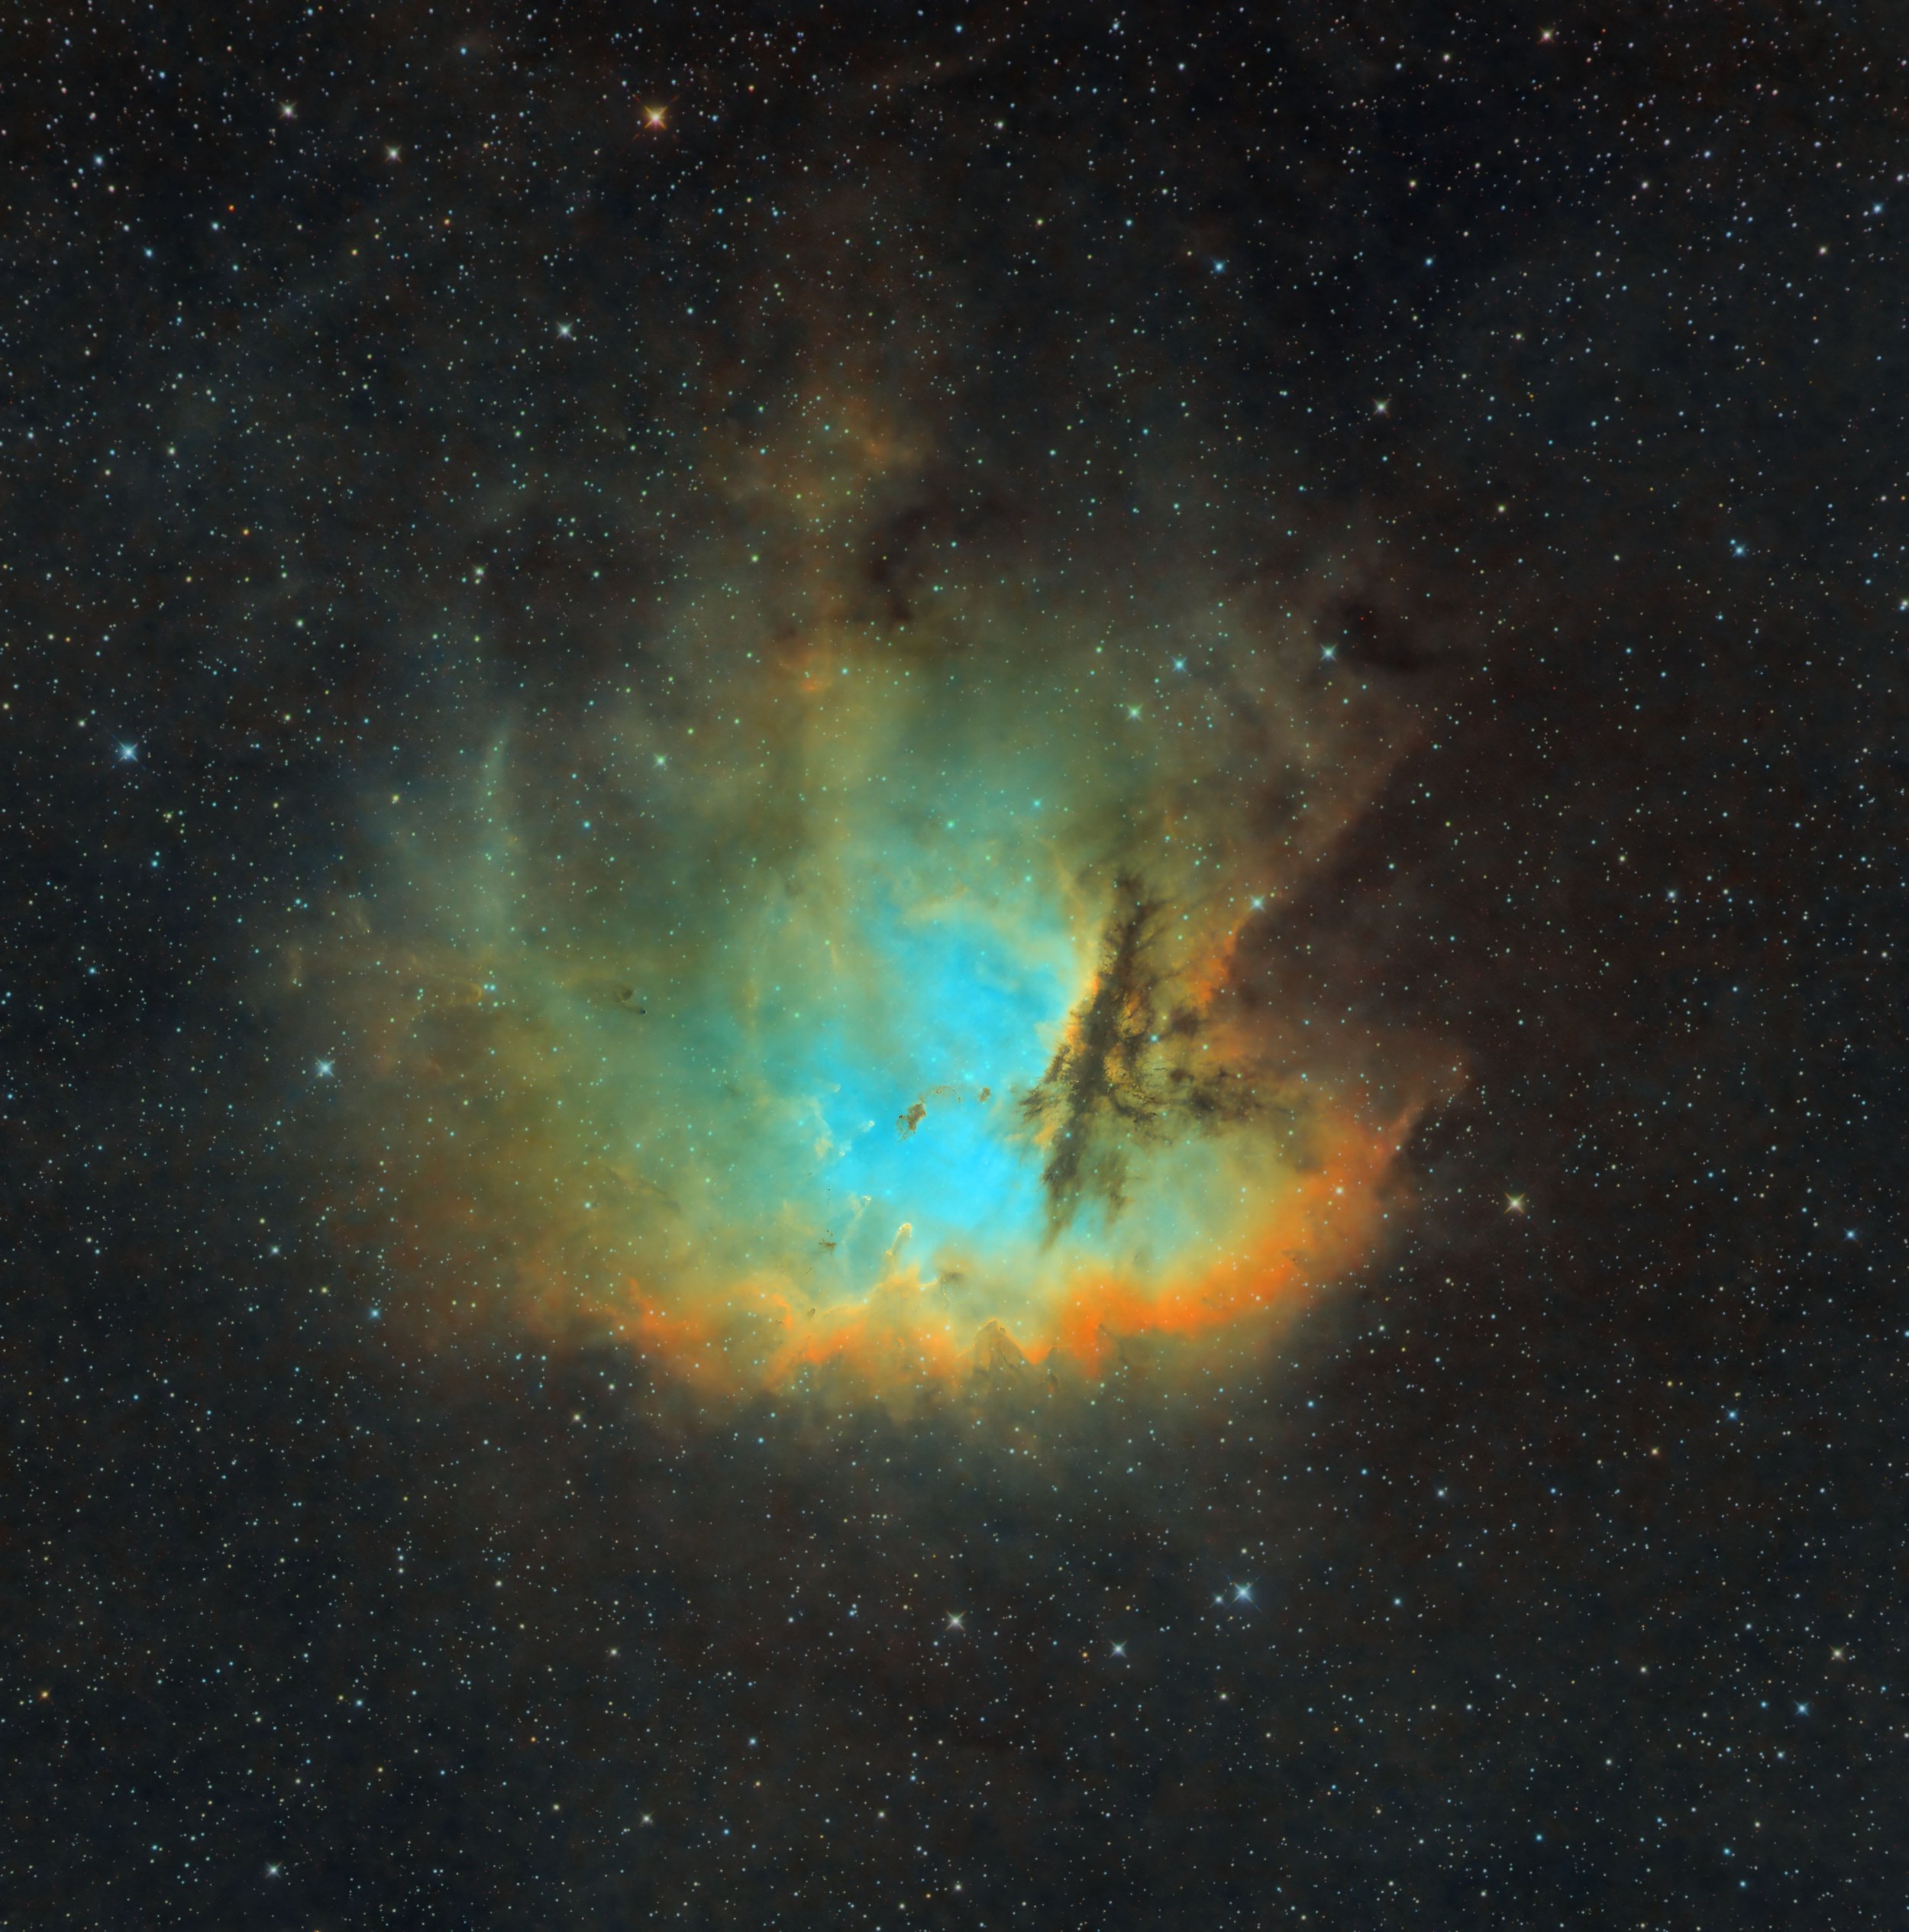
Here’s some recent images taken with the Takahashi Epsilon 200: