

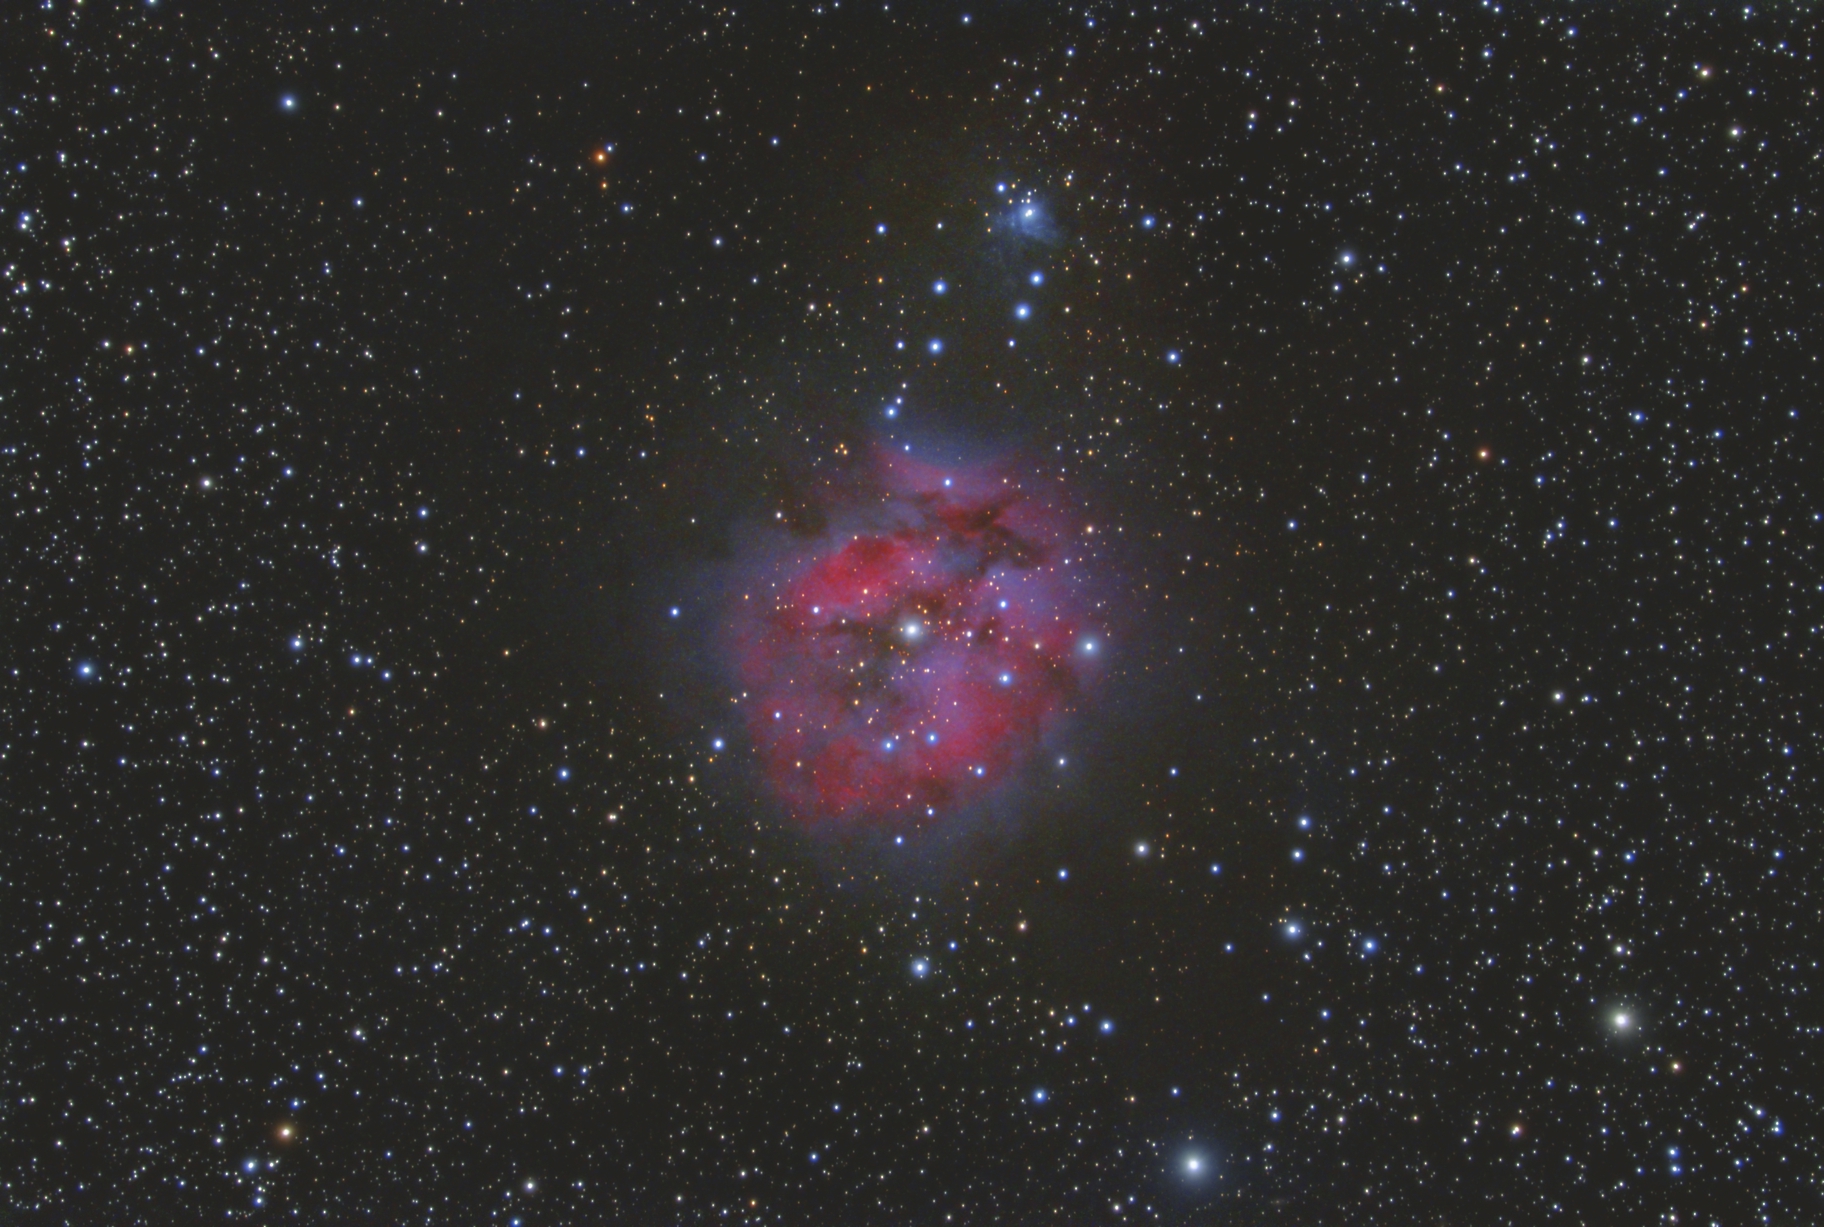
The final image. 18.5 hours of imaging time.
I started imaging the Cocoon Nebula on my EdgeHD 11” setup some time last week. I was able to get in two full nights during clear weather. As I image, I start to get excited about how the final image will turn out. So I always try and process the images I take each night as I finish them.
This allows me to see the progress and how the data looks as it starts to come together. Below are three images showing how adding more capture time can improve your final images.

This image is from the first night of imaging. It’s around 390 60s subs with the ZWO ASI071MC-Pro camera. Already, it looks quite nice. Good color, pretty stars. But still somewhat dim, and the details are lacking in the center nebula.

Here’s day two. I’ve added 360 more 60s subs. Lots more color, everything is brighter, and I’m starting to see more of the faint white nebulosity around the edges of the nebula.

Day three now. I’ve added a further 358 images. We’re now up to a total of 1,108 60s subs…18.5 hours of imaging. The outer white ring of the nebula is really visible now. Everything is looking fantastic.
I think I could image for double the time integrated to around 36 hours and get only slightly better detail. The light pollution in my area is really a limiting factor. It doesn’t stop me from getting more detail, but it takes longer and longer to achieve better results when imaging RGB from a suburb.
Some things to note for my imaging session. I learned a few lessons. I extended one leg of my CGX tripod to level it out. Normally I don’t try and get it perfectly level, as the alignment procedure can compensate for being slightly off. However, I wanted my guiding to be perfect, so I leveled the tripod. During the third imaging session, the imaged seemed to jump some about every 15 minutes. I could not for the life of me figure out what was going on. Every time it would jump, the tracking would get worse and worse. It turns out, that despite tightening down the tripod leg as much as I could, it was slipping, and lowering itself back into the retracted state. I had to stop imaging, lower the leg all the way until it was seated at the lowest point, and then I had to realign the scope. It took me about two hours to figure this out, or I would have had more imaging time.
The other issues that cropped up happened with calibrating the frames in Astro Pixel Processor. I ran out of memory, and disk space, but didn’t find out until the final integration stage of calibration, after it had run for 5 hours. So, it took me about 20 hours of running the process over and over again, first cleaning disk space, then trying again until it errored out, then moving it to an external drive…another error, this time RAM. Then I increased the RAM to 30GB for Astro Pixel Processor, and finally, 10 hours later, it finished processing the stack of 1,108 APSC sized 60s images into one final image.