
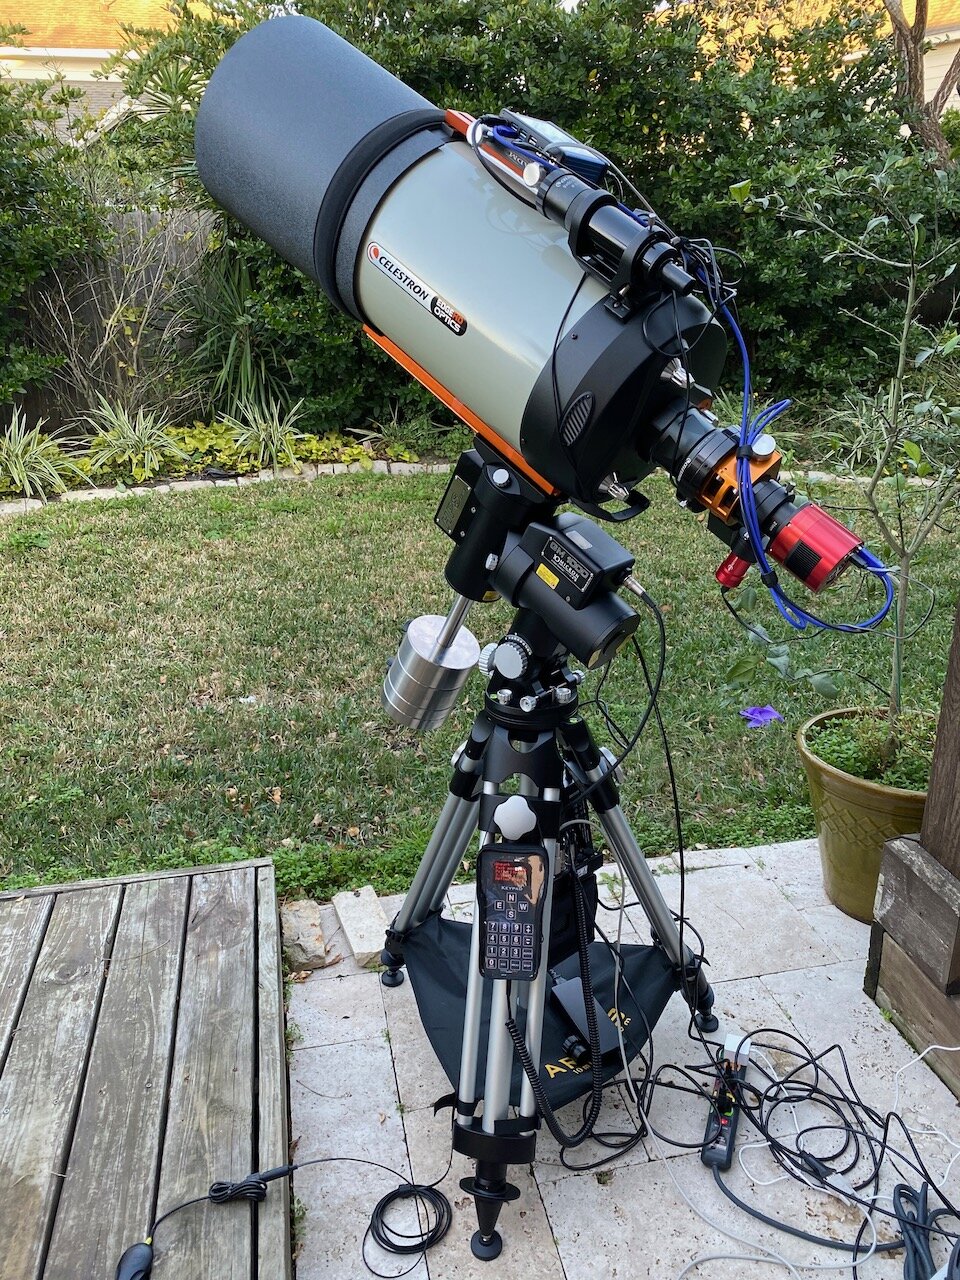
The setup shown above is what I could consider a rather advanced setup. In all likelihood you’ll start in this hobby with a much simpler setup. Astrophotography is fairly easy to get into, but it’s difficult to master. It does not require very complex hardware at the start. In fact, you can start with a simple DSLR, and a tripod. This type of setup can capture the Milky Way across the night sky when it’s visible. Upgrade that basic setup with a sky tracker, and eventually to a telescope and mount as your skills increase. But, this isn’t necessarily a recommended path, although it can be done that way. If you’re like me and you want to see some impressive stuff, maybe you jump right in with a telescope. Anyhow, this article is going to give you some basic direction on where to start.
1: Visit a local observatory or outreach program hosted by a local astronomy club.
This is a great way to get your feet wet. Meet some people who have been there, and done that. Soak in the sights, both by looking through a telescope to give you an idea of what you can see, and to talk to users that own telescopes to get their valuable input on a possible future purchase. Amateur astronomers love sharing their knowledge, and that’s exactly why they host outreach programs.

One of my first imaging setups. A smaller telescope, a smaller mount. A far cry from the complex setup at the top of the page.
2: Use equipment you have on hand.
It’s possible you already own a DSLR and a tripod. Take it to a state park, pick a fast (F2-F4), wide lens like a 50mm, 35mm, or even wider at 12mm. This kind of lens with ISO setting around 1600, will allow you to capture images of the milky way with 15-20 second exposures. If you want to up your game with longer exposures, add in a sky tracker like the SkyWatcher Star Adventurer. This allows the DSLR to track the night sky for longer exposures than 20 seconds. Up to a minute or more exposure allows you to start to capture more detail. Take advantage of the inexpensive or free software available on the Mac and enhance your skills by adding in image processing to the mix to squeeze out those extra details.
3. Big scopes don’t always equal big views.
In fact, big scopes can cause a lot of beginner issues. Telescope manufactures like to sell packaged deals combining a telescope with a mount. They often sell these with scopes that are too large for the mount to handle when imaging. The larger and heavier your scope is, the more precision that’s required to aim it. And when you have long exposures requiring extreme stability and precision, these small mounts probably are not going to cut it. A telescope is essentially like a long focal length fixed camera lens. If you’ve ever tried to hold a zoom lens steady, it’s much more difficult than a wide angle lens. The same principle applies here. You might think, why do they sell those packages? They can be great for visual use, or even planetary imaging where tracking of your targets doesn’t have to be that accurate.
4. Small scopes can see and capture more than you think.
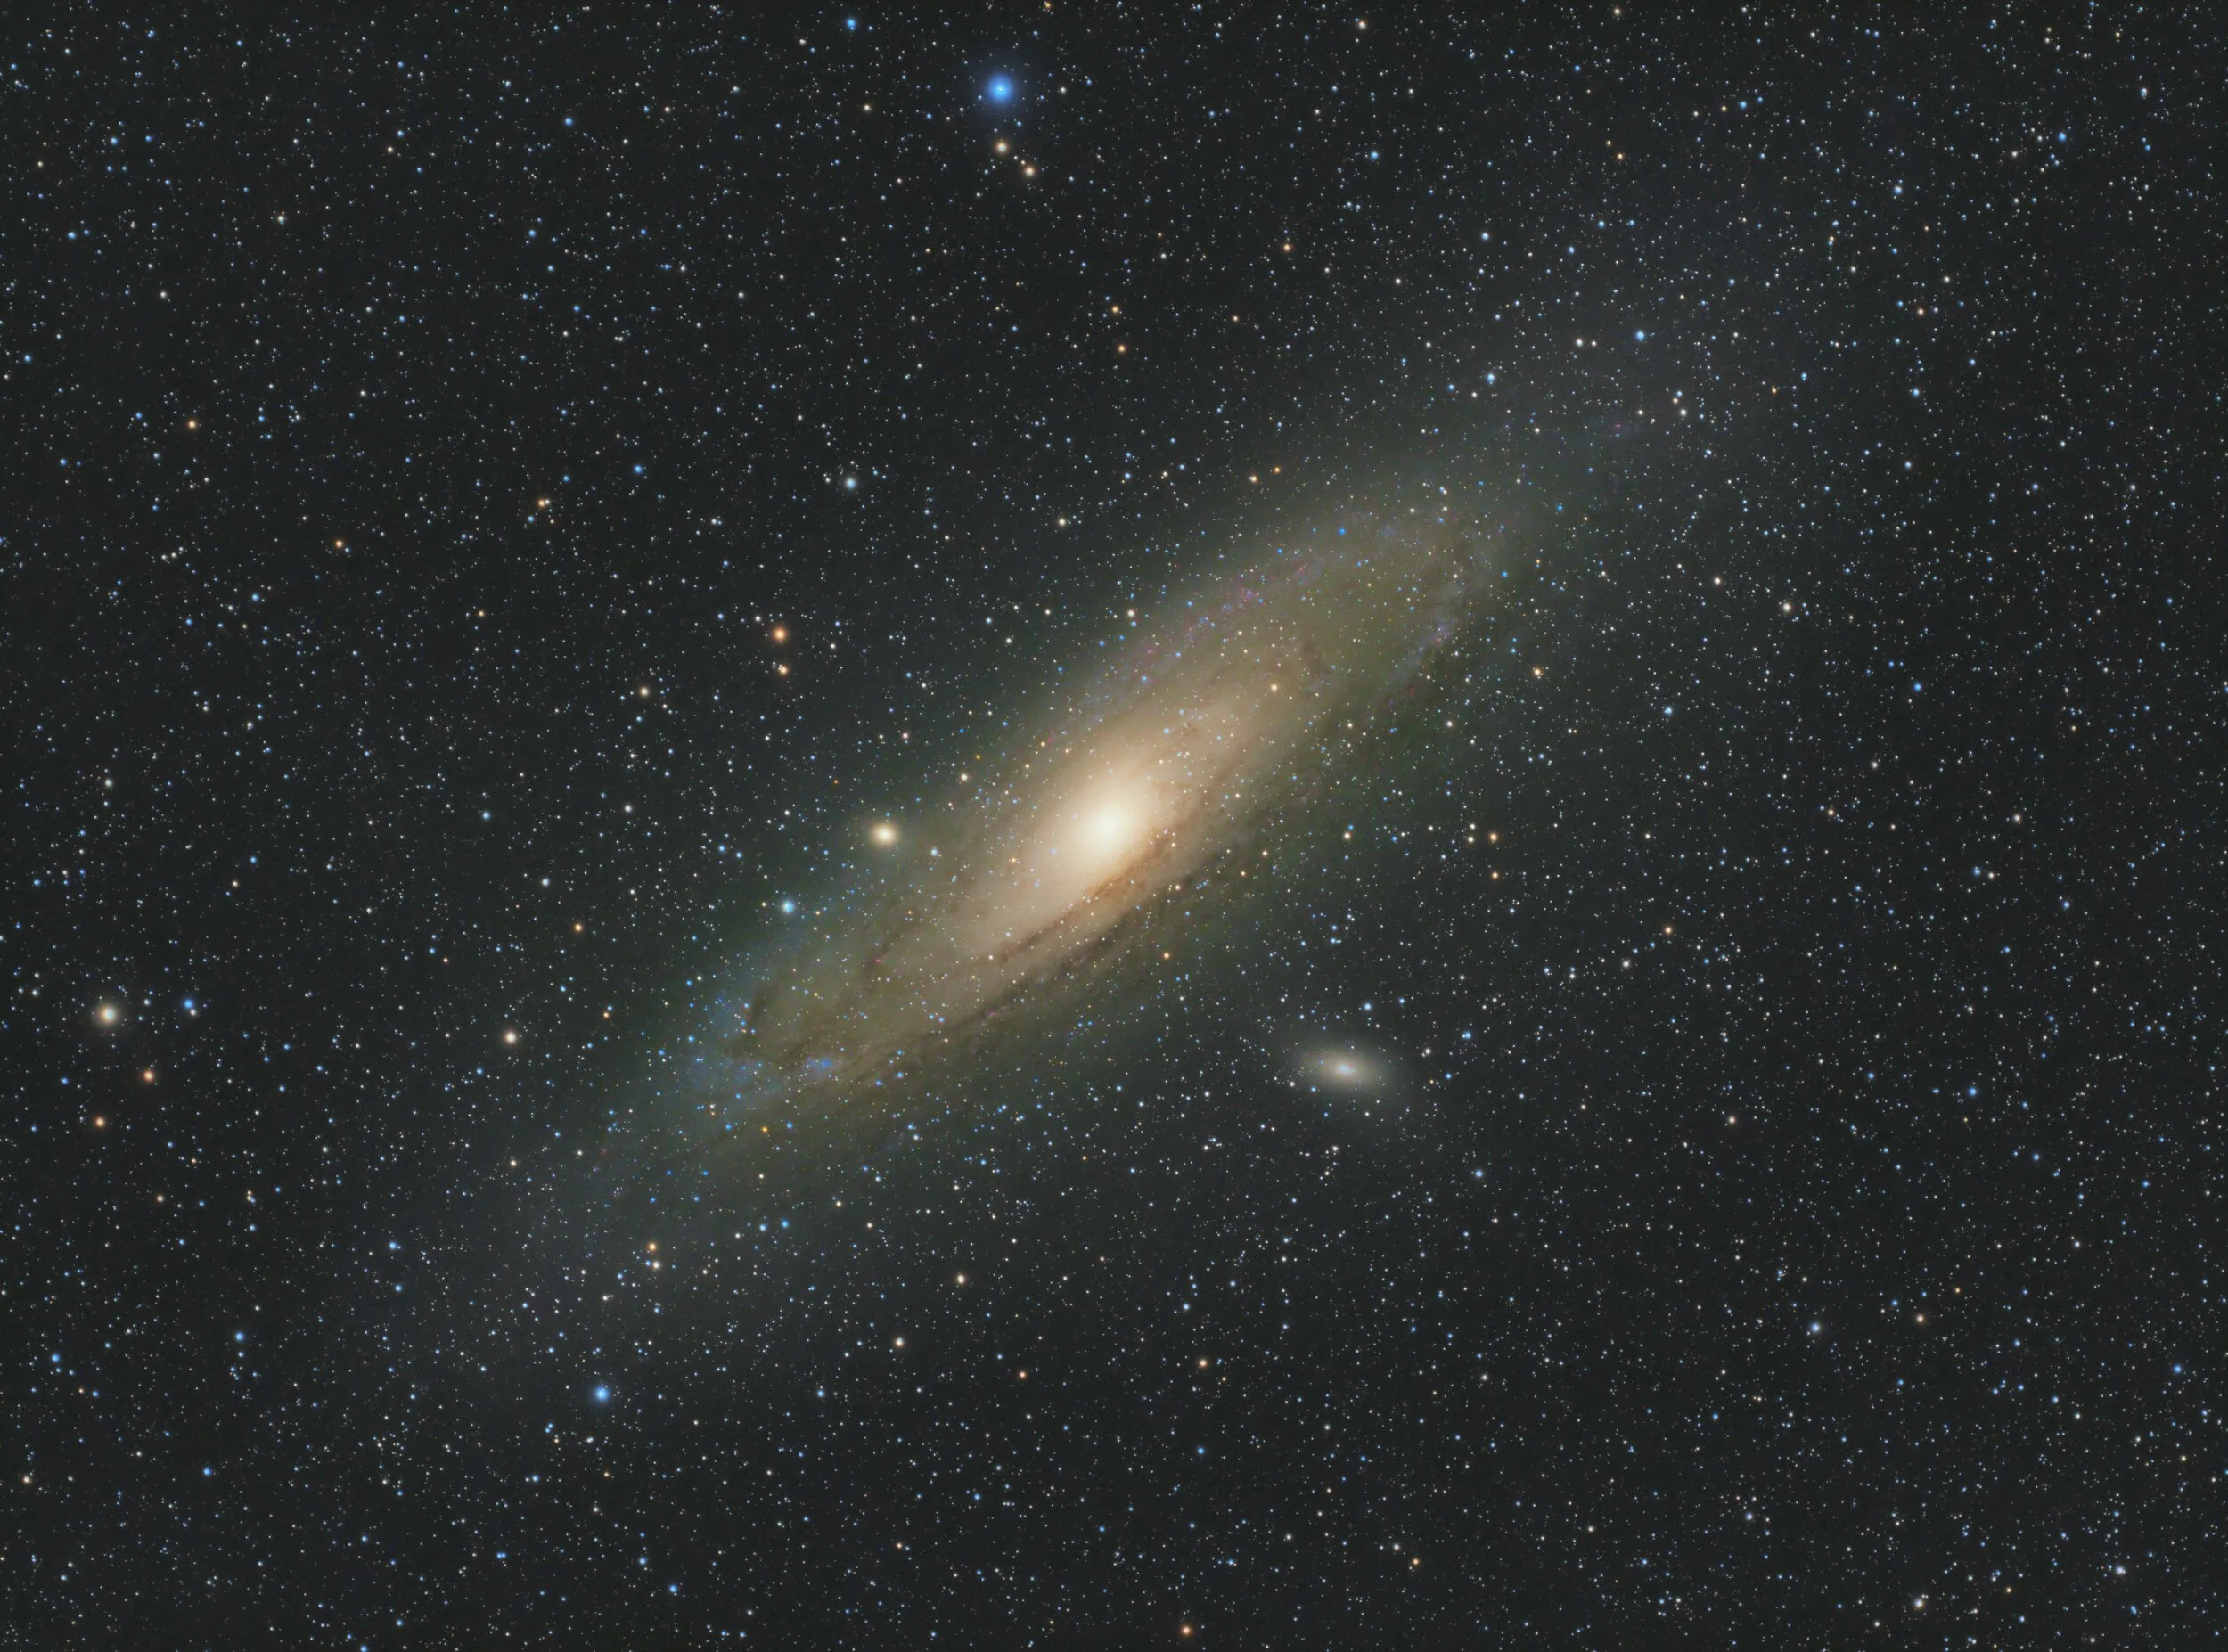
Small scopes between 60-80MM in size can capture awesome images of galaxies like Andromeda, or huge swaths of nebula in the night sky. There’s a large number of big objects that you just can’t image well with very large telescopes because the area they can see at once is so small. In fact, Andromeda is about 3° across. Compared to the moon which is 0.5° across, Andromeda is six times larger. If you tried to image it with a large telescope, you would only see a small portion of the overall galaxy. Other benefits of small scopes are that they’re light weight, and don’t require very precise tracking of the mount. Since they are not as zoomed in as a large scope, small imperfections in the tracking of the mount go unnoticed. These telescopes are often less expensive, and make entry into the hobby both easier to do from a technical standpoint, but it’s also easier on the wallet.

Andromeda Galaxy, shot with a 51mm telescope. No large scope could capture this image. It took a small one to fit in the full field of view.
5. Ask questions.
Take advantage of other people’s experiences, both their mistakes and good choices. Browse the CloudyNights.com forum (one of the largest astronomy and astrophotography forums around). Learn what you can from others. Contact me at my site contact button (on the bottom of the site) and ask away. I love talking to other people about this fun hobby, and am open to offering others advice. Also, take a look at the site Astrobin.com. This is all amateur astrophotography taken by amatuers around the world. Before I got into the hobby, I thought all these kinds of images only came from space telescopes like the Hubble. I had no idea you could capture these images from your own back yard.