


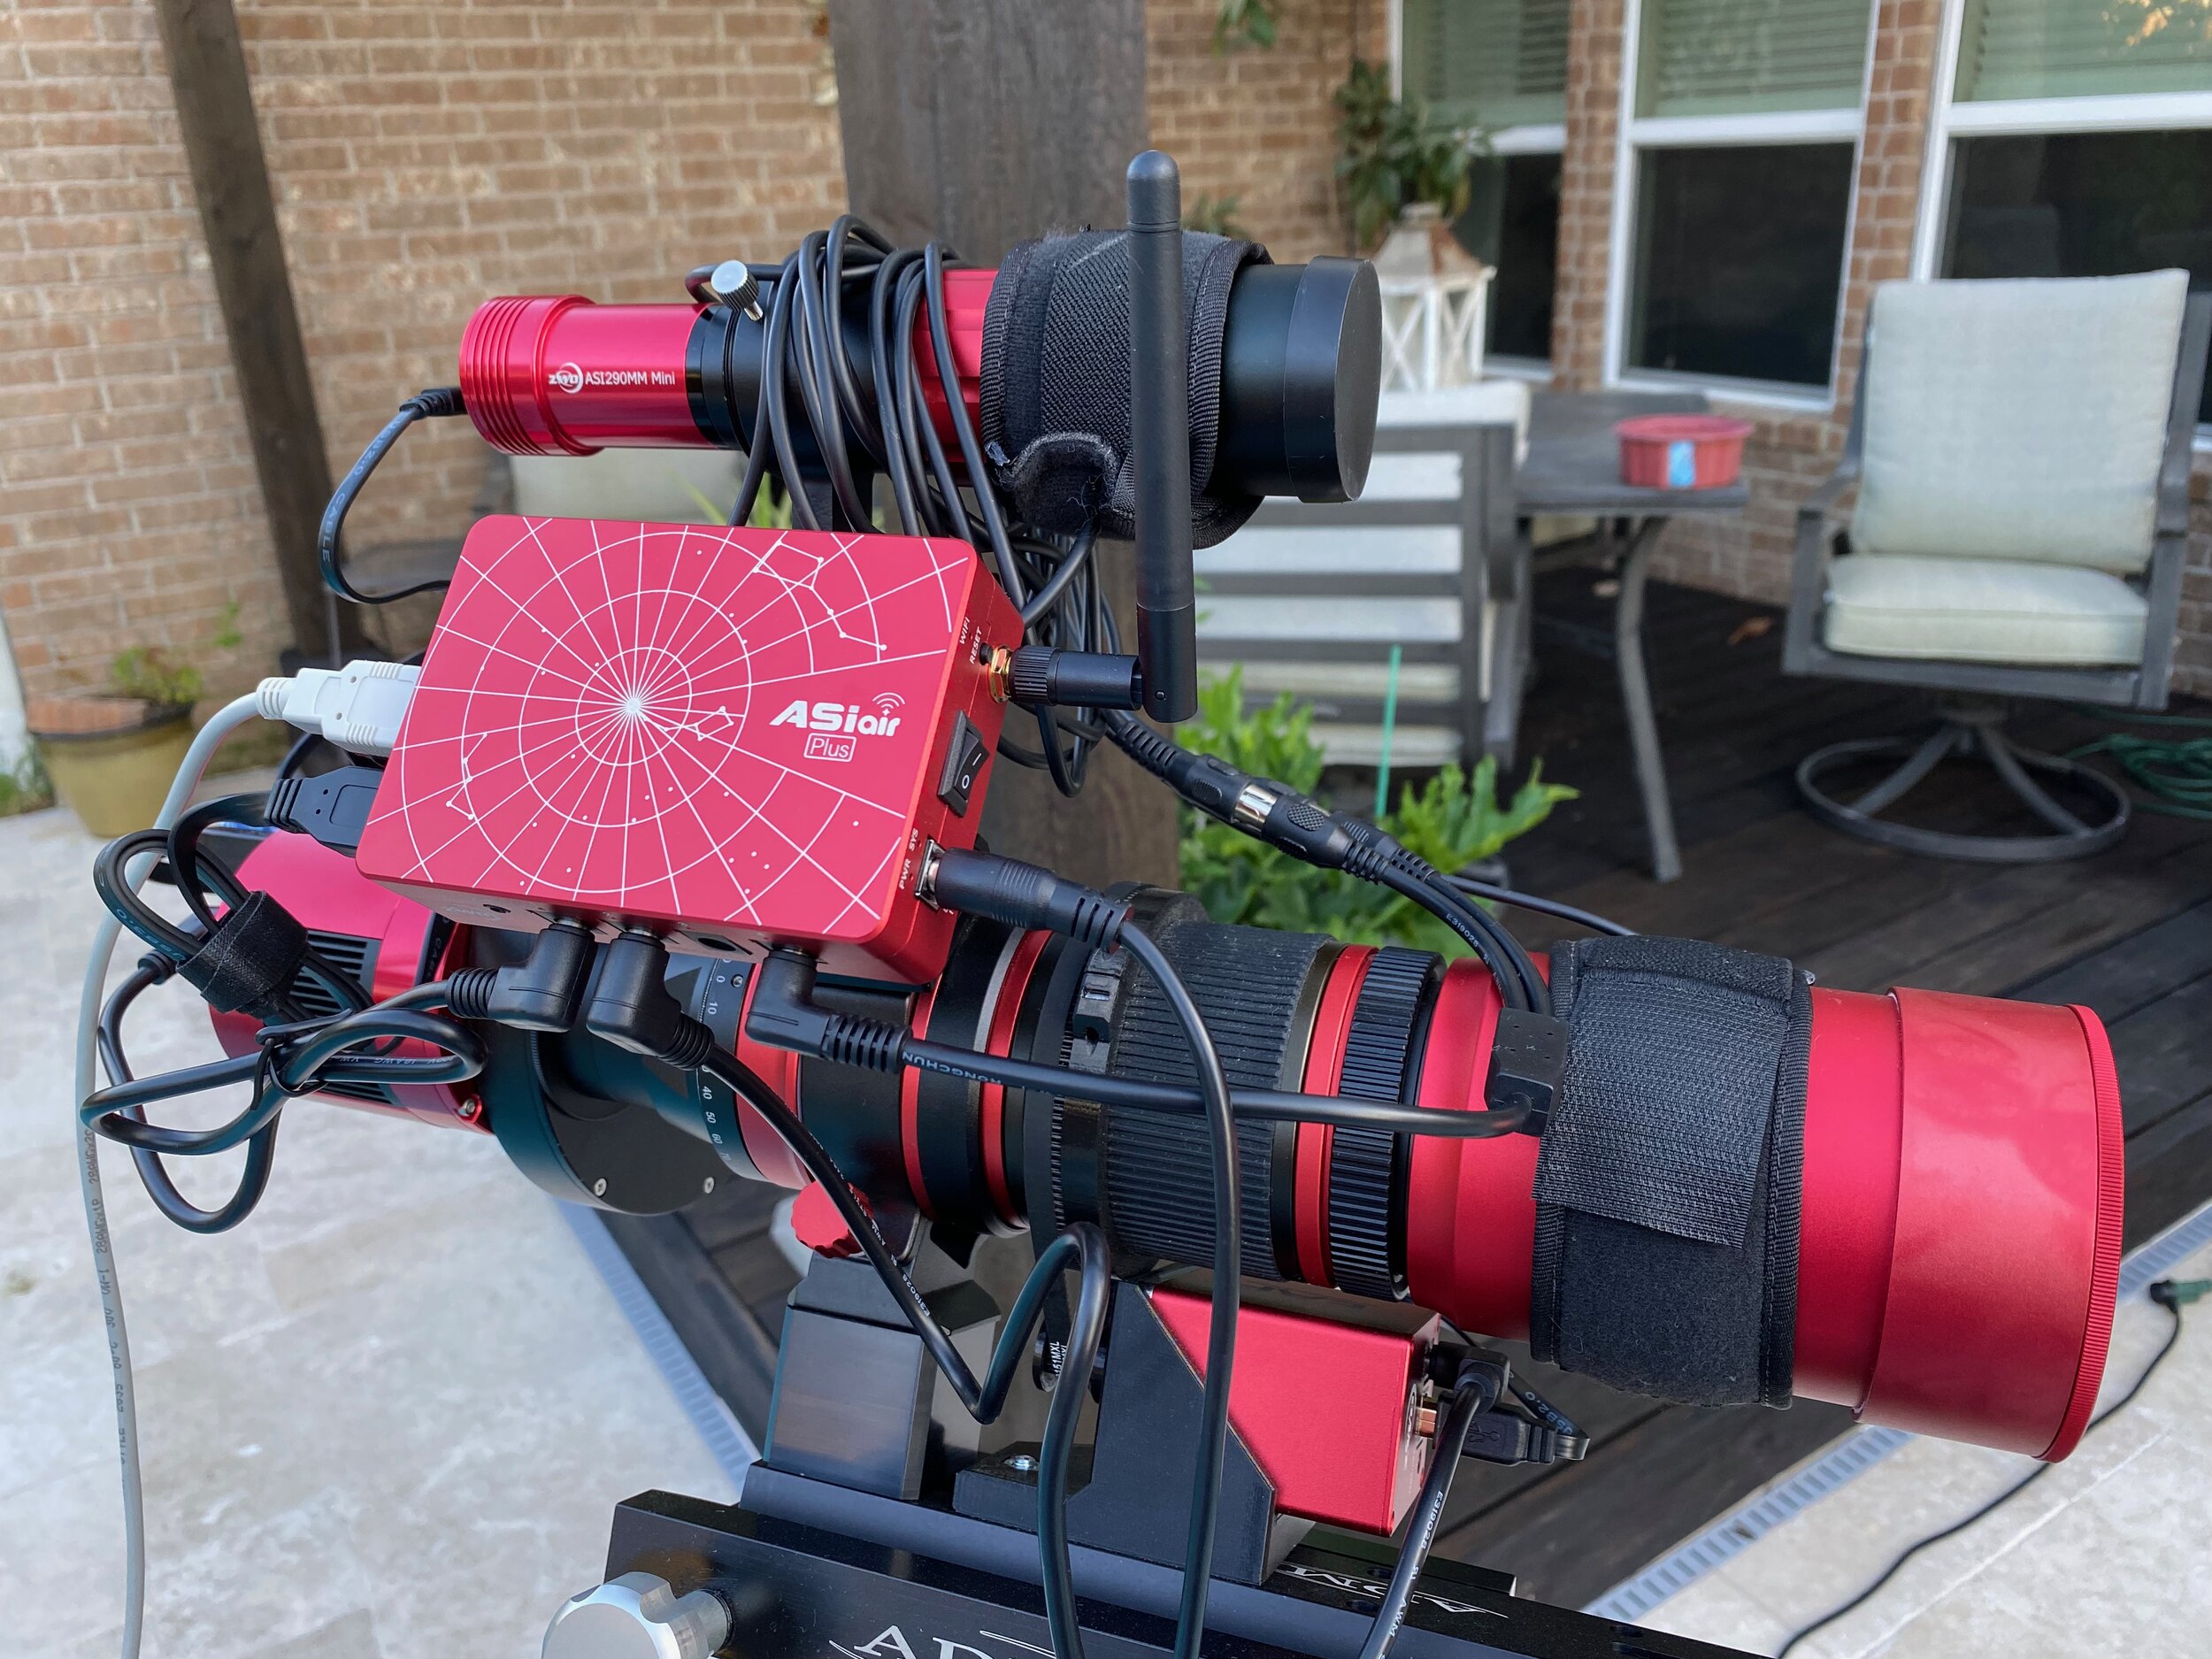
What is the ASIAir Plus?
The ASIAir Plus is the third generation ASIAir product from ZWO. It aims to replace your laptop or mini-pc at the telescope, and eliminate the need for additional software, USB hubs, power supplies, and wifi router. It can be used for DSO Imaging, and Planetary Imaging, and is a fully automated solution so that you can image through the night unmanned (while you sleep). It’s fairly inexpensive at $299, and relatively easy to operate. ZWO touts the ease of use as a primary function of the unit. Lets face it, Astrophotography isn’t easy, and any device or software that can improve the experience is a win-win for everyone. The best part is you control it from any cell phone or tablet (Android or iOS) that you already have by downloading the ASIAir app.

What’s new in the ASIAir Plus?
The original ASIAir’s were based off the Raspberry Pi 3 (ASIAir), and 4 (ASIAir Pro), and while the new one is still based off the Raspberry Pi, it has a custom designed board featuring eMMC Storage, which provides faster reads and writes of the data, and increased system stability with the ability to reset the firmware and recover from software failures. The increased read and write speed means modern high resolution cameras work with ease.
The other, and probably most requested feature was improved WiFi. Now included in ASIAir Plus is an external antenna for a stronger WiFi signal and faster communication speeds including both 2.5Ghz and 5Ghz speeds. It has a claimed working range of up to 20 meters. And if you have a physical internet connection, there’s a gigabit Ethernet port.
What can the ASIAir Plus do?
In a nutshell, there are several high level functions the ASIAir Plus can do. Deep space image acquisition, Electronically Assisted Astronomy (live stacking), and Planetary Imaging. But here’s a full feature list of the device:
Deep space image sequencing for single targets and multi targets (in plan mode)
Live stacking (with calibration frames)
Planetary imaging with high speed video capture
Deeps space sequencing can handle both color cameras and mono filter sequencing
Automatic focus with a focus motor, or Bhatinov mask assisted focus
Guiding with automatic guiding calibration
Polar alignment function
Power management
Dew heater control
DSLR shutter release capability
USB Hub
Automatic shutdown at the end of a sequence
Target lookup featuring multiple catalogs; Messier, IC, NGC, and Sharpless


How does the ASIAir perform on its first night out?
About two years ago I was imaging with a MacBook Pro laptop connected to my telescope. I had the laptop sitting in a chair next to my setup, and the weather was set to be clear all night. I set up the equipment and went to bed while it imaged away. I woke the next morning to the sound of rain, and my heart raced. I jumped out of bed and ran outside to see my equipment drenched in rain. The chair the laptop was sitting in was concave, and had filled with water which the laptop was now sitting in. I freaked out, and yanked the power cable under the porch covering, and immediately started assessing the damage. This is the sort of lesson you only want to learn once, or if you’re lucky, you never want to learn this lesson. And that is the beauty of having an inexpensive device like the ASIAir. They’re easy to replace if by some crazy coincidence a stray summer shower hits you too. There’s no reason to ruin a thousand dollar laptop.
The ASIAir Plus software interface
The Air interface is broken down pretty well. Across the top are a set of icons that get you into the basic setup screens for each piece of equipment. The WiFi icon is actually the ASIAir’s main window showcasing power management features. Next comes the camera settings, then guide camera settings (including dithering options), mount settings, filter wheel settings (with current filter selected), focuser settings, and last are the storage settings.
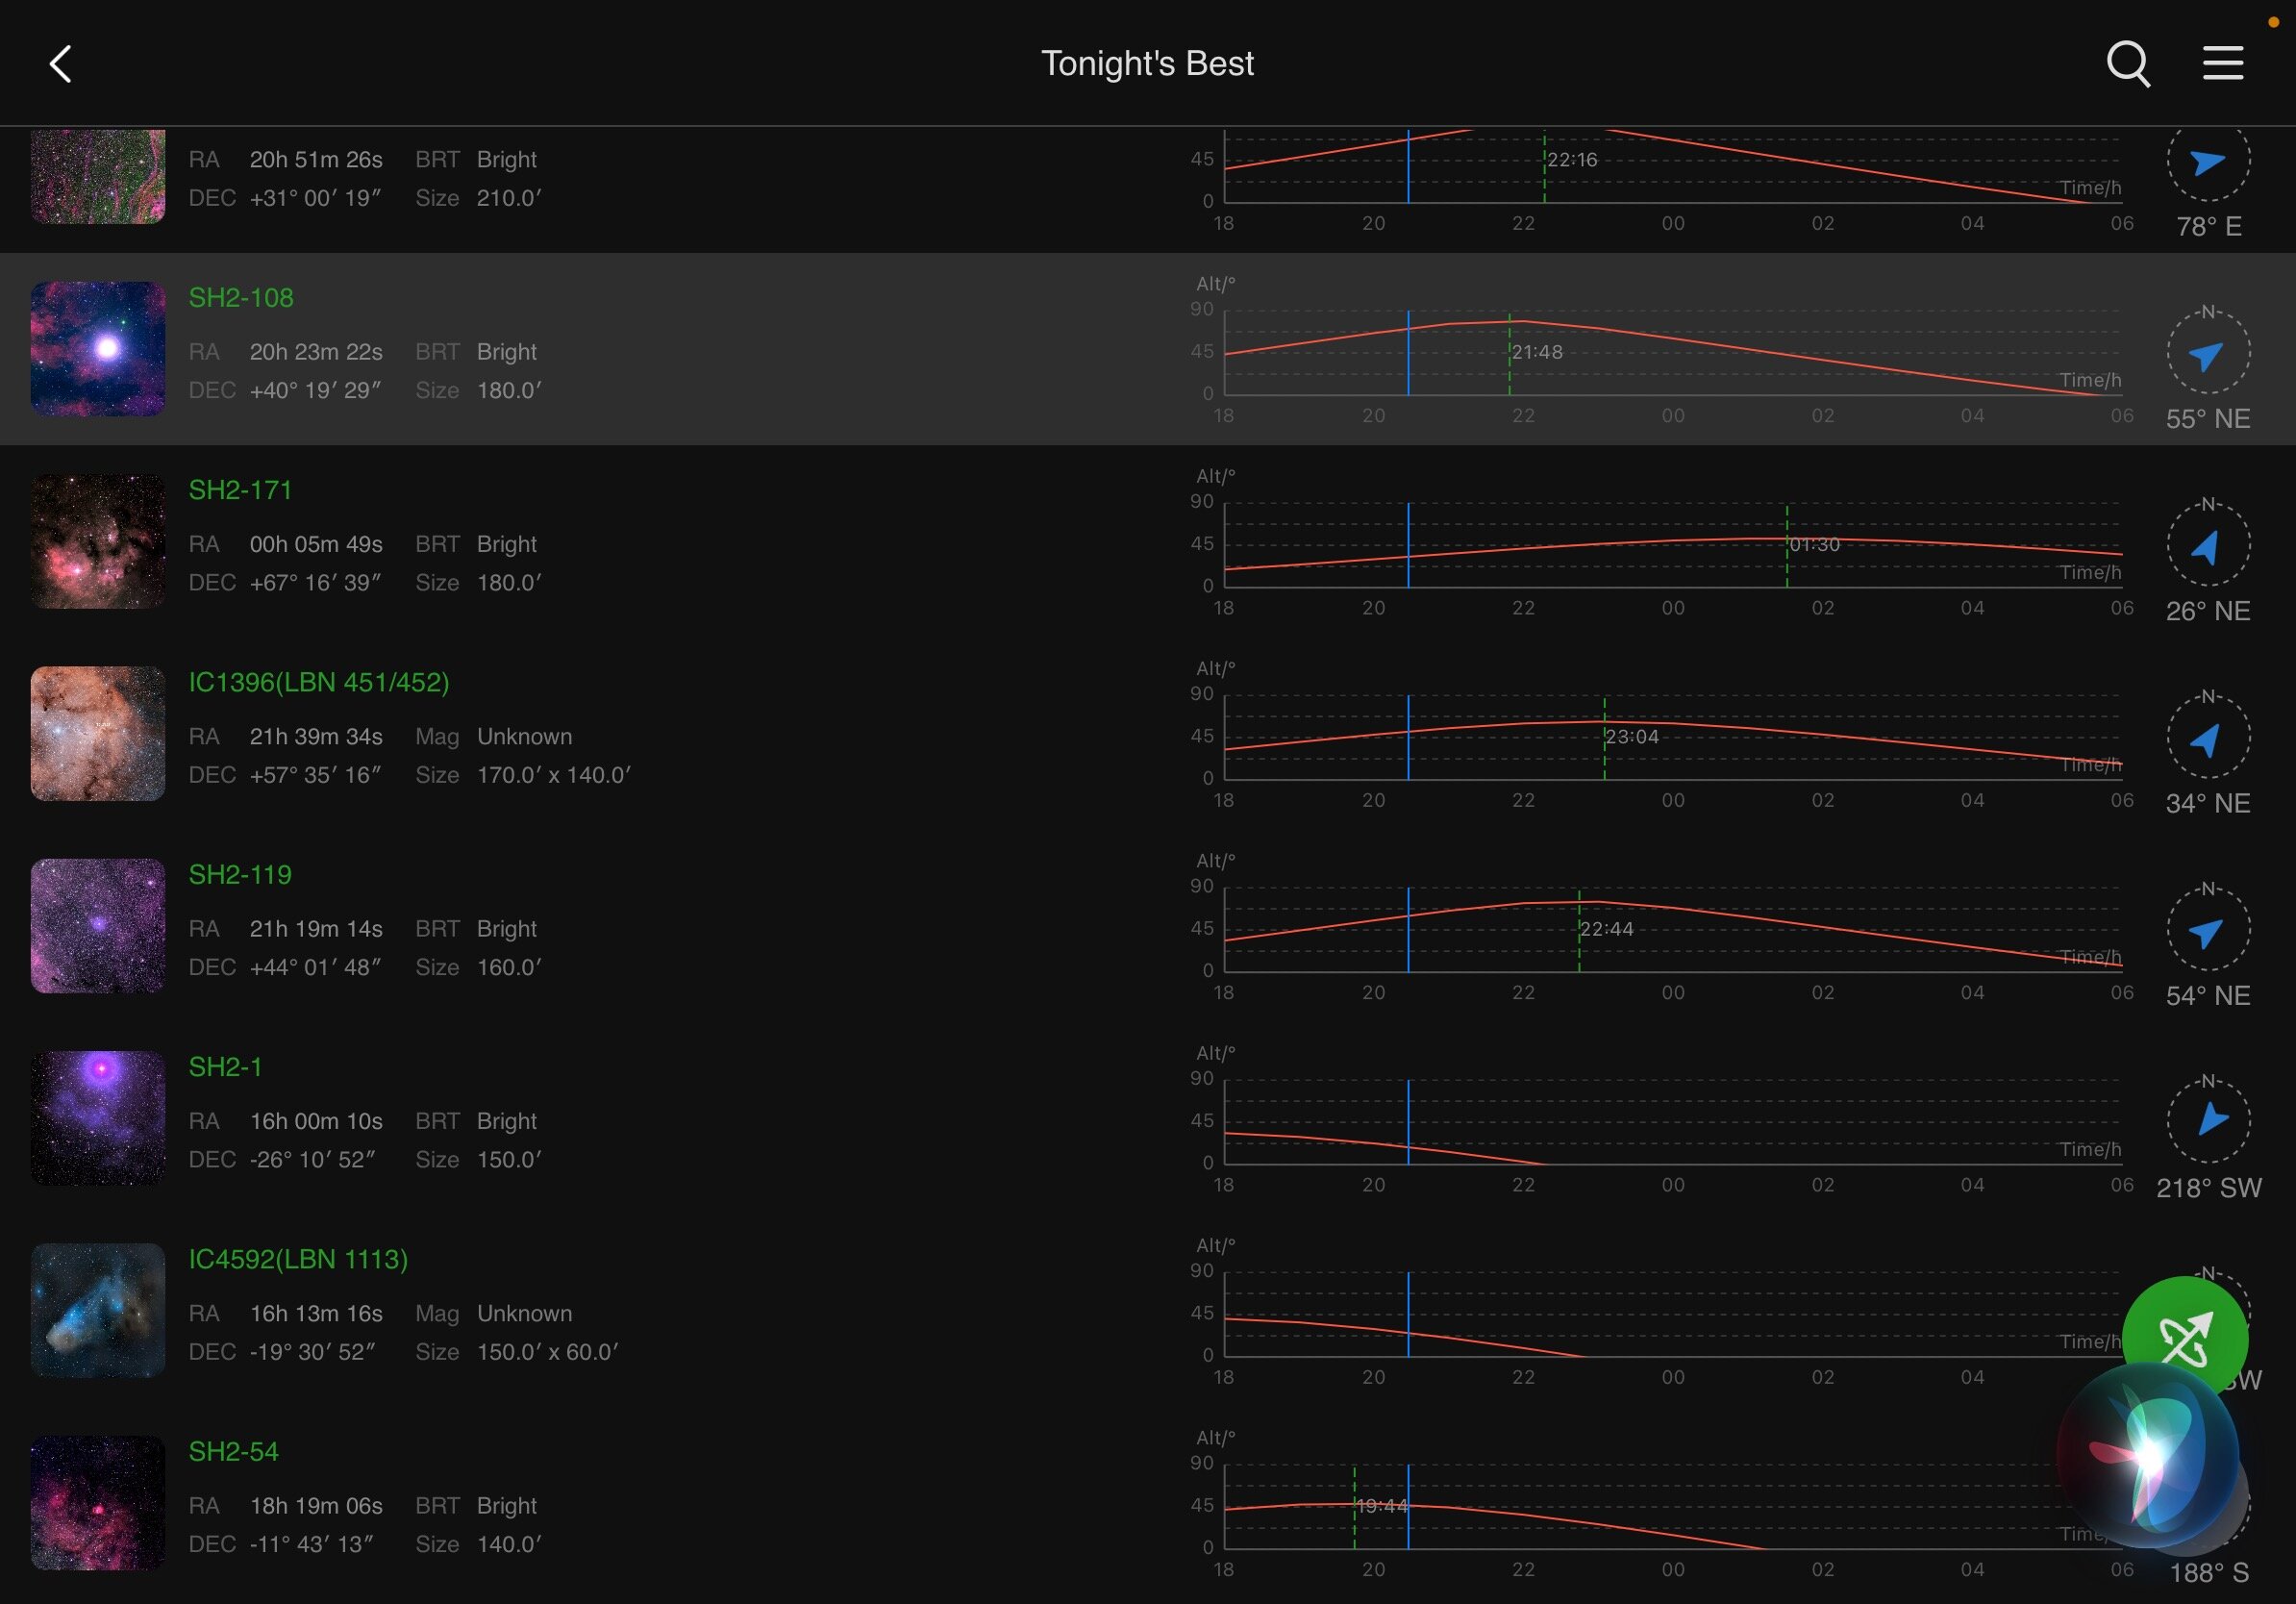
Below those icons from left to right are the guide window, which can be expanded full screen to see calibration, and some basic guide parameters. In the callout to the right of that, you can see your current target, RA and DEC of your mount and arrows to manually move the mount with slew speed below that. Choosing the magnifying glass next to the target name brings up a search window where you can research and find specific targets to image. Each target is showing with an ephimeridies for your location, so you can see how long it will remain in the sky during your hours of darkness.
The icons down the left side of the main window turn on and off the histogram (which shows at the bottom) the focuser settings (shown to the right of those icons), a guide icon which turns on and off the small guide window, then a button to plate solve, and a few additional tools like annotate (which labels objects you’ve taken a picture of). At the bottom you have a histogram showing the light you’re capturing, min and max light values listed as ADU on a 16-bit scale.
Finally the words and icons on the right control which mode the ASIAir is in (like live stacking, DSO, planetary, or auto focus, sequence planning, preview (for quick captures) plan mode (for adding multiple targets), and autorun for running your sequence. There’s a big capture button which starts all captures for each mode, and an exposure setting, which gets overridden when using a sequence. Lastly the bottom right icon downloads your current image into your Photo library. Otherwise all images are captured and saved on the internal memory of the ASIAir Plus.
Polar Alignment
On to the ASIAir Plus operation. In order to run the system through its paces, I intended to use all the functions I could as part of this run. After connecting up all the equipment, I started with the polar align process. ZWO holds your hand for this, and walks you through the steps, taking images and plate solves to confirm the mounts location and angle it’s facing. It provides instructions and a crosshair with circle that you want to try and move the center of the mount to. While straight forward, I found as you get closer and closer to perfect polar alignment, you tend to overshoot your movements, and the updates to the screen are a little bit too slow to keep up with your movements of adjusting the mounts altitude and azimuth knobs. I think a small window with a live view here would be beneficial. Once I got the hang of it, I decided to settle for “good”, but not “great” polar alignment, dialing in that last bit of accuracy takes some getting used to. Previously I’ve used a QHY Polemaster, and that to me has a process that leaves me feeling like I got things aligned well. The Air left me with a feeling like I didn’t have as much control, and the accuracy of the final polar alignment was questionable.
Guiding & Picking a target
The fears of my polar alignment were unfounded though. As I next went on to picking a target to slew to then auto focused, and ran a guiding calibration.
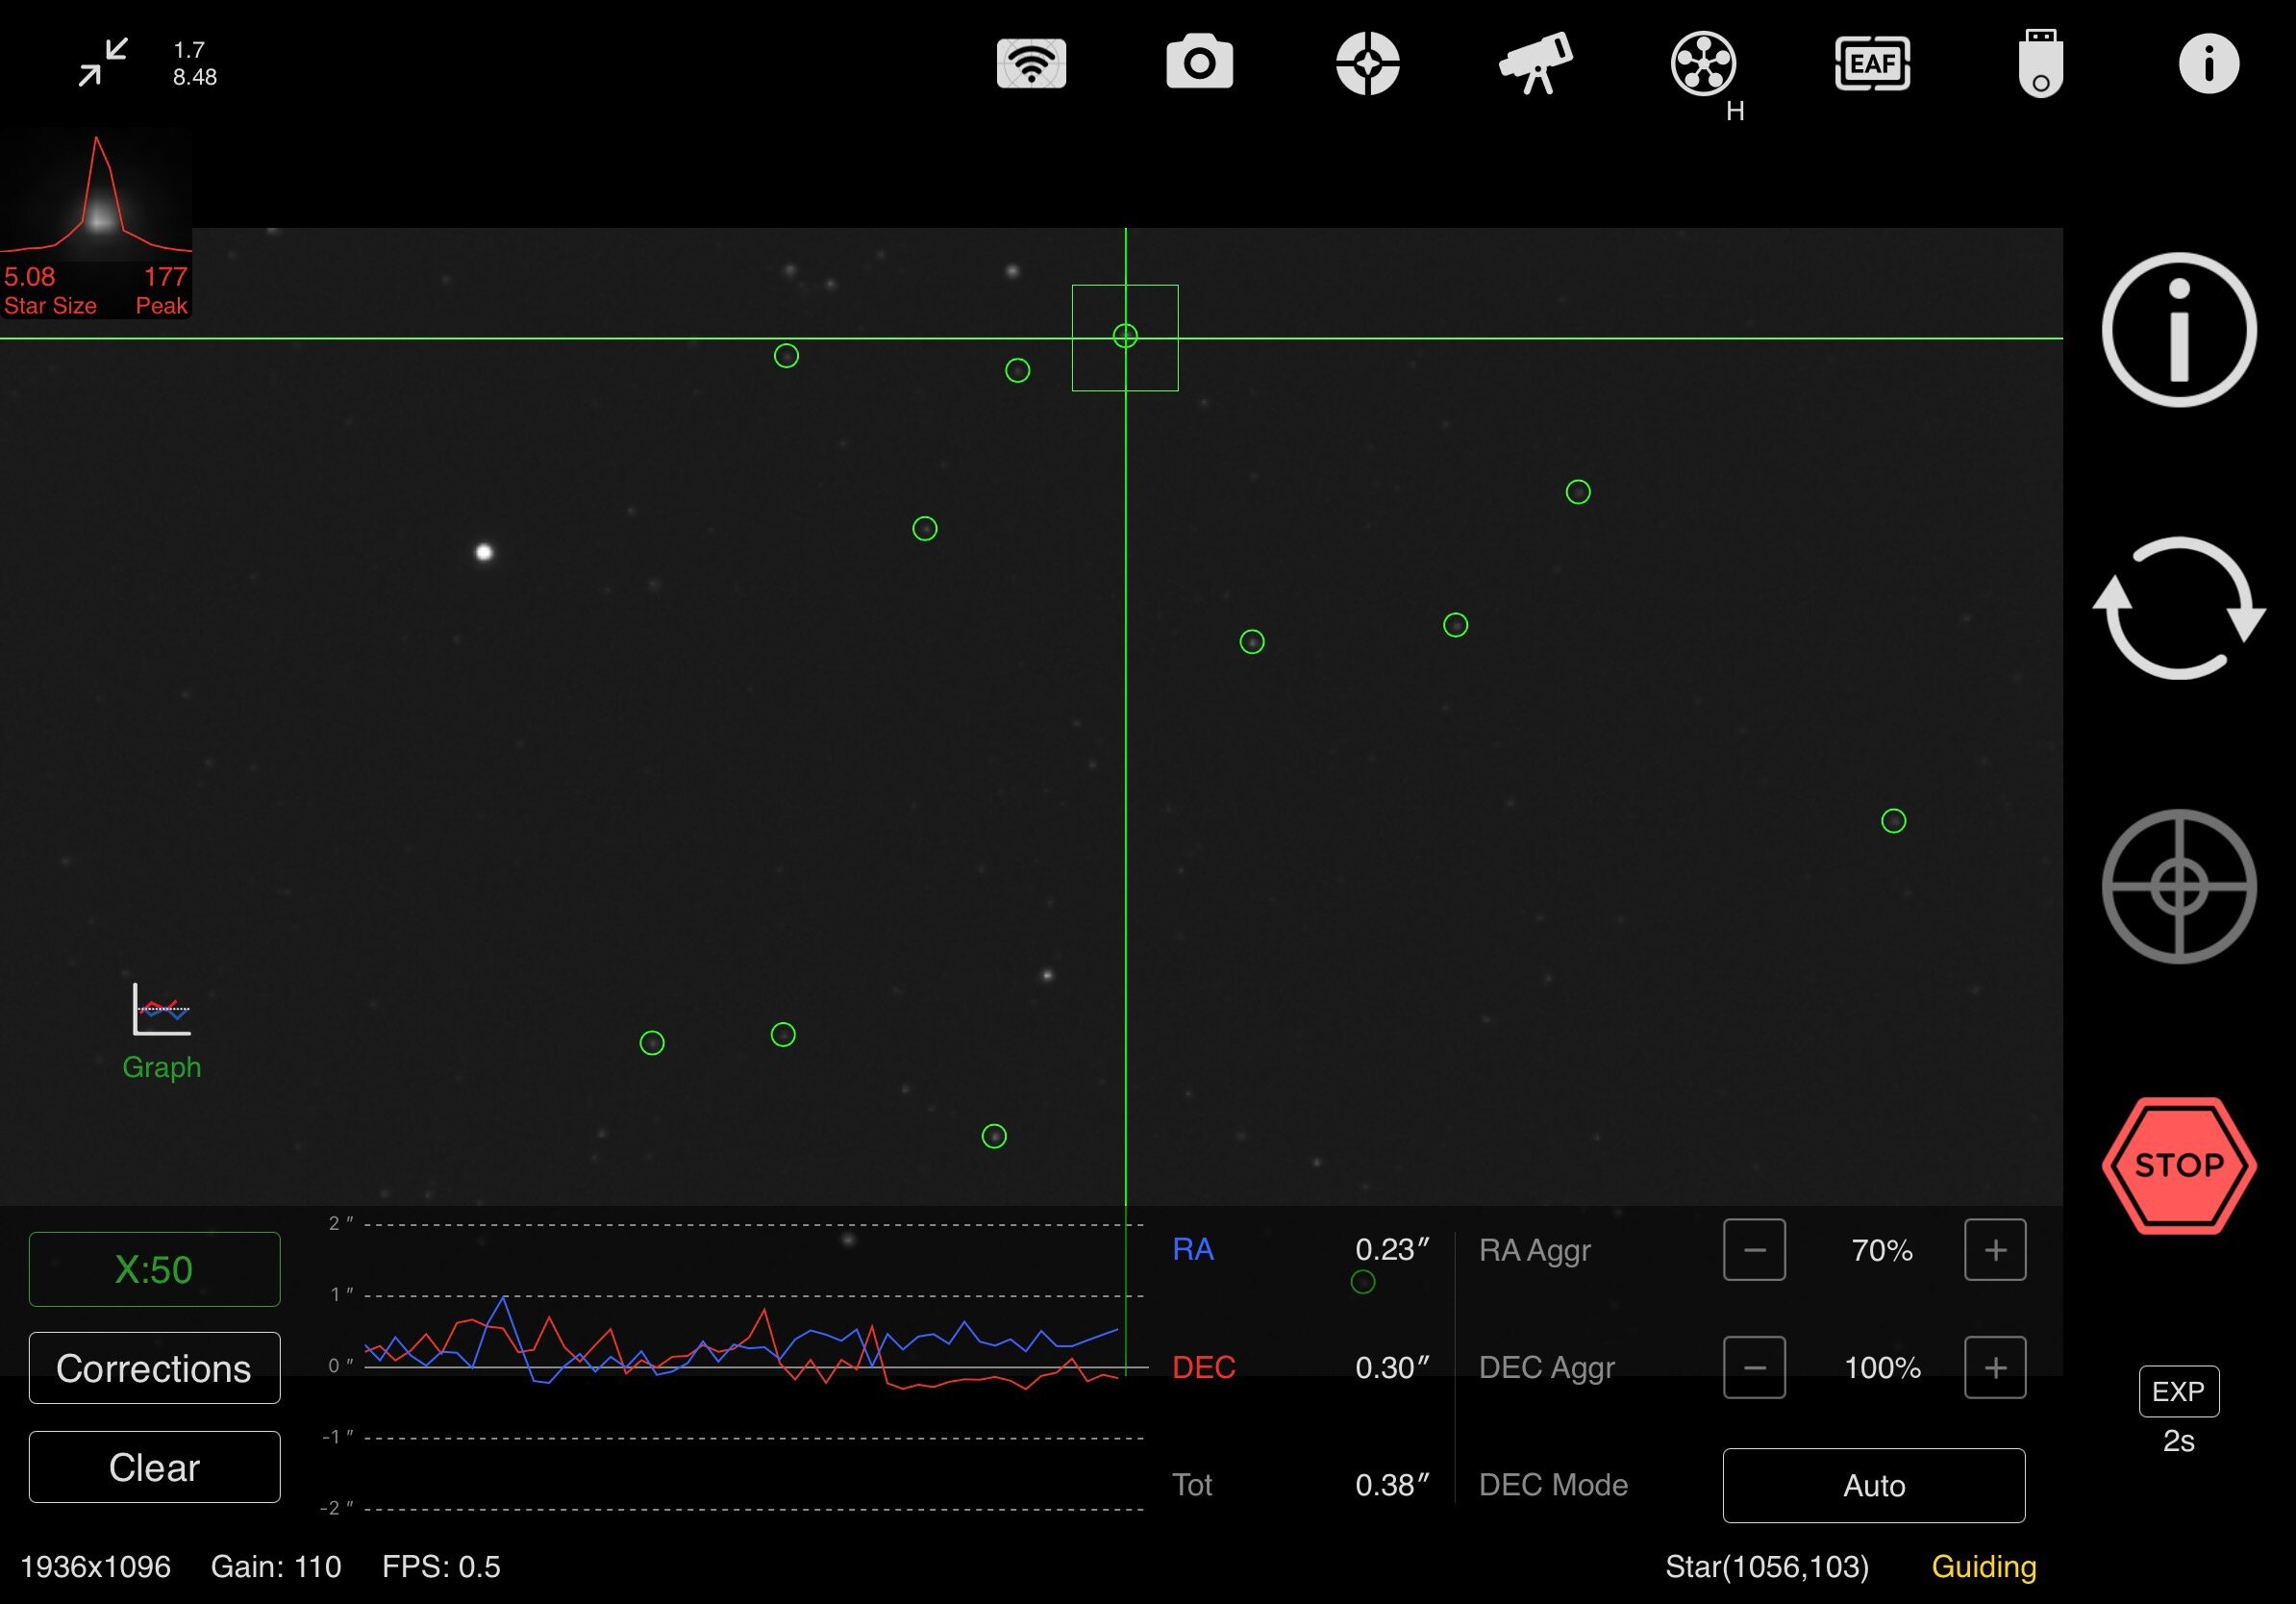
The guiding calibration completed in a few minutes, and you can see in the guide image above my polar alignment was good enough for guiding well. My total RMS was .38”, which is well below my pixel scale, so no guiding issues were seen in any images I took.
Creating an image sequence
In order to automate a nights imaging, you have to set up a sequence. A sequence is basically a list of actions you need the ASIAir to do for the evening. That includes defining which filters you want to use, how long to expose, and how many frames to take. You have the option to perform a meridian flip when the object hits the meridian line. You also need to define what has to happen when the sequence completes.

For my sequence, I chose my target, turned on the meridian flip, and selected Goto Home Position (this is what it does when the sequence is complete). I didn’t tell the ASIAir to shut down, because I like to define a sequence in the morning to shoot flats, and want the camera to remain cooled down and not off.
The big plus button lets you add types of frames. These can be Lights, Darks, Flats, or Bias. For each you define which filter, binning, how many, and the duration of each frame. I’ve set these up here to shoot HA, SII, and OIII, 300s frames with 30 of each. (Creating a color camera sequence is even easier since you only need to make a single set of frames). Along the bottom the Air displays a time estimate for the sequence, storage size estimate, and time to Meridian flip for your object once it reaches the meridian line. All this information is important to know to plan your night. If you don’t want to image past the meridian, You only have 1 hour 13 minutes in this example. So you might want a sequence that only lasts 1 hour. It’s also important to know how many hours of night you have available. One feature that would be nice is to indicate sunrise time so that you don’t create a sequence that lasts through daylight. Once daylight appears, you don’t want to be doing 5 minute exposures with the sun up, or you’ll ruin your camera. I’ll often check my iPhone weather app to make sure the sky is cloud free, and what time sunrise is so that I make an appropriate sequence. (NOTE: Plan mode has the ability to stop at twilight, so I’m not sure why it isn’t in this area too.) Once your sequence is set, press the back arrow in the upper left corner, switch to Autorun mode, and press the big button to start imaging. The mount will slew to the object you picked, center it, start guiding, then begin capturing the sequence. Any focusing that needs to happen can be set in the EAF menu using the icon at the top of the main screen. Focus can be set to run at the start of sequences, between filter changes, and after temperature changes automatically throughout the night.

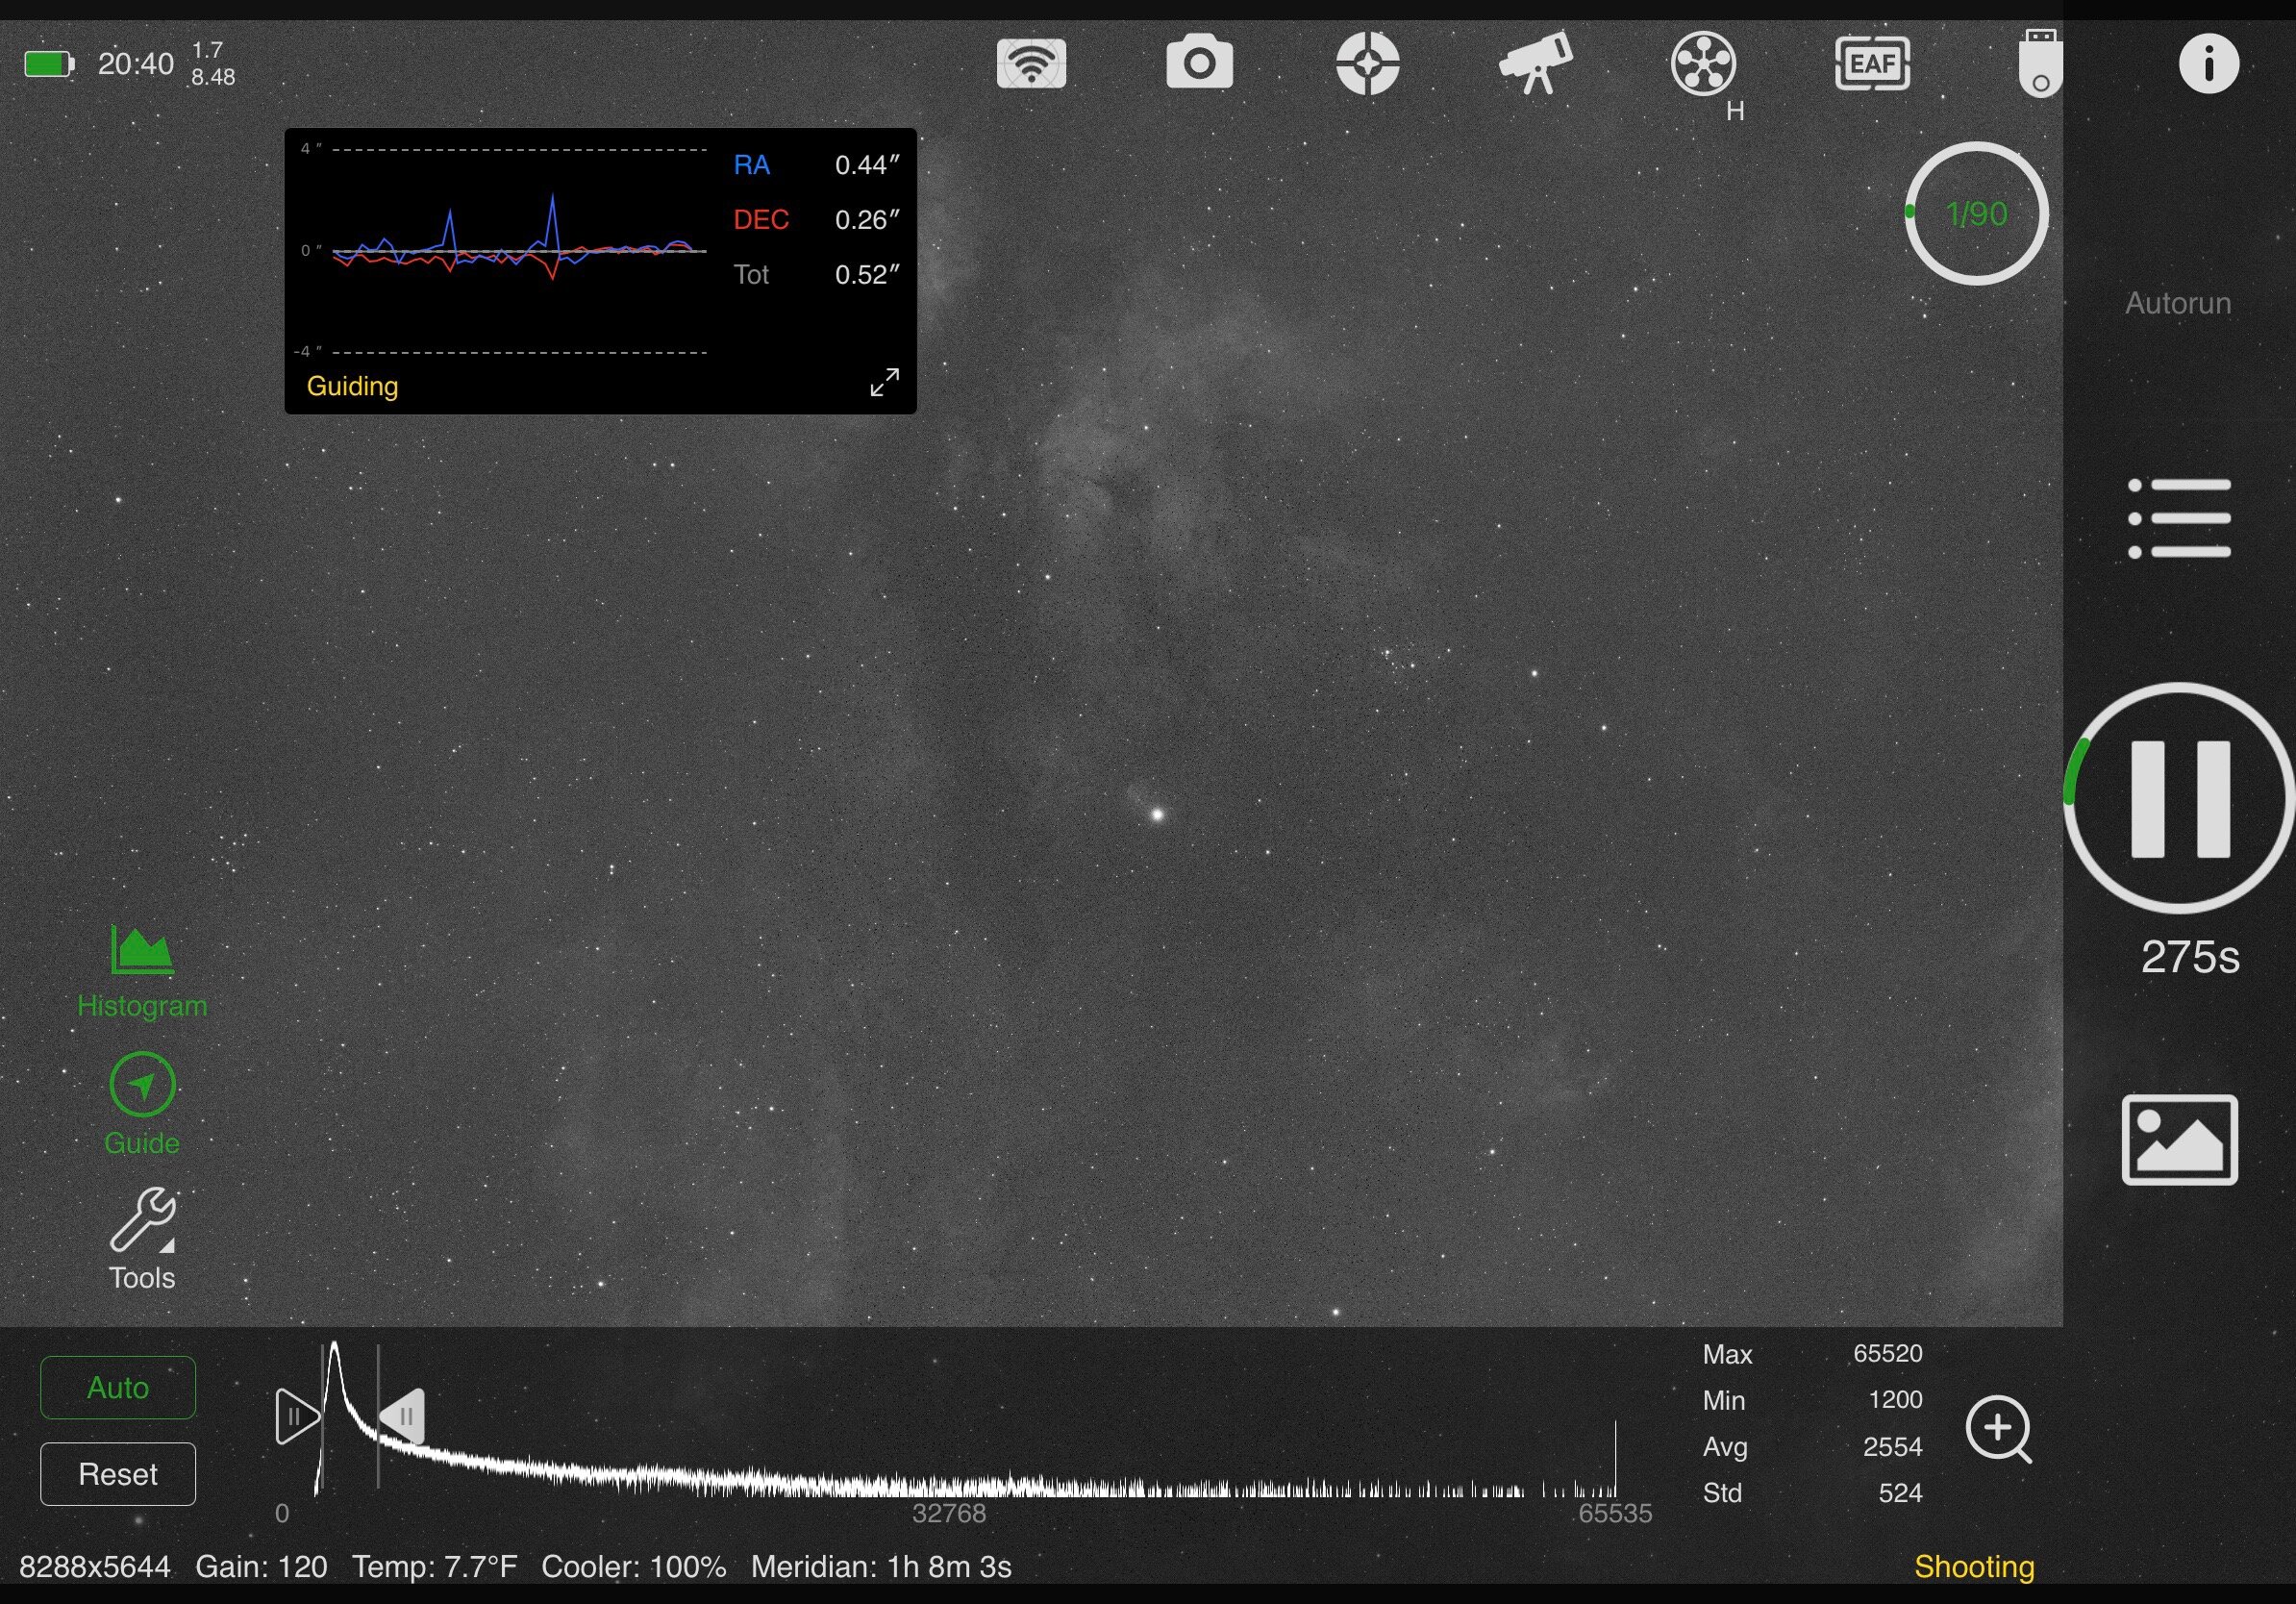
Here’s my iPad, connected up to the air, imaging a sequence from the comfort of my home.
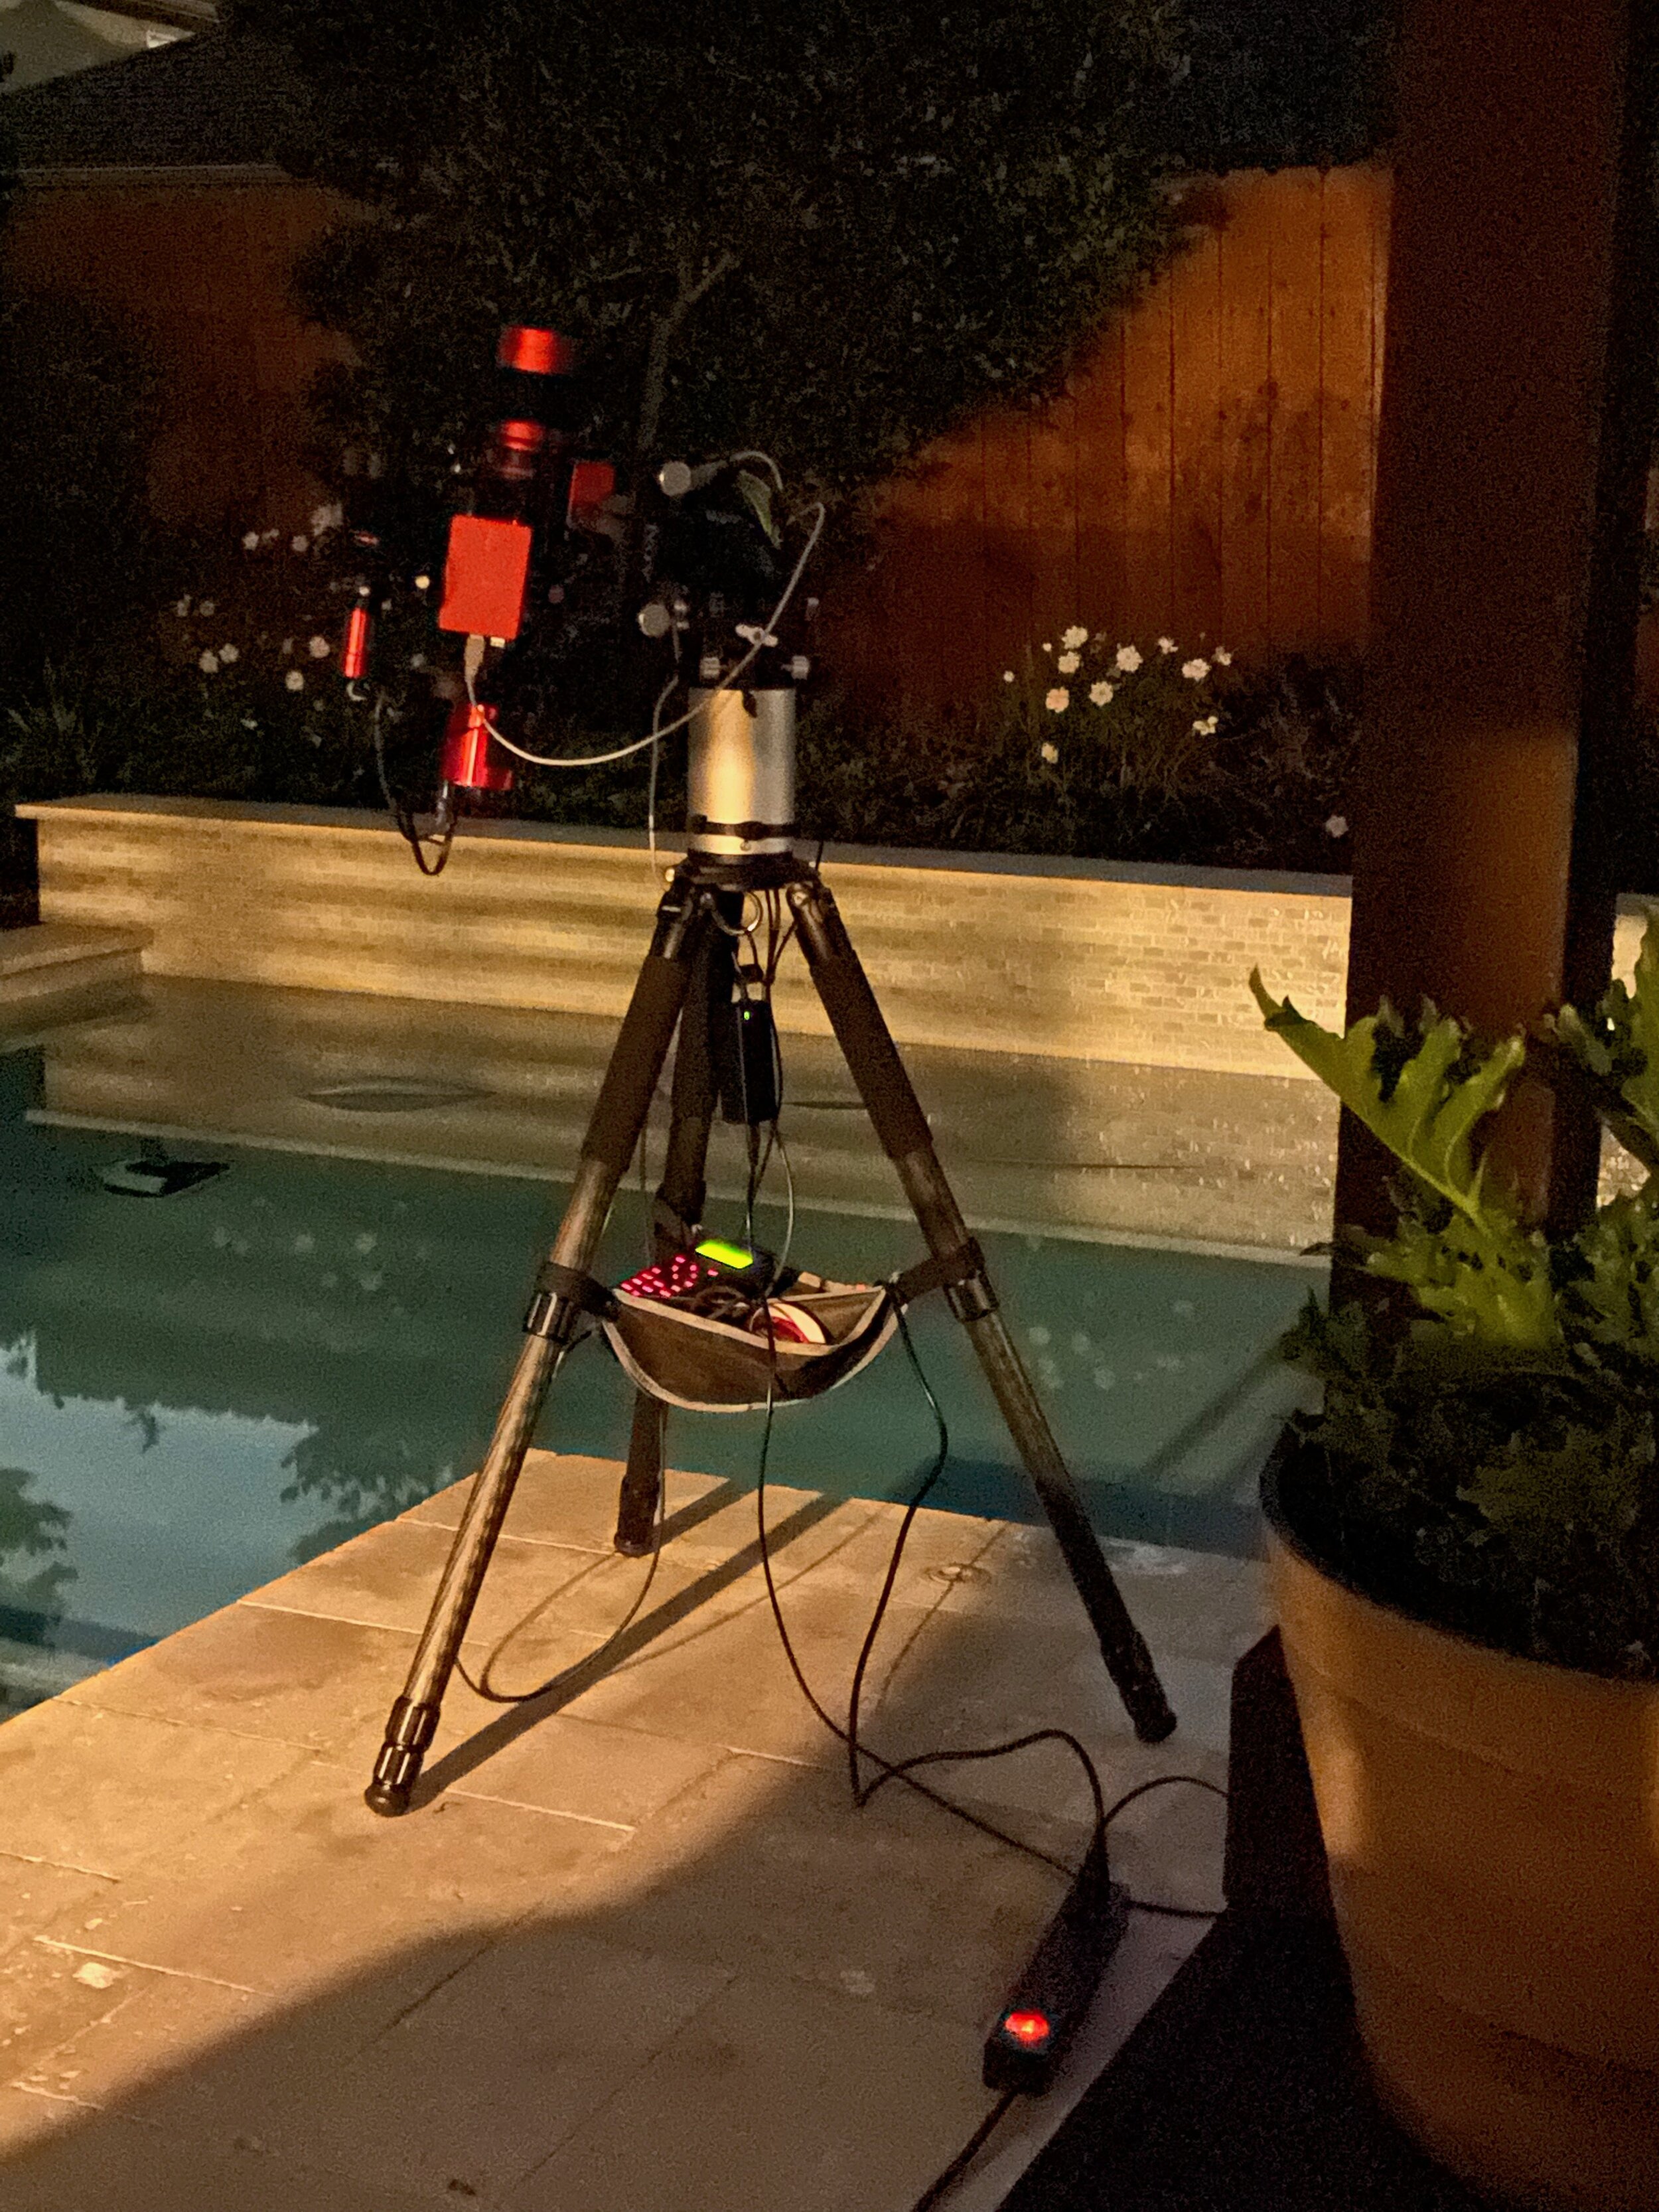
Testing the Wifi range
With my sequence running now, it was time for me to get some sleep. The WiFi range had no issues getting inside my house from my back porch. With the previous ASIAir Pro, I couldn't go more than about 10 feet from the unit, and definitely not inside my home. I plugged in my iPad to charge overnight next to my bed, and decided to take one last look at my ASIAir Plus to check on progress. To my surprise it connected right away even though I was at least 30 feet away and through several walls in my home. Progress was continuing without my intervention, so I went to sleep. The next morning I woke up to find my ASIAir had parked my telescope, and was sitting idle ready to shoot some flats. I quickly made a new sequence of flats to match my lights, and set them to use the auto exposure mode for flats. Everything worked great.

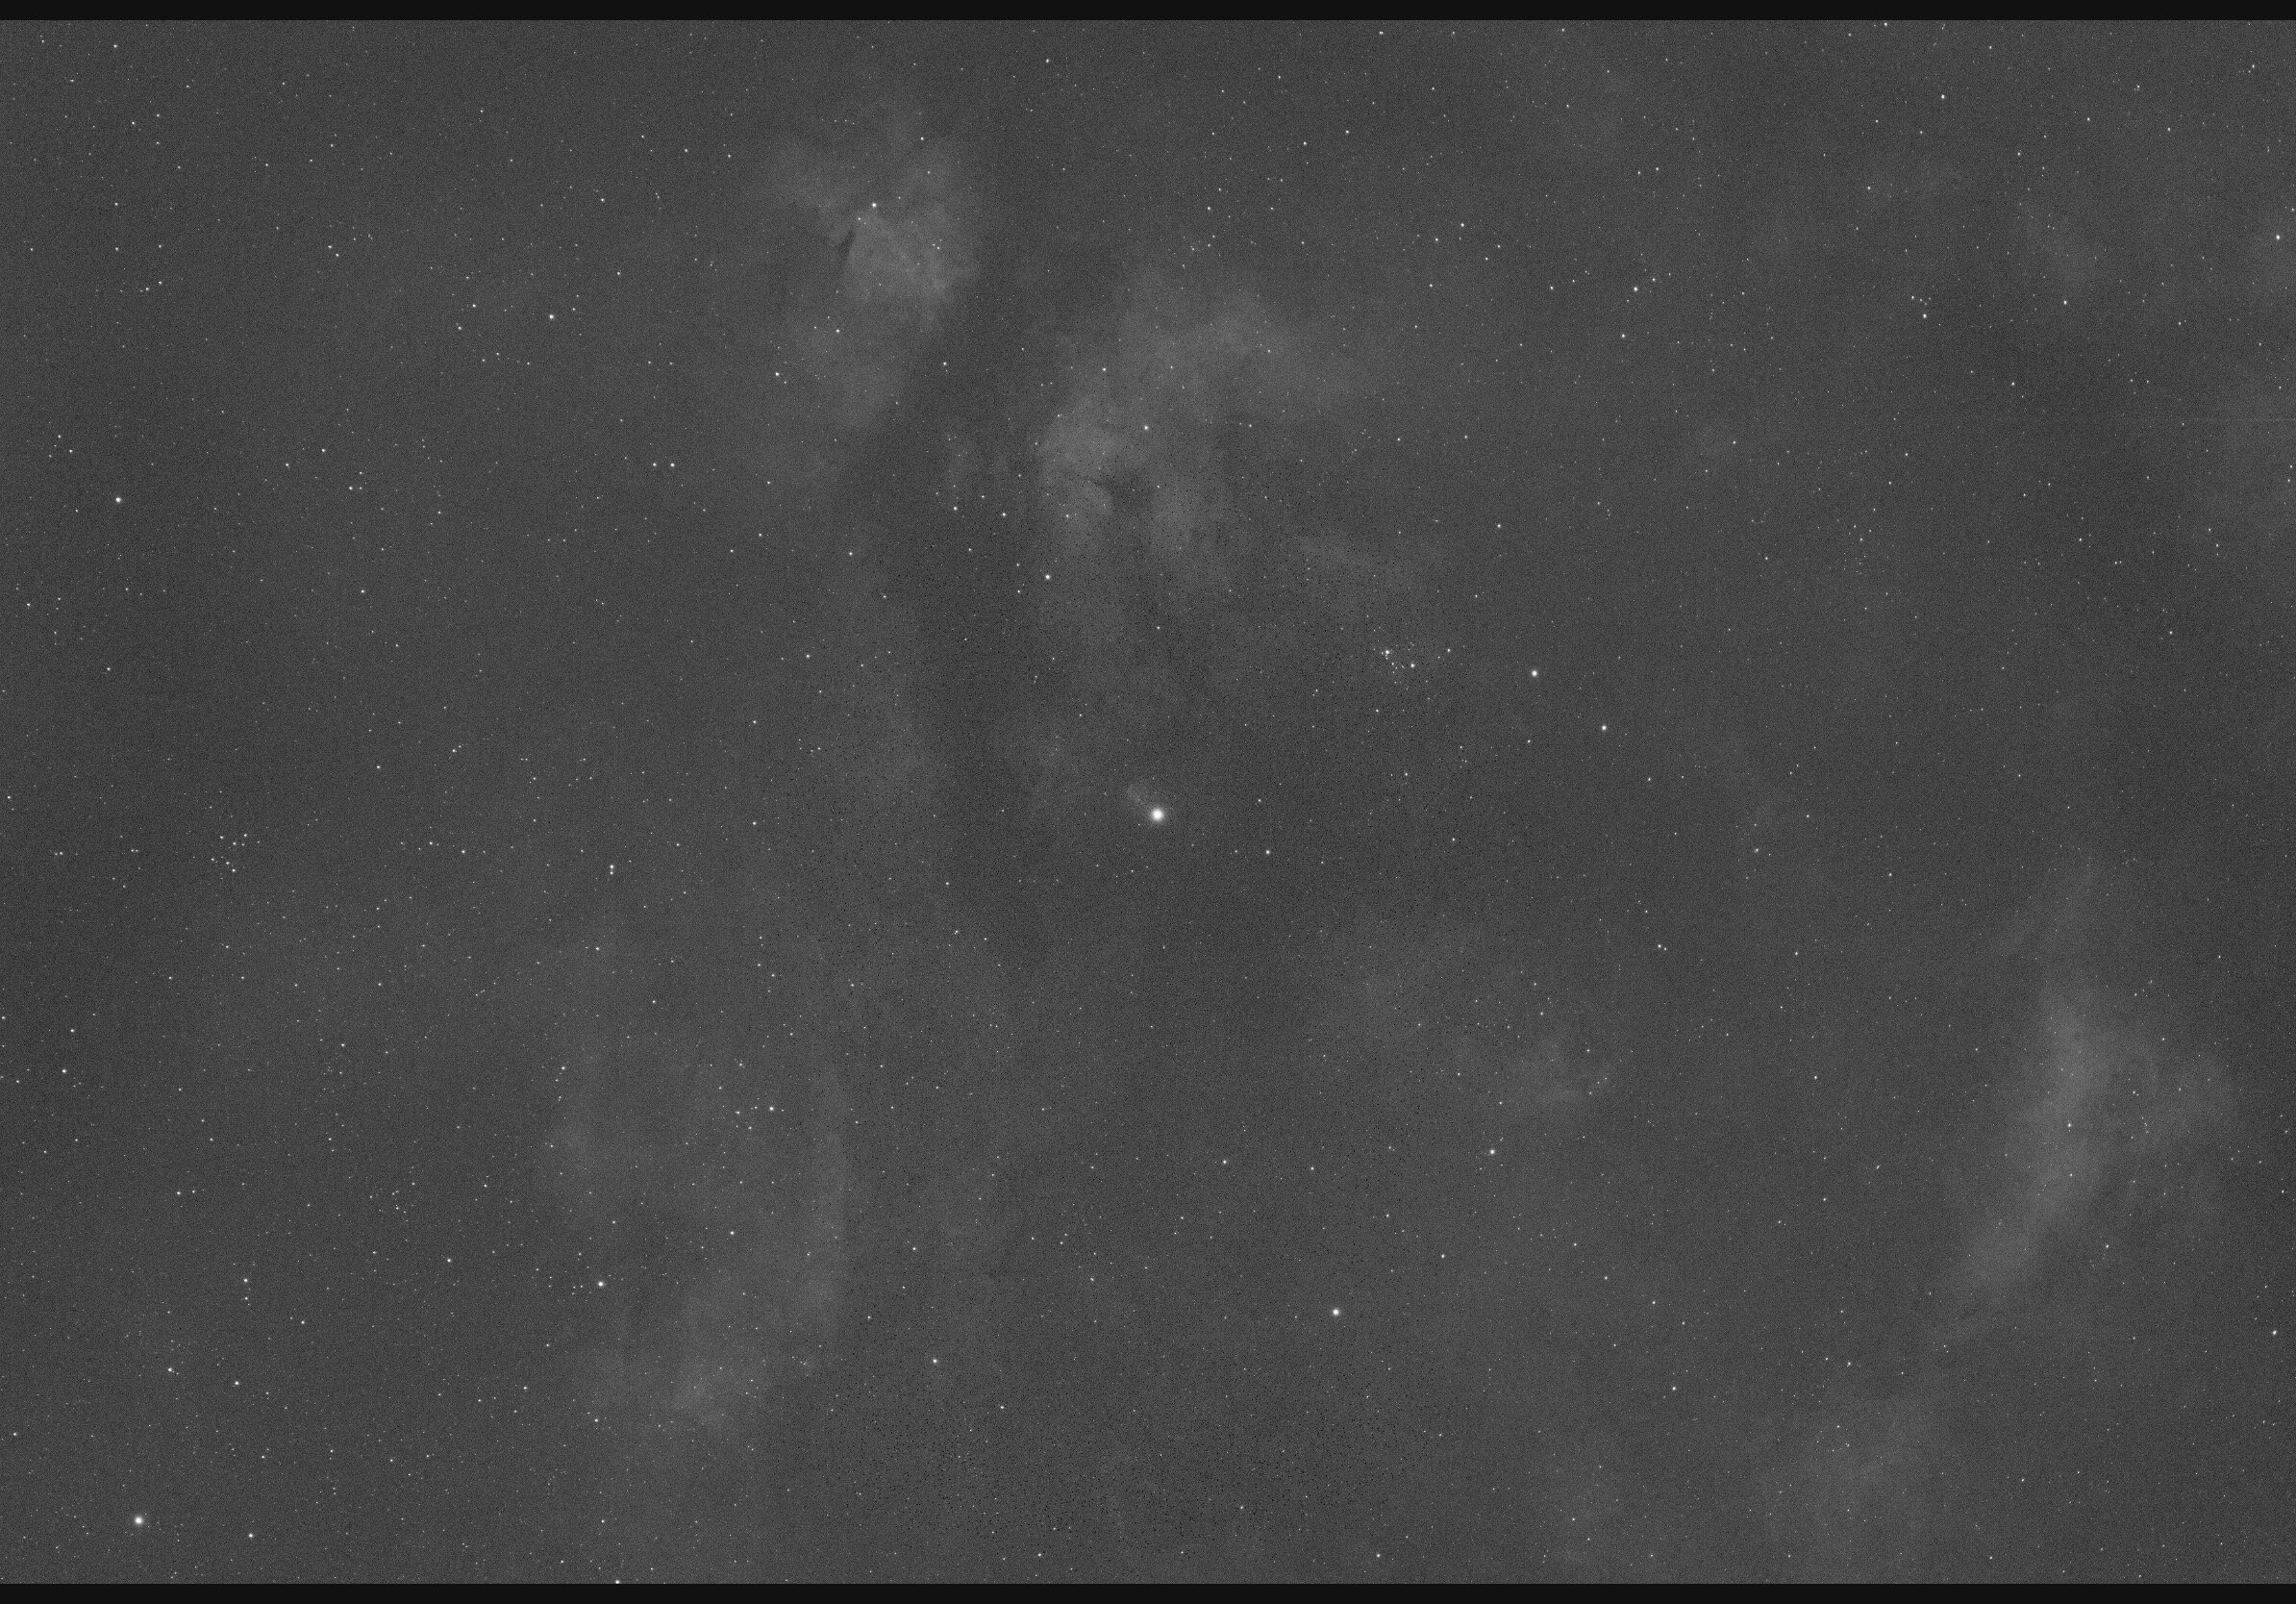
The last part of the process was to pull the images off the ASIAir Plus, and process them on my Mac. They’re stored in a series of folders on the drive. In the main ASIAir folder, there’s a folder for each object, and inside that, there’s a folder for each type of frame, so I encountered one for flats and one for my lights. A few hours later, I had processed my first image off the ASIAir Plus.
The SADR star region. 10.5 hours total into HA, SII, and OIII filters.
Conclusion
The ASIAir Plus is a well refined package. It does about 95% of anything you might want to do with your Astrophotography gear. I only covered one aspect of its use: DSO imaging. I would love to test it out for planetary imaging, or live stacking, but I spend most of my free nights on DSO imaging. I’ve used the ASIAir Plus over two nights for this article, and encountered one crash (possibly self induced by clicking through the interface panels while a sequence was running), which disconnected all my external devices (focuser, guide camera, filter wheel, etc.). I was easily able to connect them again and start the sequence I had already created, and it didn’t require a reboot.
I had one other issue, which could be addressed in a future update. I live in a 90%+ relative humidity area, and the camera cooler is so fast and efficient that cooling down takes mere minutes and has been creating ice crystals on my camera sensor window of the ASI294MM-Pro camera. I’ve not seen that before with this camera, but warming up the temp of the camera causes it to go away, and manually reducing the temp in 2.5° increments over about 30 minutes keeps the ice from forming. A lot of ZWO’s higher end cameras come with sensor window dew heaters that help avoid this problem. But the 294 doesn’t have that option. Manually managing the temperature by lowering it incrementally while using the preview function was a painful process. I’ve asked that they add a feature to the temperature control to lower it over a specified time frame (like 30 minutes) to help avoid creating ice crystals.

These black dots were tiny ice crystals forming on the sensor window during rapid camera cool down with high relative humidity.
I can whole heartedly recommend the ASIAir plus to anyone getting their start with Astrophotography. And some more advanced users might actually like the simplicity, especially if you have a travel imaging setup. It eliminates many early hardware setup trials and tribulations, and allows you to skip over the complex array of software packages that are available to astrophotographers, all of which have their own complexities and nuanced differences.
The only caveat that comes to mind with this system, and it’s largest drawback, is that to fully automate DSO imaging through the night, you’re tied to ZWO specific hardware when using the ASIAir Plus. This is obviously a limitation put in place by ZWO to capture more business (since they sell hardware), but it’s also a support nightmare for them as well.
Out of the box, the system supports most commercial mounts (surprisingly it includes some very premium mounts like the 10Micron, and Rainbow Astro mounts), ZWO cameras, DSLR cameras, and ZWO focusers. The biggest limitation for me is the lack of support for other focusers, power supplies, rotators or accessories like SQM, or weather specific hardware. Some of my setups use Moonlite focusers, and have a Moonlite focus motor attached. So the ASIAir Plus doesn’t work with them unless I replace my focuser and focus motor with a ZWO solution. It’s disappointing for sure. I like the ASIAir so much, I would prefer to use it on all of my setups. But, I understand it would be difficult for ZWO to suddenly be responsible for everyone’s hardware combinations (and drivers) that come along with supporting more options.