

A quick overview of the equipment and settings I use to capture flats.
Celestron's C5 Spotting Scope: Maximize Your Grab-And-Go
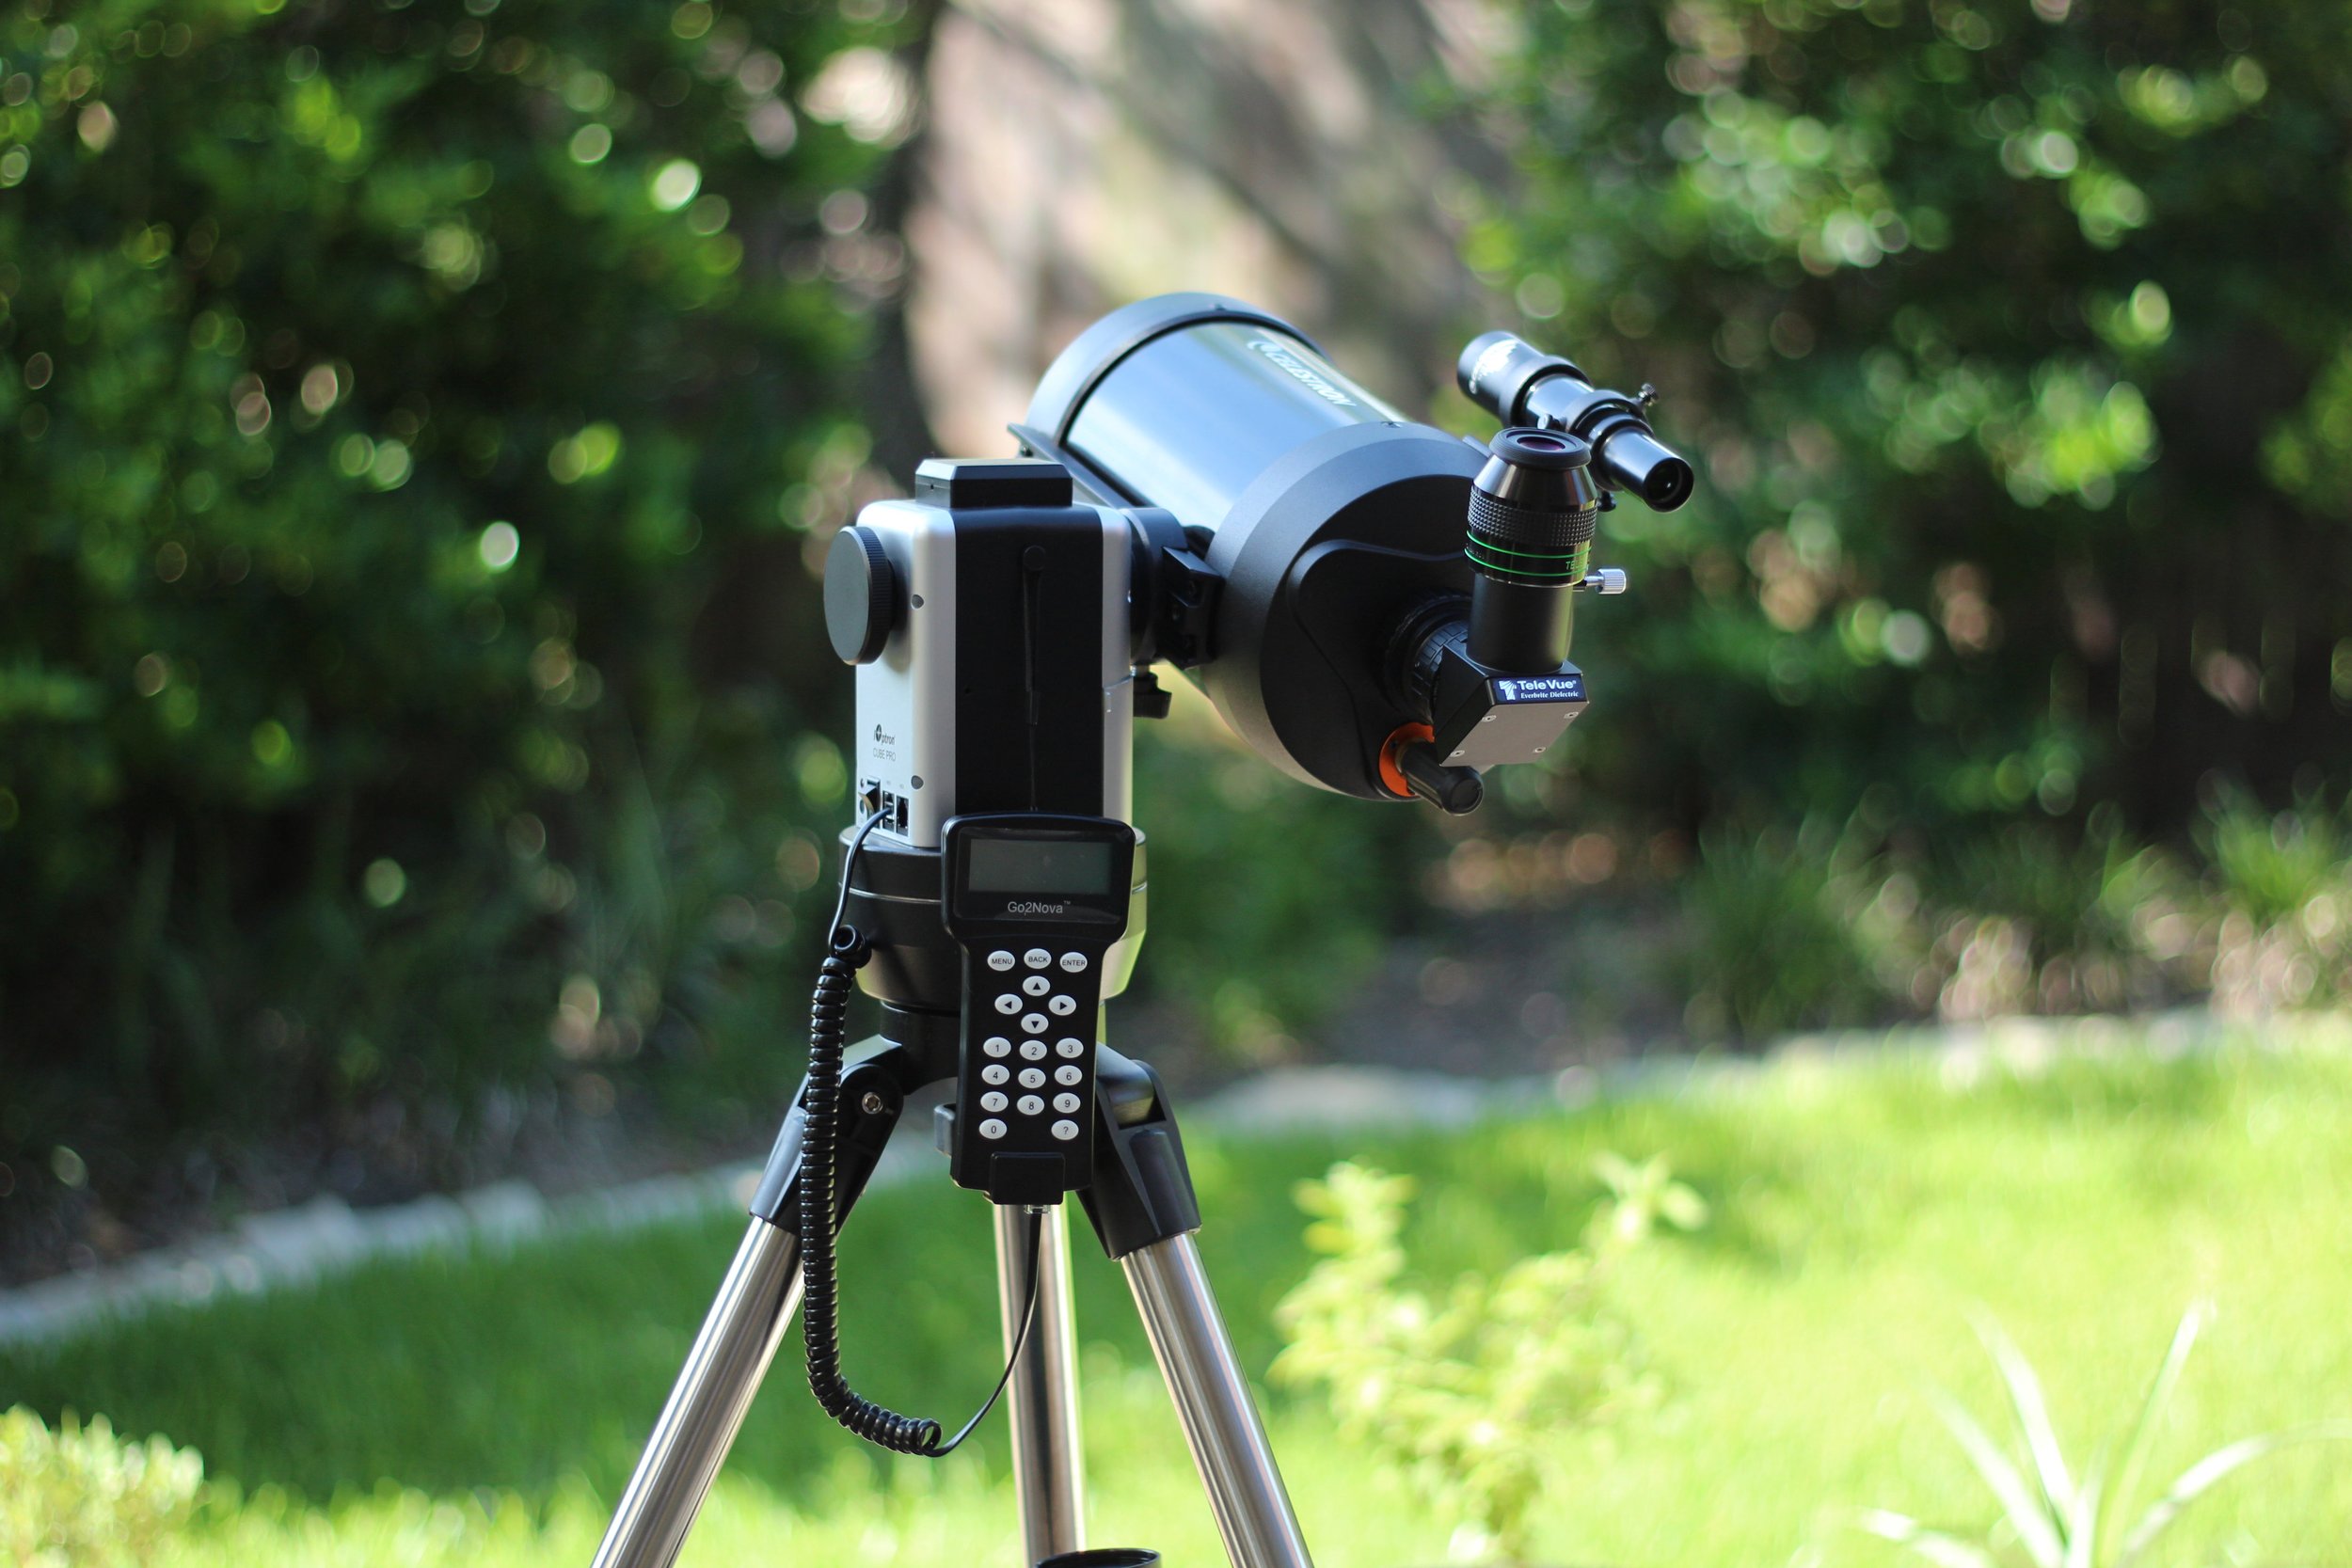
Make no mistake, this is a BIG, little grab-and-go. The biggest I could fit on the iOptron Cube Pro mount. The AT60ED wasn't cutting it for planetary views. The mount has a weight limit of 8lbs, so I opted for the largest scope with the longest focal length that I could get to fit on this class of mount. That happened to be Celestron's C5 Spotting Scope. Yes, Celestron sells this as a spotting scope, but at it's heart, it's really a 5" Schmidt Cassegrain telescope with XLT Starbright anti-reflective coatings. It's focal length is 1250 at a speed of F10. It's perfect for planet and moon viewing. It's got almost 3 times the focal length of the AT60ED and it's only 6lbs. Two pounds under the weight limit of the mount. This gives me room to add a few light accessories. It pairs well with eye pieces from 32mm down to about 6mm.


Astro-Tech 6" f/9 Ritchey-Chrétien Astrograph

HUBBLE AT HOME
A recent addition to my set of telescopes. This is probably the most economically viable Ritchey-Chrétien telescope money can buy. It can be found for around $350 at most places. I bought this one used for even less. The Ritchey-Chrétien design is probably most famous for being the same optical design that's in the Hubble Telescope. This is probably the largest scope I can feasibly put on my mount for weight reasons. The AVX has a 30lb max payload capacity, and the AT6RC is around 13lbs with no other gear. So, I'm probably pushing 18-20lbs of astronomical gear with this scope. Due to the long focal length, getting the polar alignment dialed in is crucial. But once set, I'm able to get some half way decent images out of it.
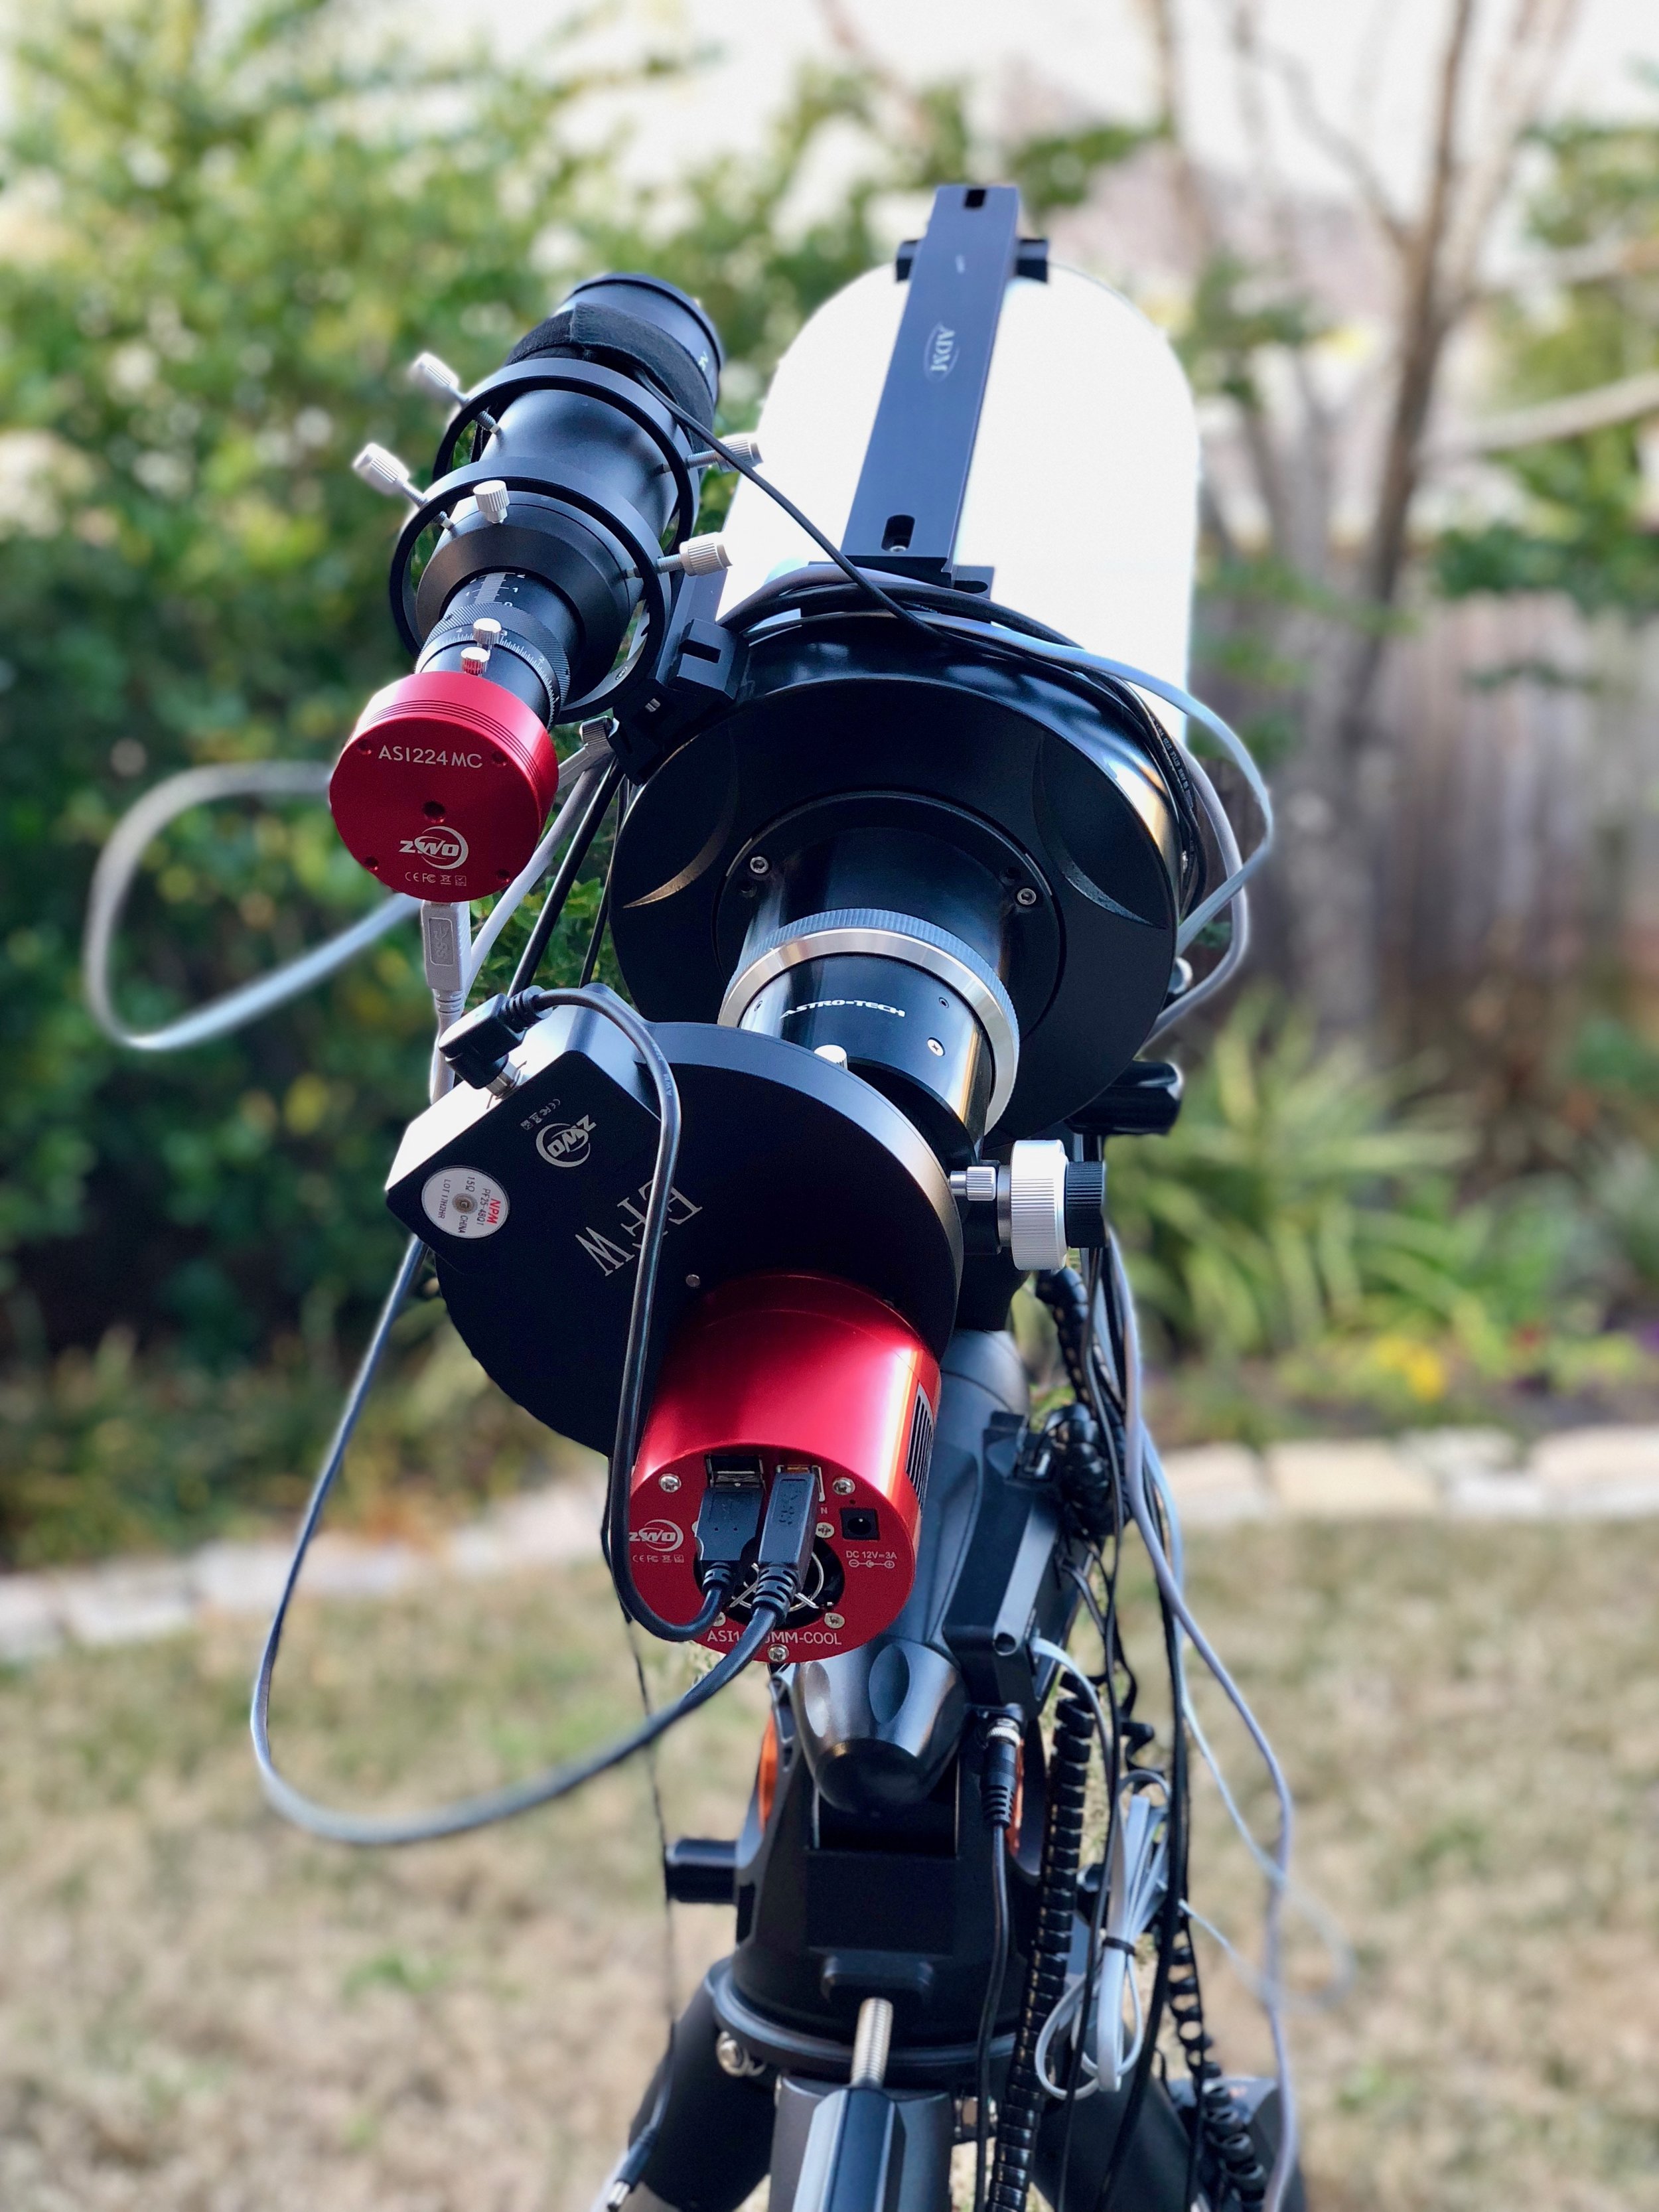
These images show all the gear set up and ready for a night of imaging. Pictured here is the AVX mount, AT6RC, Orion 60mm Guide scope, ZWO ASI1600MM-Cool camera for primary imaging, ZWO ASI224MC camera for guiding, the ZWO 8 slot electronic filter wheel with LRGB and Narrowband filters, an Astrozap dew heater on the guide scope, Astrozap dew shield, and a Bahtinov mask from Grosky.

M51, Whirlpool galaxy taken on this setup later that evening.
Celestron’s All Star Polar Alignment Procedure
The 2017 iMac Pro Astrophotography Processing Workstation

Here she is. The 2017 iMac Pro, and my new astrophotography processing workstation. I've just moved up from a 2013 Mac Pro. The new setup includes two Dell P2715Q 27" 4k monitors along with the iMac's 5k 27" monitor. The iMac consists of an 3.2GHz 8-core Intel Xeon W CPU with 32GB RAM. Performance wise, it's about 2x as fast as my previous 6-core Mac Pro. It's connect to both a 6TB and an 8TB RAID storage solution. The 6TB is backup currently, and the 8TB stores all my data and work files.
I'm currently running Astro Pixel Processor on the left display for calibration and integration of captured images. I'm running PixInsight on the middle monitor for processing the integrated images, and I have PhotoShop running on the right hand monitor for last minute color touch up.
This setup might seem like overkill, and it probably is. It's primary use is as my home business graphic design and video system.
Pictured in the setup from left to right is the Dell P2715Q 4k Monitor below that is some Sennheiser HD 650 headphones, a Blu-ray disk drive, the Schiit Audio Asgard headphone AMP and PreAMP. Then the 2017 iMac Pro base model, a 1TB portable G-Drive for transferring images off my 13" 2015 MacBook Pro capturing laptop. A Sphero Star Wars BB-8 robot, World of Warcraft mouse pad, the other Dell P2715Q, and an XBOX 360 controller for games.
Above the monitors is a Mission Chart from when I worked at NASA. It features the mission and communications route for the Shuttle flight STS 51-G. Hanging to the left is a flowchart showing the history of Apple hardware up to the 2013 Mac Pro.

Yours truly…not an actual astronaut, and not an actual space suit.
Starting out with mono Astrophotography

I took advantage of a recent sale on ZWO cameras, and sold my old color camera to move into mono imaging. The benefit of using mono is increased resolution and sensitivity in the camera. One shot color cameras have a Bayer matrix over the sensor which is like a screen door with red, green, and blue filters placed over every third pixel. These pixels are merged into a single color photograph in the software after the image is taken.
In a mono camera, you shoot black and white, and use a individual color filters over the entire sensor so that all of the sensor is shooting in that one color. After you're done imaging, you merge all the colors into a single higher fidelity image. Below is one of my first attempted color images using LRGB filters (Luminance, Red, Green, and Blue).

M42 (Orion Nebula) shot in LRGB on my ES102mm ED telescope.
Moonlite Focuser for the Explore Scientific 102ED CF

I upgraded to this Moonlite 2" crayford design focuser for a few reasons. The initial reason was that the compression ring clamp that came with the Explore Scientific scope didn't compress very well. The reducer I have has a beveled edge, and it just wouldn't grab it tight enough. The weight of the camera made the reducer shift in place, which made artifacts show up in my images from the shift. Secondary reason is that the built in drawtube is not very long, which means that to switch between imaging and visual, you have to add and remove extension tubes. With the Moonlite, the drawtube is 4.5" long and can accommodate both lengths just by rolling it in and out to the desired length. No more threading black extension tubes onto a black drawtube in the dark.
Installation was very straight forward. The focuser is collimated at the factory, so I only need to unbolt the 6 hex screws where it meets the OTA tube, and then replace them with the new focuser. Took about 10 minutes. My only gripe would be that I wish they included the allen wrench required for putting in the new screws.
There are a few options you can order. I did the dual rate focuser, with focuser lock, and two vixen style mounts for finder scopes or laser pointers. Additionally you can add a stepper motor and electronic control for focusing from your computer. This is something I'll likely add later, but so far I've not had any issues with losing focus during the night.
