

Traveling with the Star Adventurer
Last month, I finally got an opportunity to travel with my Sky-Watcher Star Adventurer Pro Pack, and my Canon T3i DSLR as my only rig. It was a family outing to west Texas near Garner State Park where the skies are around Bortle class 1 or 2. There, the Milky Way looks like a dusty cloud in the night sky. I didn’t have any real room to take a telescope with all the family bags, so I packed as light as I could. The Star Adventurer, a tripod, my Canon T3i plus lenses, and a 13” MacBook Pro.

Check out the Big Dipper here in the North sky. This was a 15 second shot with the DSLR where I was staying. You can see the tree tops lit up at the very bottom from the neighbor’s back porch lights.
The forecast gave me one truly clear night, and several partially cloudy nights. So I had time to play around before the first clear night. On my first night, I set up the sky tracker and pointed it towards Polaris to polar align. Polar alignment was a snap with the built in polar scope. I used Polar Scope Align Pro for the iPhone to find where Polaris should appear in the polar scope. Then dialed it in with the manual align controls on the Star Adventurer.

Always check your batteries
Here’s where I encounter the only issue I ran into for the weekend. Check your batteries. I was perfectly aligned, and yet I was getting star trails. I could not figure this out for the life of me. I probably spent 2-3 hours checking alignment, picking different targets, with different exposures, and got star trails on all of them. This drove me nuts, as polar alignment is very straight forward. You find Polaris in your finder scope, and make it match the orientation shown in PS Align Pro. Easy peasy. But if your batteries are almost dead (enough energy to turn on tracking, but not enough to move the mount), then no matter how aligned you are, you’ll get star trails. Once I noticed the red light on the on/off indicator for the Star Adventurer was blinking in pulses with its effort to move the mount, I realized the battery was probably low for it to be doing that.
Batteries replaced (I did bring some backup AA batteries), now tracking worked perfectly, and I was prepared for the first clear night.
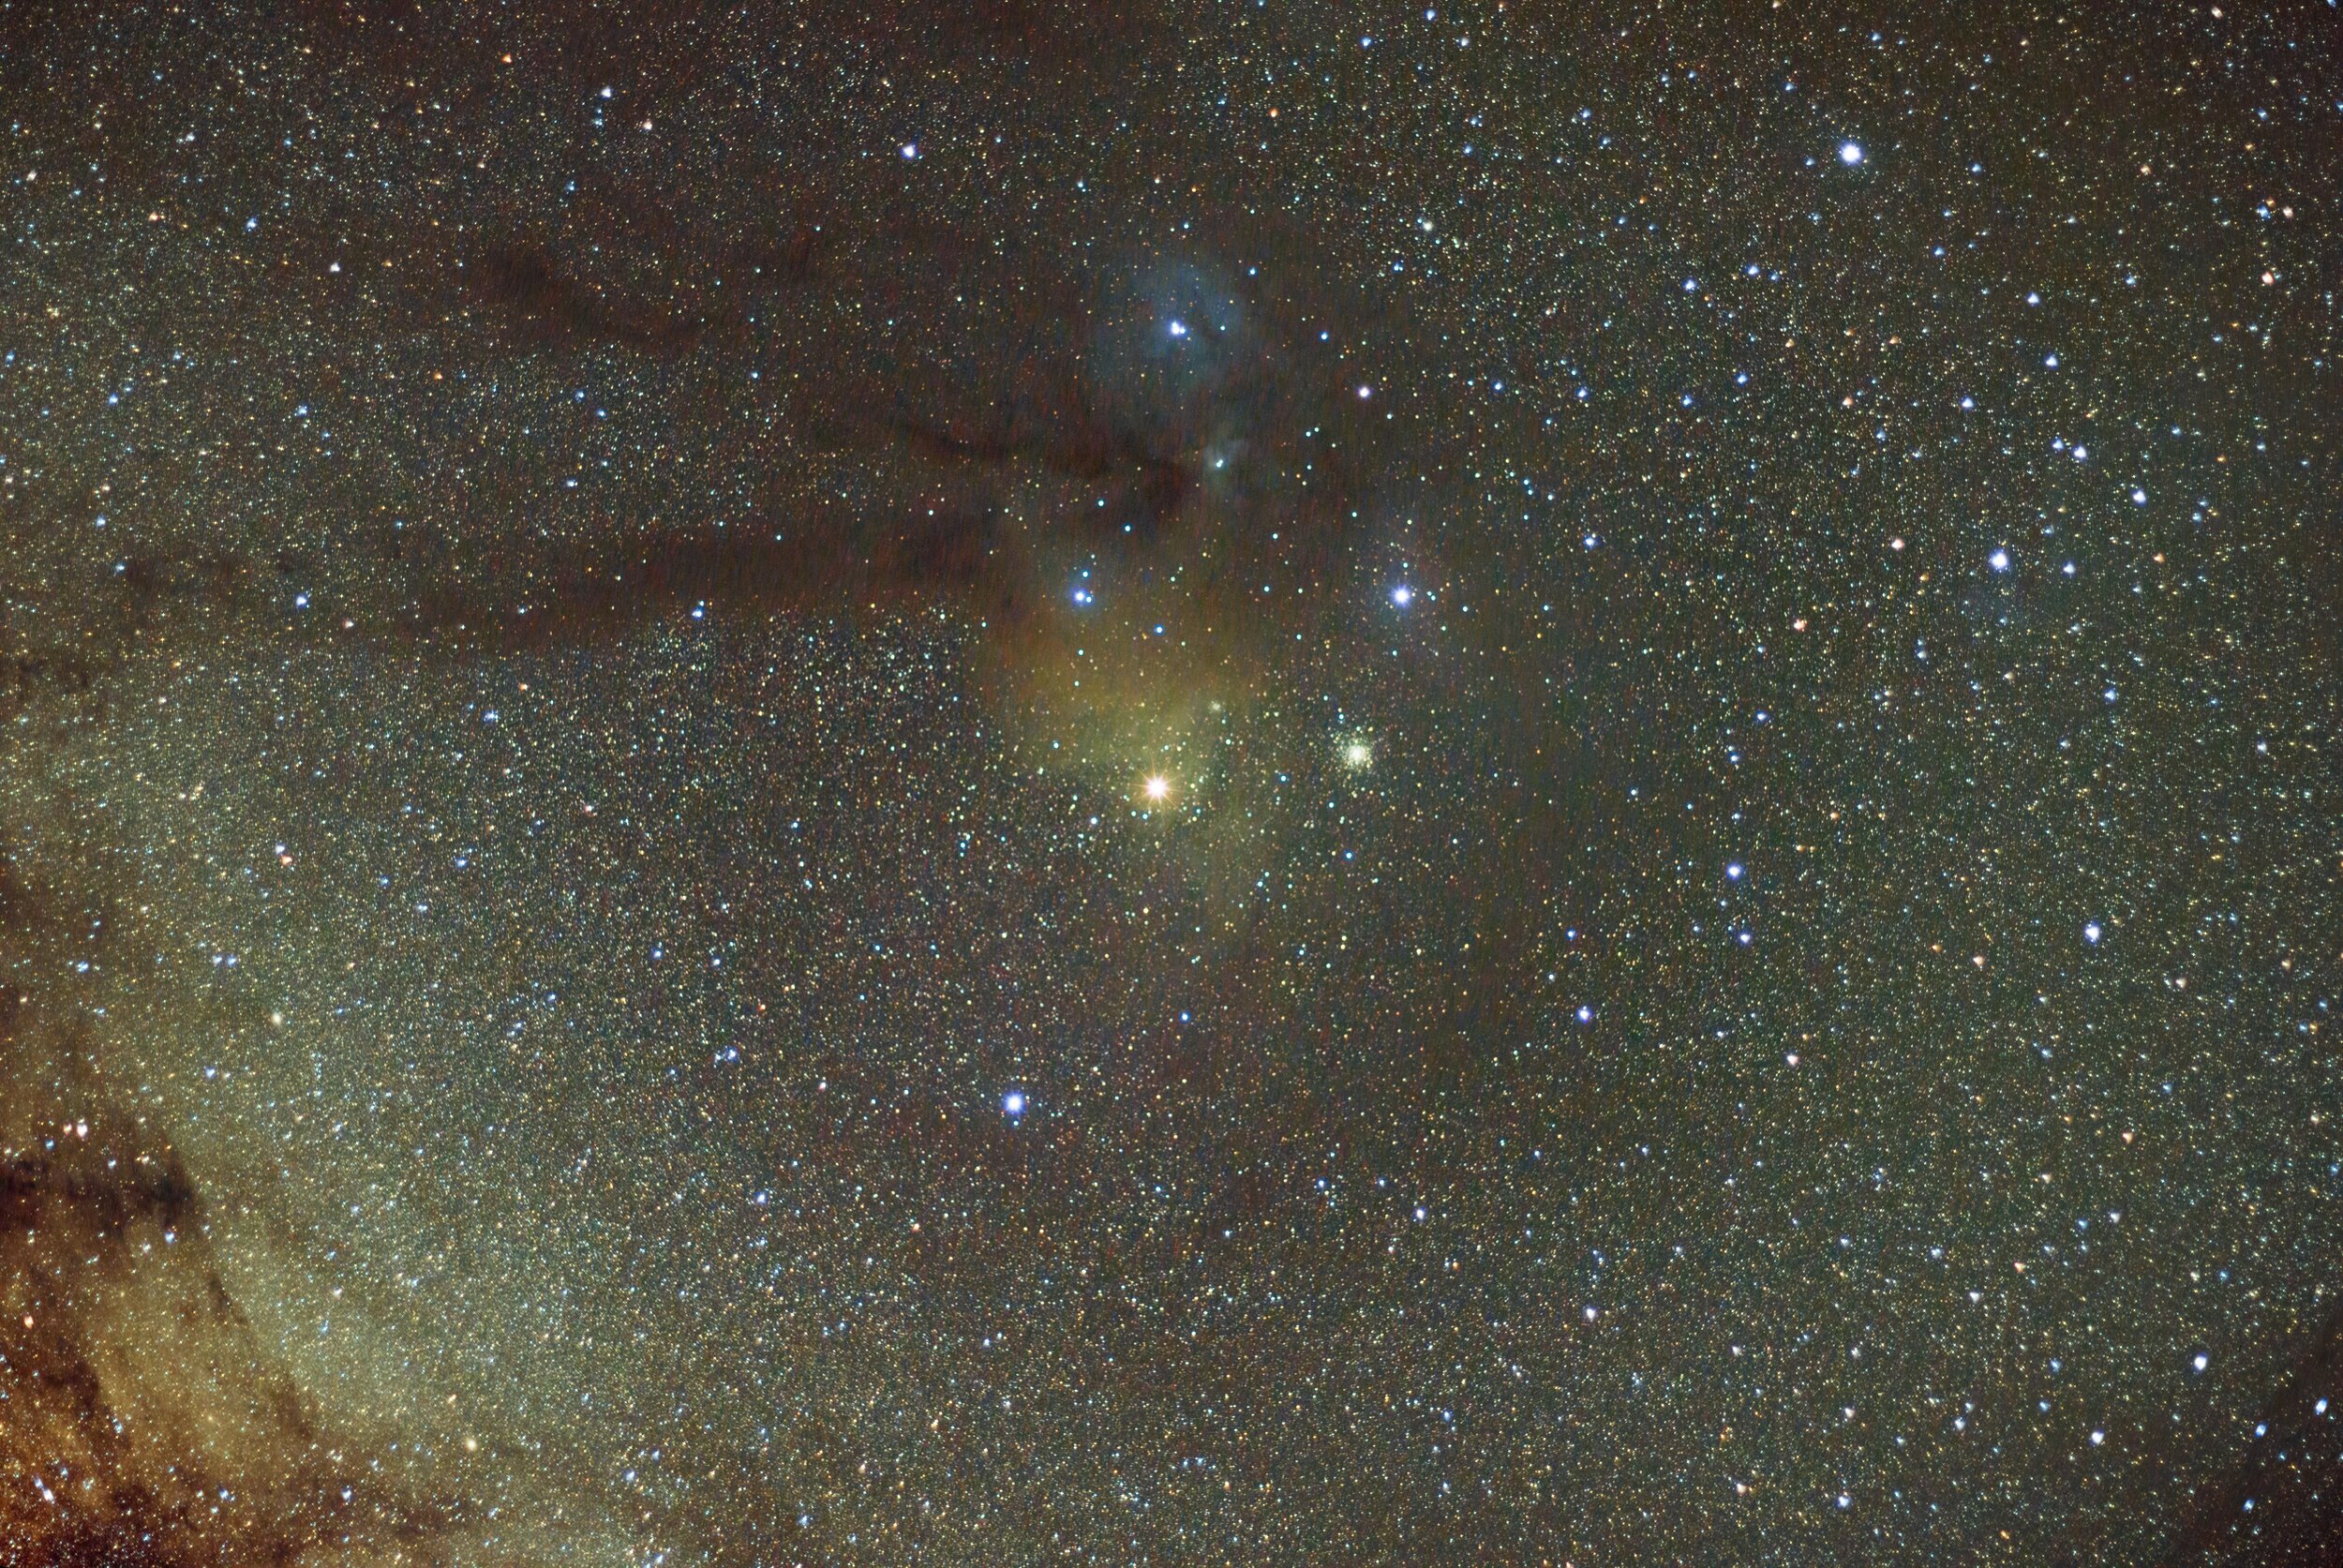
I got the laptop, and Star Adventurer set up, I decided that I wanted to monitor the images as they came in, and not rely on the Canon camera to store the images. So I tethered the camera to my laptop, and used AstroDSLR to start taking the images. I put on my Canon 50mm f/1.8 lens. It’s the cheapest fast lens they offer. But, because it’s fast, it can gather light pretty quickly. In fact, I only shot about an hour of images of the Rho Ophiuchi region, an area of the sky I’ve wanted to take for quite some time, but can’t see from my back yard at home.

Rho Ophuichi region taken with the Canon T3i and 50mm f/1.8 lens.
Beautiful astrophotography with the Star Adventurer
The Sky Adventurer performed flawlessly. Man, this thing has super accurate tracking. It was really a blast to use. To find my targets, I used SkySafari 6 Pro on the iPhone. Using the built in compass, I was able to point in the general direction, and look for a pattern in the stars that I could match to what I was seeing through the camera. This allowed me to point my camera mounted to the top of the Star Adventurer with some accuracy. The above image was captured in less than an hour, but my aging camera battery started to run out of power. Satisfied that I got one good set of images, I called it a night, and processed the images the next morning on my laptop with Astro Pixel Processor.
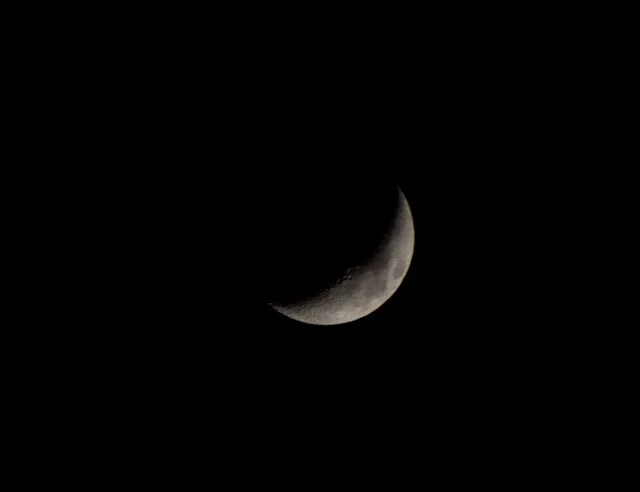
The moon shot with the Canon 250mm kit lens.
The last night I was there, I managed to grab some shots of the moon right before the clouds rolled in. We were treated to a spectacular lightening show behind the clouds. So I took a few shots of it before shutting down on the last night.
